
Hessian Tape Camouflage Netting
by Eric Mac Intyre
Overview
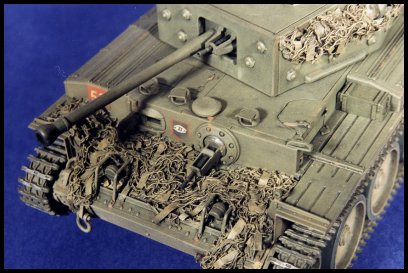
Many of you may be familiar with this very popular and successful form of camouflage netting. For those who aren’t, "Hessian Tape" was a type of netting which was very popular with Commonwealth armies during W.W.II. It differs from ordinary netting, such as that used by the Germans in that it has attached to it many strips of material which hang down looking like strips of tape.
Many photos of British armor during and right after Normandy have this netting. The most popular uses for this netting was wrapped around the turret, and draped over the gun barrel and front hull. However, other combinations and additions can be found also, depending on the crew of the vehicle.
The primary purpose of this netting as it is with any camouflage, was to make the vehicle very difficult to make out from the rest of the terrain. In this respect it was quite effective, the netting helped break up the harsh edges of the vehicle and the long strips of material gave an appearance of leaves. When properly used in conjunction with the local foliage, the vehicle could be made to look as if it was just another bush or tree.
How to make the "Hessian Tape" netting
 This
task is actually quite easy to do, even for an inexperienced modeler. As there are no two
photos of this netting on a vehicle which are the same, the modeler has some liberty in
his application of this netting. However, as a general rule, I always recommend finding
some photos of your vehicle and then simply imitating what you see in the picture. An
important point behind armor modeling is to reproduce history, not artistic fantasy.
This
task is actually quite easy to do, even for an inexperienced modeler. As there are no two
photos of this netting on a vehicle which are the same, the modeler has some liberty in
his application of this netting. However, as a general rule, I always recommend finding
some photos of your vehicle and then simply imitating what you see in the picture. An
important point behind armor modeling is to reproduce history, not artistic fantasy.
The following instructions are designed to be a guide and can be applied to various Allied vehicles, one simply has to adapt them to meet your particular needs.
To begin, your vehicle should be painted and weathered. Next, you should
find some kind of commercially available netting such as the one offered by Verlinden.
Other kinds can be used from other manufactures, as long as the netting is colored. I do
not recommend making your own from gauze because it is very messy to dye the material
yourself . Furthermore, unless you use a non water soluble dye, the color will run all
over your model when you apply the netting. This is not the time to get cheap folks.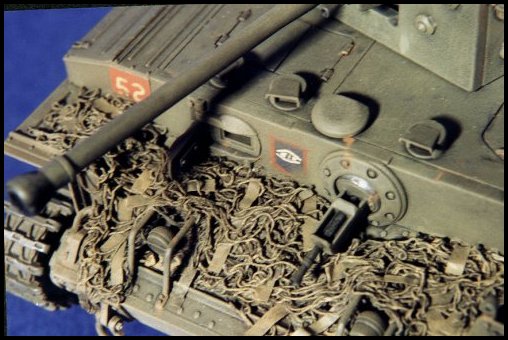
The reason it important to apply a pre-colored netting is that it makes painting simpler later on. If you apply a white netting, then it will not only be more complicated to paint, but you will be forever chasing after white spots that will appear.
Construction
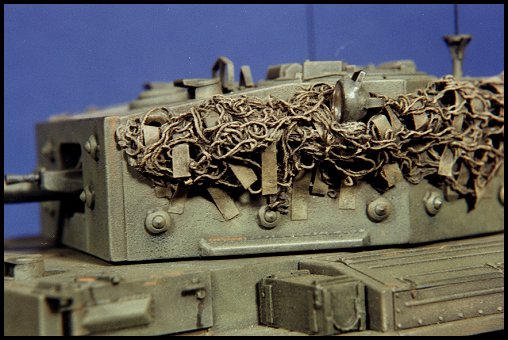
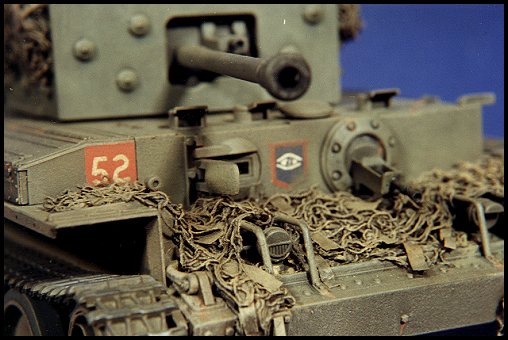
First select the areas were you want to apply your netting. The turret is always the most complicated. Research has shown that often the netting was held on to the turret by small lenghs of wire or string and it was usually just draped over the barrel and hull. You can use this method to aid in securing your netting to your vehicle. In the case of my Cromwell, I used a small 0.010 wire which was attached to the 4 large turret lifting points. I simply strung the wire around the turret loosely from loop to loop.
With the wire in place, you now have something to secure your netting to. Cut your netting material into pieces that would best suit the areas you want to cover on your vehicle. What you will want to do is drape the netting over the turret wire. Remember less is more, you can always add more netting later if you fell the first layer is insufficient. Attempt to dry fit the pieces to make sure they are the size you want.
 Next,
create a mixture of white glue and water, about 50-50% of each. Lay out your pieces of
netting on a flat smooth surface. Then, using a large soft brush dab the netting with the
glue mixture. Pick up the netting and carefully lay it over you vehicle. The netting will
have a tendency to bind up, so work slowly. If you have used a wire on the turret, drape
the netting over the wire. Try to completly cover the wire while positioning the netting
so it looks as natural as possible. Again use the photos as a guide to get a
"realistic look". Remove any excess glue drips with a bit of tissue, and let the
netting partially dry over night.
Next,
create a mixture of white glue and water, about 50-50% of each. Lay out your pieces of
netting on a flat smooth surface. Then, using a large soft brush dab the netting with the
glue mixture. Pick up the netting and carefully lay it over you vehicle. The netting will
have a tendency to bind up, so work slowly. If you have used a wire on the turret, drape
the netting over the wire. Try to completly cover the wire while positioning the netting
so it looks as natural as possible. Again use the photos as a guide to get a
"realistic look". Remove any excess glue drips with a bit of tissue, and let the
netting partially dry over night.
**Warning, if you allow the netting to completely dry, it will be very difficult to introduced the "Hessian Tape" strips later on.
Now it is time to create the "Hessian Tape""strips. I used Tamiya’s high quality modeling tape for this purpose. You could try ordinary masking tape, but I’m not sure what the results would be. Lay pieces of tape out on a small piece of glass or mirror, then proceed to cut it up into strips of various lengths. The width of each piece is dependent on your taste as well as the photos you are using. I have seen various widths being used in photos, therefore exact dimensions are not that important. It just has to look reasonable!
Next, remove each piece one by one with a pair of tweezers and place it
on the netting in a random fashion, again photos are a big aid. Try to layer some pieces
and don’t be afraid to have some strips overlap each other. Now, using your tweezers,
lift up some of the partially dried netting and weave the ends of the strips into the
netting. This will add to the layered effect. Finally, using a small brush, paint each of
the strips with your white glue and water mixture.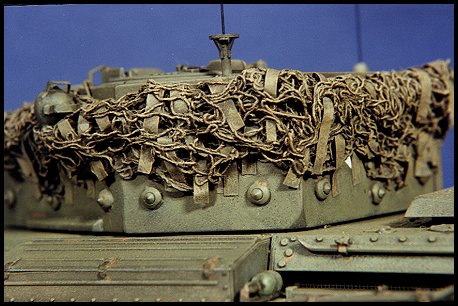
Let this dry again until it is almost solid. Now you must cut new pieces of netting, smaller then before. What we want to achieve is a layered appearance to the "Hessian Tape" netting. Proceed as before, laying the netting over the first layer and wipe off any excess glue. With your tweezers, start lifting up some of the strips and weave then through the second layer of netting. You may also want to add some new strips to your netting at this point.
Painting
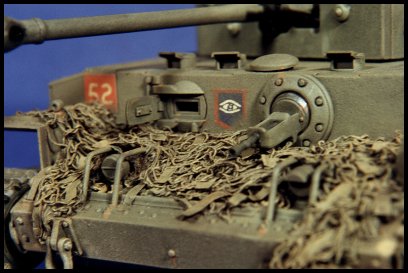
When everything has completely dried you can now proceed to painting the netting. I would recommend to use an airbrush with the finest tip setting . You want to try to paint only the netting, not your vehicle. I used Polly Scale, Railroad Tie Brown no.414329, mostly to differentiate the netting from the rest of the vehicle. You could also use various shades of green if you wish. Once your paint is dry, you can now proceed to dry brush and weather the netting to your taste. To aid in the appearance of the netting, it may be helpful to paint highlights on the strips to help them stand out. You may also have to go back and touch up any areas of overspays on your vehicle.
 Conclusion
"Hessian Tape" netting is a great way to differentiate your model in a very realistic way. The extra depth and texture it gives your vehicle will, when properly executed, add that little something which will make your work stand out. My instructions above are only meant as a guide and should be taken as such. Every project is a different as every modeler, therefore I encourage everyone to try this out and add their own twist to this project.
| Main | What's New | Articles | Reviews | Gallery | Think Tank | Contests |