
Painting a German SS Eichenlaubmuster (Oak Leaf Pattern)
Mark Bannerman
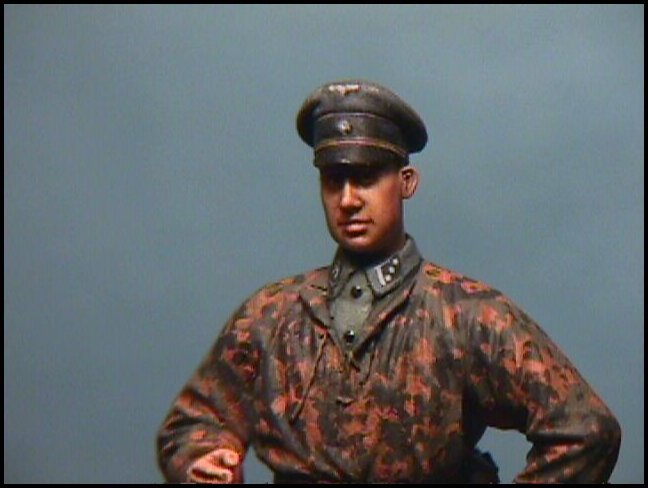
The SS- Eichenlaubmuster Oak leaf Pattern, or termed "regular pattern" is the most typical of the reversible SS pattern smocks, and was quite prominent in the Normandy and Ardennes campaigns. These were made of herringbone twill with a drawstring waist band, and elastic cuffs. These came in various shades termed "Autumn", "Greens" , "Browns" and "All Season" . For this article, I tried my hand at the "Autumn" look.
For my subject, I chose yet another 1/35th scale white metal Hornet figure. I used a separate resin head from same series. I did this as I wanted the figure to have a cocky look about him. The head provided with the figure, while nicely detailed, looked somewhat boring. I cleaned up the figure and attached the arms and head with 5-minute epoxy. Quite a bit of clean up was required but a sharp Xacto knife and sand paper allowed for ease of removing flash. There were quite a few pit holes and these were filled with auto car filler (the orange stuff!).
I sprayed the figure with Tamiya white Fine Metal Primer. I tried this stuff for the first time and it is finer primer than the grey primer. It quite literally flows onto the figure like silk. But either the Grey or White Tamiya metal primers are fine for this purpose. Once the primer was dry, I covered the figure's boots and head with Para M Film tape (masking will do) to protect the areas from subsequent paint cotes and also allows for easy handling (at the boots). I mixed up some Tamiya Earth (20%), Tamiya Khaki (20%) and Tamiya Grey (10%) and cut this mix with 50% isopropyl alcohol. I airbrushed the entire figure twice with light coats to ensure all the primer was covered. When the Tamiya paint had cured, I applied a very light wash of Burnt Sennia oil and Testors thinner along seam lines, belts, and flap seams. This provides for subtle shadows. The day after, I base painted the trousers a grey colour using Humbrol Track Colour (67) mixed with a drop of Humbrol White. The under jacket was painted Tamiya Field Grey out of the bottle and the smock was left intact as the sprayed combination of three Tamiya colours left a reasonably good colour match to the Autumn Oak Leaf smock base.
The next step was the laying of the Oak Leaf camouflage pattern.Looking at references, there are several patterns on one jacket but not one is distinct . In other words, there are no consistent patterns. The "leaf" prints are randomly applied and this will make our task so much easier. The pattern consist of a random array of a muddy dark brown, and a bright distinct reddish yellow pattern similar to the colour of autumn oak leaves. I started out by laying in the irregular patches using a mix of Humbrol Brown Bess (any brown will do) mixed with Black, keeping more on the black side. Make sure this series of patches never meet. The patches should cover about 40% of the smock surface. Let this dry for about thirty minutes. I added a series of bright reddish yellow patches composed of a mix of Gold Ochre oil and Humbrol Red. I cannot recall the actual ratio but try 80% Gold Ochre oil to 20% Humbrol Red.
At this point the figure should be covered in 60% of non-descript patches. I then used the two same colours mentioned above (Brown/Black and Reddish Yellow ) and applied blotch patterns by stippling the brush onto the smock. Perfect round dots is not what you are trying to capture but rather "blotches". Apply blotches of the Brown/Black mix to the Red/Yellow patches and the reverse. Quite frankly, the best brush for this is an old beat up brush which has hardened hairs. Ensure to add thinner every time you lay colours for ease of flow. Humbrol paints dry very quickly and hence, blotches will become clumps after five minutes of exposure to air if not properly thinned. I examined the figure to see if there were areas that look in need of filling. I kept adding blotches until 75% of my figure was covered.
Once dry, I added Tamiya Smoke in the shadow areas. I mixed Smoke with alcohol 50/50 and let it run into the crevices and crannies. Very light coats at a time. Once this had dried (give it a day), I sprayed on liberal coats of PollyS Dull Cote. This will immediately reduce the shine from the Smoke and any sheen as a result of using oil Gold Ochre. That wraps up a fun and enjoyable project.
| Main | What's New | Articles | Reviews | Gallery | Think Tank | Contests |