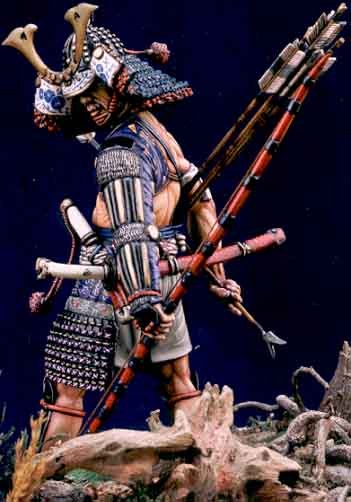
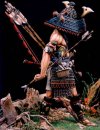
Without any doubt the White Models 90mm Samurai is one of the most
beautiful models ever cast in this scale! It is also one of the most
complicated to assemble,
At least from my point of view. But I can assure anyone, that the finished
model will make you forget all the hardships encountered during
construction and painting!
Anyway let’s have less of the talking and more of the action, as the whole
venture is time consuming, due to the multitude of parts. 58 well cast
white metal pieces, quite a lot of pieces for a single figure! I spent 87
hours in construction, certainly a lot of time but I could not help it
could I?
All pieces were pinned prior to gluing for a secure bond .I assembled as
much parts as I could, before painting. The remaining parts all received
pins, for easier handling during painting and also for ease of fixing in
the end, as they would have corresponding holes wherever they might end
up! I’m always stressing this point of ‘pinning’ at our club meetings and
you might as well get some dose of it all!
The most challenging aspect of this figure is not the rich embroidery on
his silk clothing! It’s the large area of oriental flesh that presented me
with the biggest painting headache to date! I conjured up a basic mix on
my palette, and it turned out quite satisfactory. All colours are Winsor &
Newton Oils and Vallejo acrylics except where noted.


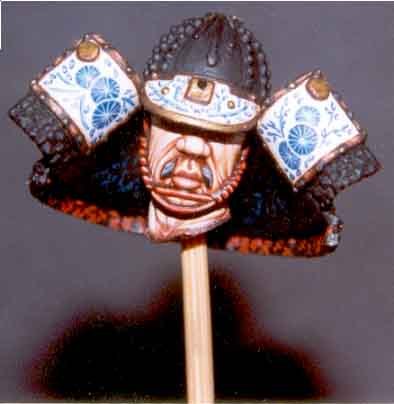
Eyes
The eyes were painted first. A pale gray acrylic was used for the
eyeballs. Irises were painted with Mars Black. Mars Brown was painted over
the Mars Black, leaving a dark outer border and the pupils showing. I
highlighted the lower half of the irises by adding Tit. White to the Mars
Brown. I omitted the catch of light as the face would be pointing slightly
downwards and would be quite concealed by the mabizashi (peak) and the
fukigaeshi (side flaps) of the kabuto (helmet) Lower eye lashes were
outlined with Mars Brown and upper lashes with Blue Black.
Flesh Mix
Base-Mars Orange+Mars Yellow+Tit. White
Shade-Mars Orange
Highlight-Base+Mars Yellow+Tit. White
This initial application was painted in the traditional wet–in–wet method.
After all was dry I applied the deepest shadows and highest highlights
Deep Shade-Mars Brown+dab of Brown Madder
High highlights-Highlight+Mars Yellow+Tit. White, in two gradated steps,
adding just a little more Tit. White in the last step.
I painted all the remaining flesh after I finished the face. I felt that
once I manage to overcome the hazardous task of obtaining a satisfactory
overall balance of flesh tone, I would be able to confront the other more
intricate and elaborate patterns!
Tourniquet on right arm
This was painted in oils.
Base-Tit. White+dab of Raw Umber
Highlight-Tit.White
Shade-Base+Raw Umber
The tuft of grass around the supposed wound was painted in Terre Verte
oils. Shade was Blue Black+Ivory Black. Highlights were Sap Green+Winsor
Green (Yellow Shade). Highest highlights were Chrome
Yellow+Tit.White.Blood was smeared on with Mars Red and highlighted with
Cad.Red+dab of Cad.Scarlet.
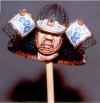
Kabuto (Helmet)
The Kabuto was next .It was painted with Mars Black over a brown acrylic
and when it was dry I applied a wash of Ivory Black. When dry again, I
picked out the scales’ edges with a mixture of Raw Umber +Tit.White, for a
highlight effect. I used this technique on all the other armour parts. The
blue lacing on the kabuto and nodawa (throat and upper chest cover) was
painted in a Susogoi manner, which means, "Shaded colour lacing growing
lighter towards the top"
Cobalt Turquoise was used as a base for this colour. Blue Black was added
for the lower row, next came a row with straight Cobalt Turquoise, and
then added a dab of Tit.White for each subsequent row. The base colour for
the lower red lacing was Cad. Red deep with Cad.Scarlet+Cad. Yellow used
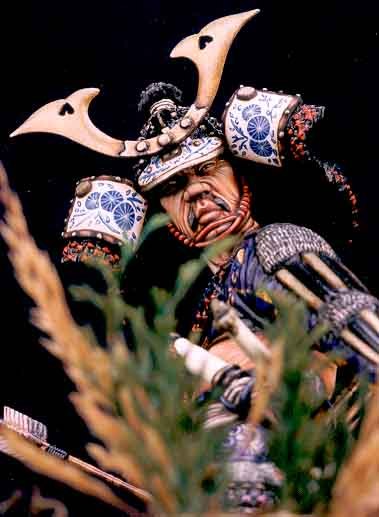
for highlights. Shading was done with Ivory. Black. For the Kabuto no o
(tying chord of the helmet) and agemaki (helmet back bow and tassels), I
added Naples Yellow for the highlights to obtain a slightly different
shade .The lacing pattern had to be simulated from the inside by painting
it with darker shades of the outer colours as it was not sculpted on.
The floral pattern on the mabizashi, the fukegaeshi, and the nodawa was,
925 Intense Blue over 820 Off White background. Leather edges on the side
flaps were, Burnt Umber+Mars Yellow oils as a base with Mars
Yellow+Tit.White for highlights and mars Black for lowlights and
demarcation around the golden studs. These and all other gold parts were
painted with gold printers’ ink+Burnt Umber oils as a base with highlights
in Gold and Silver printers’ inks and lowlights in Burnt Umber. Once dry,
the kabuto received several thin coats of Vallejo acrylic gloss varnish
for a Yoshino Urushi (Glossy finishing lacquer).
Kuwagata (helmet crest)
The helmet crest as supplied in the kit was in two separate parts, and I
felt that it would be too heavy to put together as instructed, so I
replaced it with another crest made from 5 thou plastic sheet. The crest
was painted as described for the gold parts.
Waidate (Right side Armour)
This was painted in acrylics. The background was 858 Ice Yellow. The
three-leaf pattern was painted with970 Green, highlighted with 942 Light
green and 827 Lime. Lowlights were 950 Black+970 Green.
Kote (Armoured sleeve)
This was my first attempt in acrylics where I had to paint in the shadows
and highlights.
Base-960 Violet
Highlight-811 Blue violet+951 White
Shade-Base+950 Black
I chose a pattern of dragonflies and fans, and these were painted in oils
and acrylics respectively, for the simple reason that I was scared that,
any corrections I would surely have to make, on the sleeve colour, would
prove too difficult to achieve with the same mixture of acrylics. So the
dragonflies were painted with Gold Ochre, adding Tit White for highlights
and straight Burnt Umber for the shade. The fans were more straightforward
and I dared myself to paint them with acrylics.
The black and gold armour on the sleeve was treated as described for all
black and gold metal parts.
The mail was coated with Lamp Black, and dry brushed with Silver printers’
ink+Mars Black once dry. Random washes with Burnt Umber+Burnt Sienna were
applied to the mail to depict rust, and also to add some depth and realism
to the mail. Silver Printers’ ink was used to pick up some hot spots of
mail.
Chest and back belting+leather edge of Kote
Base-Mars Orange+Mars Brown+Liquin
Highlight-Mars Orange+Tit White
Shade-Mars Brown+brown Madder
Haidate (Divided apron-like thigh Armour)
These were painted prior to assembly, and received locating pins.
Corresponding larger holes were drilled on the figure, and filled with
Milliput. While the milliput was still soft, I pressed the Haidate in,
after I coated the pins with Talcum powder. At this point, some more folds
were sculpted on, to the tops of the Haidate, which would make up the
waist sash. When I removed the Haidate, I was left with four locating
holes in the figures’ upper thighs. The blue portion of cloth was painted
as follows, in oils.
Base-French Ultra Marine Blue
Shade-Blue Black
Highlight-Base+Tit White
The embroidery was painted with Gold Ochre as a base, with Tit White added
for highlights and Burnt Umber for the shade. The lower dotted pattern was
painted in 994 Dark Gray and highlighted by adding 820 Off White over a
pale gray background. After all was dry, three very diluted coats of
Vallejo satin varnish were painted on the cloth area.
Horizontal lacing
Base-Mars Yellow
Highlight-Base+Tit White
Shade-Burnt Umber
Crossed lacing
Base-Purple Lake
Highlight-Base+Tit.White
Shade-Brown Madder+Ivory Black
Once dry the scales received the same treatment as described for the
armour.
Shorts
This was also painted entirely with acrylics.
Base-Sand Gray (Lifecolor)
Highlight-986 Deck Tan+Beige (Andrea)+918 Ivory+820 Off White
Shade-Deck Tan+Field Gray (Andrea)+Black 950
Katana and Aikuchi (Sword and dagger)
Tsuka (Grips)
Base-Tit White+Mars.Yellow
Highlights-Tit White
Shade-Base+Mars Yellow+dab of Burnt Umber
Saya (Scabbards)
Base-Cadmium Red
Highlight-Cad.Scarlet+Cad.Yellow
Shade-Brown Madder
When dry, Rotring Red drawing ink was painted on to portray a rich deep
effect. Design on both scabbards was kept as simple and effective as
possible. It was painted with Naples Yellow+dab of painting medium, in
dissimilar strokes parallel to the Tsuba (Sword guards). When dry, they
were lacquered.
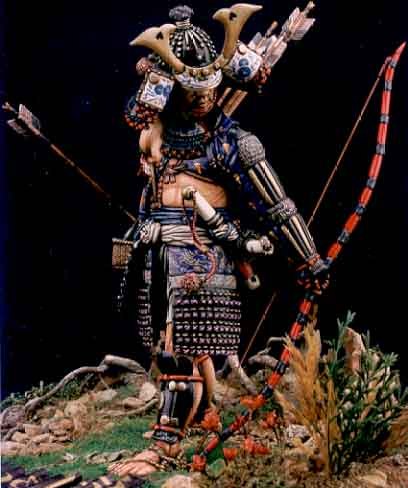
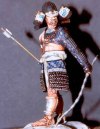
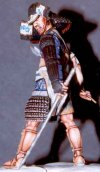
Yumi (Bow)
As can be viewed in the in-process photos, the bow consisted of two
pieces. I tried to fix them together at a very early stage, by inserting a
pin right through the clenched fist. Well I succeeded in doing so, but
after a couple of days of rotating the figure around, the inevitable
happened! I managed to break the bow from near the inserted pin, on the
upper portion, due to the fact that the drilled hole left a very thin wall
of metal! So now I had to shorten the upper part by one segment to expose
some length of pin. Nonetheless I still had some pending brainstorming, as
to how should I attach a straight Tsuru (string) to the bow, after it was
fixed and painted. I solved this by forming two similar spools out of fuse
wire, which were coiled round a piece of piano wire length similar to the
one that would serve as the bow string. At the end I formed them in a loop
over the bow’s ends and secured them with super glue. These bow string
reels, are called Tsurumaki and very conveniently, left me with two hollow
coils, in which to insert the string, which in turn was cut to size
allowing for some spacing at the inserting ends! This may sound like a lot
of wasted time, but I can assure you that it’s not. By spending quite some
time in planning this relatively small-scale engineering, you really
invest for the closing stages, when all parts just click together, with no
messing around with sweaty, sticky fingers, which will smear your paint!
The bow was painted in the same manner as for the sword and dagger. The
black bindings were painted with Mars Black, highlighted with Tit White
and shaded with Ivory Black. The bowstring was painted to represent hide
in a tan acrylic, and toned with Burnt Umber oils.
Suneate (Shin guards)
The same procedure was followed as for all the other armour plating and
gold items.
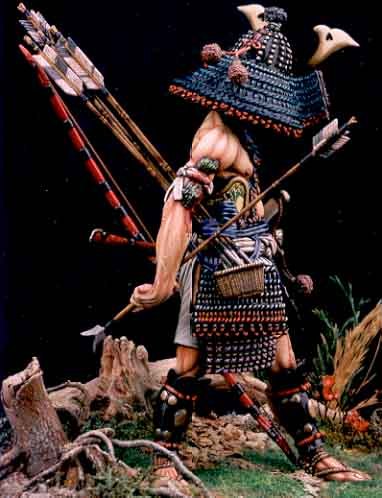
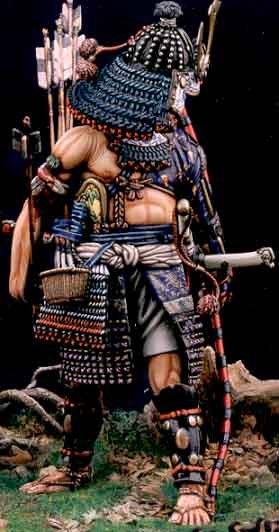
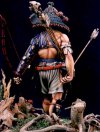
Waraji (Rice straw sandals)
This type of footwear which was initially worn by retainers, was adopted
by all Samurai as fighting on foot became more common. And our soldier
coming from the Gekokujo period, which means ‘low overcoming the high’
referring to the peasant revolts of the 15thC, has the appropriate
footwear along with all the other clothing and armour, all gathered from
the battlefield, from dead Samurai. This is the reason why I painted as
much variety of colours, patterns and leather bindings as I could, to
depict them, as belongings of diverse fallen Samurai! Burnt Umber oil was
brushed over a tan acrylic. Excess was removed with a clean brush and Mars
Yellow+Tit White was used for the highlights.
Ebira (Open quiver)
The quiver as supplied in the kit is made of cane. Still, I had to make
some alterations to the back part, for a more snuggly fit. I also pondered
how should I mount the arrows once everything was painted! In reality the
arrows would fit in between rows of bamboo or leather strips at the top of
the ebira. So I inserted a piece of balsa wood inside the ebira, which was
grooved at the top. This in turn received a wash of Burnt Umber oils and
dry brushed with Mars Brown+Mars Yellow+Tit White. A strip of lead foil
was bound and glued to the back stem, with quite a considerable length
left unbound at the spot where, later on it would be turned around the
arrows for a secure fit as in reality! Again Burnt Umber oil was brushed
over a tan acrylic. Excess was removed. Highlights were picked out with
Yellow Ochre+Tit White.
Ya (Arrows), Ya no ne (Narrow arrow heads), Karimata (Forked arrow
heads), and fletchings.
I used extra long hypodermic needles for the arrow shafts, and being
hollow, allowed me to mount them on jigs to ease off the handling during
painting. The same applied for the arrowheads and fletchings, which were
pinned and they in turn were also mounted on hollow jigs. To portray a
pillaging soldier I used some three-sided flights and narrow arrowheads
from Poste Militaire’s bow and arrows 90mm kit, for an assorted full ebira!
Shafts
These were painted with a tan acrylic and received a wash of Burnt Umber
oils. When dry, Mars Black was used to depict the intersecting segments of
the bamboo shafts, and Burnt Umber was feathered round the base of these
segments. Highlights were Yellow Ochre+Tit White.
Arrowheads’ and fletchings’ bindings were painted with 950 Black and
highlights added with Mars Black+Tit White. Arrowheads were burnished and
sprayed with PS-31 Tamiya Smoke.
Fletchings
These were painted as follows:
White
Base-820 Off White
Wash with Mars Brown
Highlights-Tit White+dab of Raw Umber
Black
Base-822 Black Brown
Wash with Ivory Black
Highlights-Mars Black+Tit White
Uwa Obi (Waist Sash)
This was the third and last item painted in acrylics and was painted in
one attempt!
Base-Beige (Andrea)+941 Burnt Umber
Highlight-Base+820 Off White in 6 gradated steps
Shade-Base+941 Burnt Umber+822Black Brown
Waist and Ebira belting
Base-Winsor Blue+Liquin, over a pale gray acrylic
Shade-Blue Black
Highlight-Cobalt Blue+Tit White
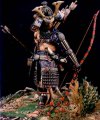
Terrain
This was built up with Das Pronto, and textured with a rough stone. Cat
litter and natural dirt was sprinkled over a coating of diluted white
glue. Two pieces of real logs were embedded in the soft das, and small
stones, vegetation, and static grass were added. Various washes with Burnt
Umber, Mars Brown, Mars Red, Mars Yellow and Winsor Green were randomly
applied. The whole terrain was dry brushed with the same oil earth colours
that were used for the washes. Finally, after 417 hours of pain stacking
construction and painting, the figure was mounted and stuck on the base.
Name plate, was added from a piece of Black Brown lead foil, which started
life as the cork covering on a wine bottle! Came in really handy as I
could manipulate it to look like a piece of cloth. Lettering was done in
Gold Old English dry transfers.

Conclusion
I hope you enjoyed reading this article and hopefully you may find some
useful tips. I really enjoyed writing it; at least it was not as demanding
as the construction and painting. All in all this was a very rewarding
project, where as I stated more than once; a little forethought can go a
very long way in the execution of the completed figure!
Keep on painting!
References
Arms & Armour of the Samurai; by I.Bottomley & A.P.Hopson, published in
1996 by Saturn Books Ltd in Great Britain.
Osprey, Elite Series No23 THE SAMURAI. published in Great Britain in 1989.
Photographs
Mario Cocker:-Finished Model
Ray Borg:-In-progress-shots