"Painting Panzers" The
Post-Shading Way
An Alternative Approach to Finishing AFV Models
by James Blackwell
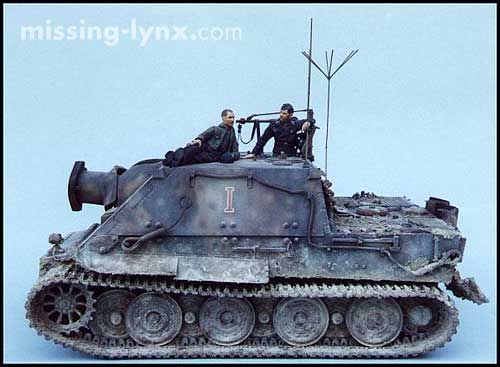
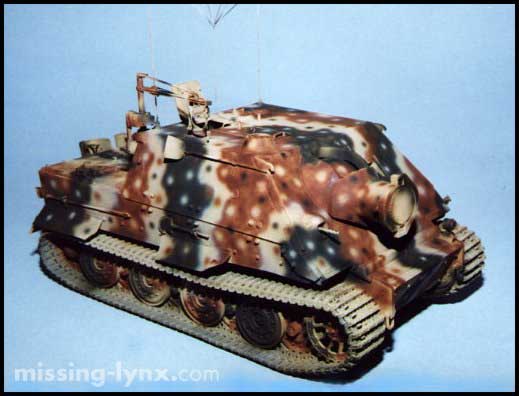
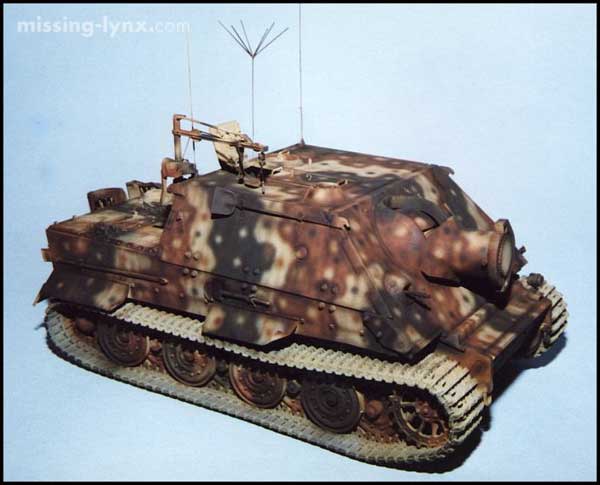
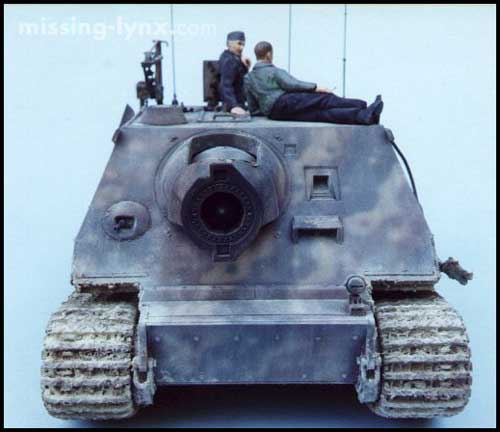
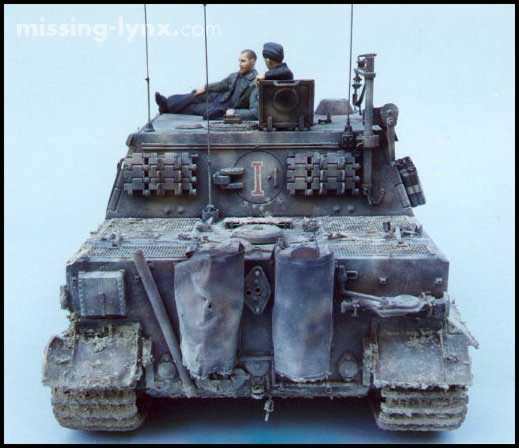
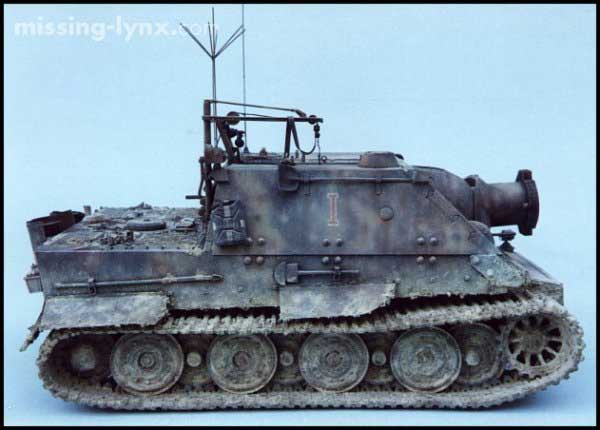
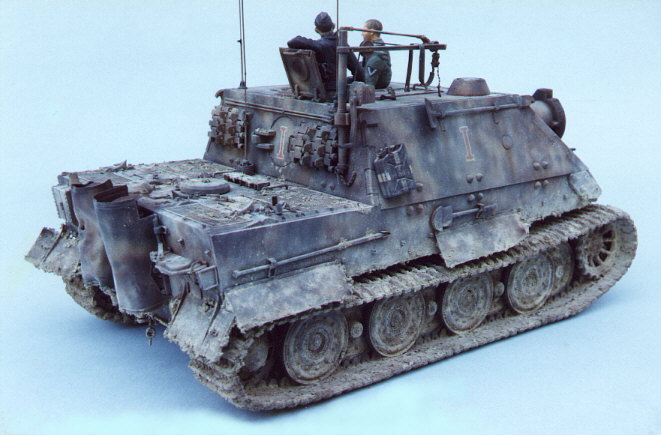
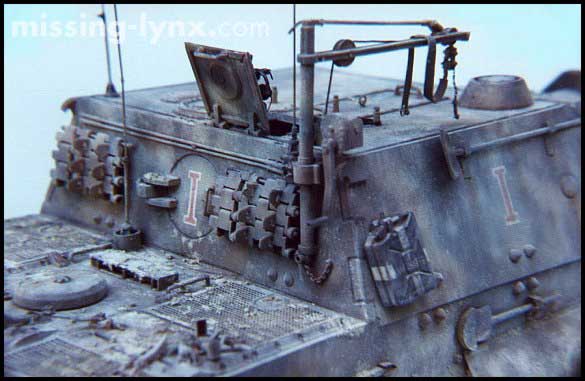
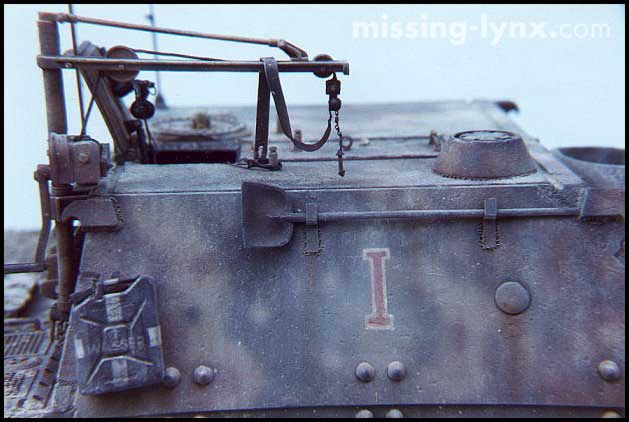
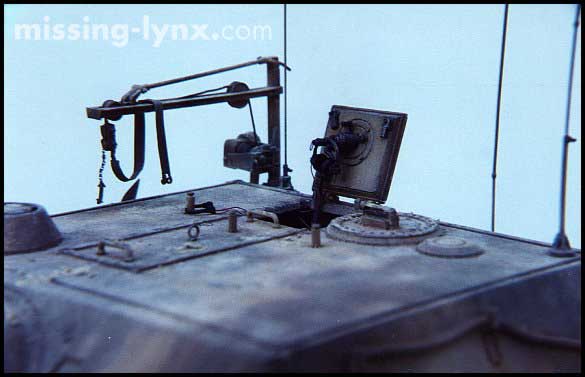
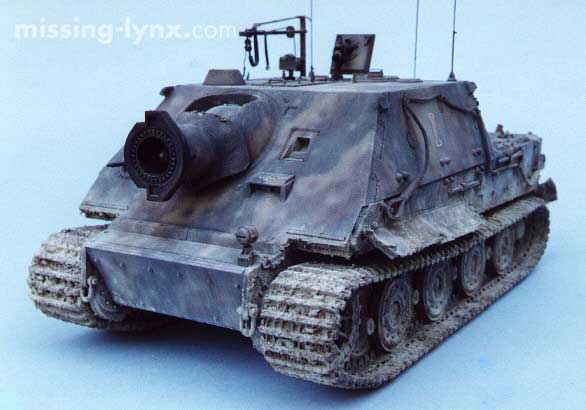
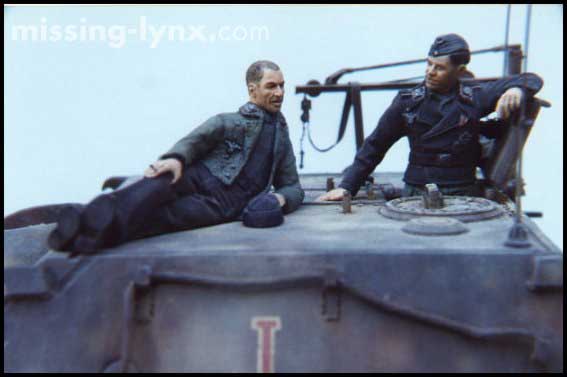
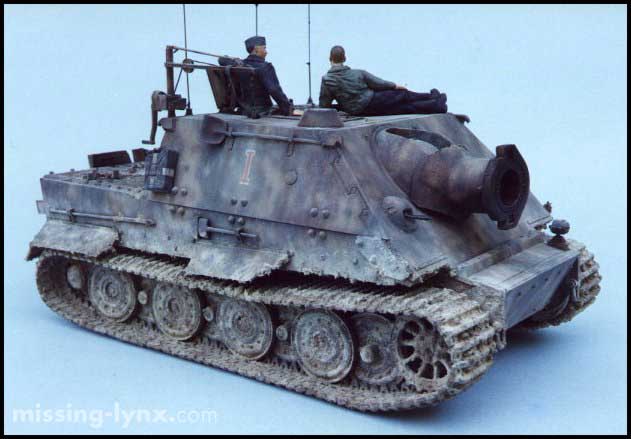
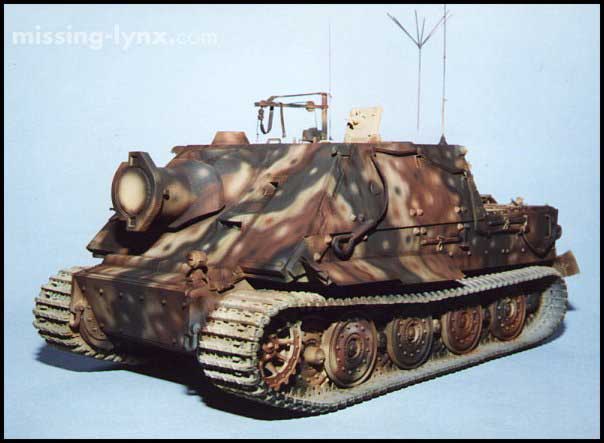
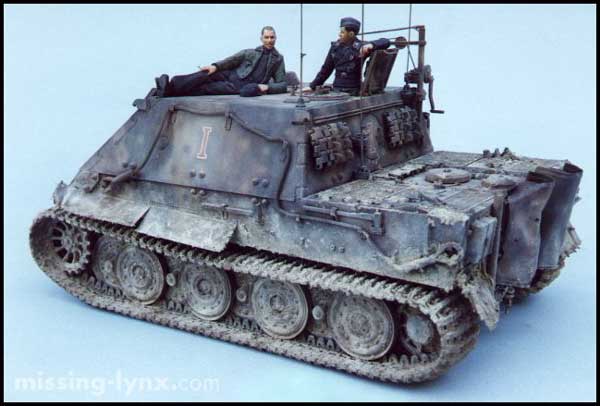
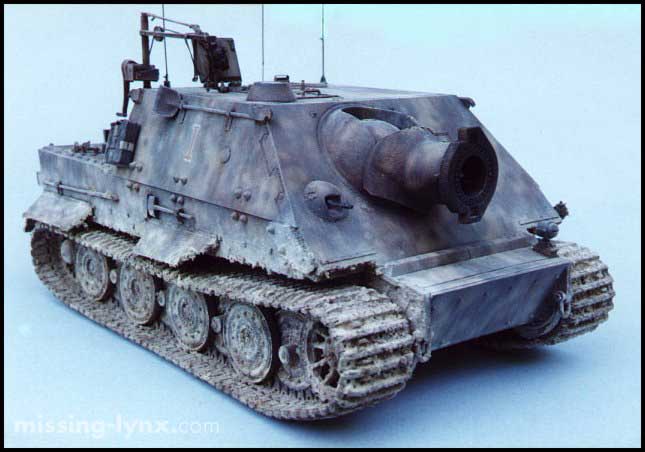
38cm RW 61 "Sturmtiger", St.Mrs.Ko. 1001
"Painting Panzers" by Post-Shading will explore this particular
approach of painting and weathering AFV models through a straightforward
seven-step system. This method is based on airbrushing and the use of
pastel chalks to achieve more "realistic" paint jobs and weathering
results on your scale model armour kits
Introduction
The two extremes in approaches when contemplating finishing
a model are the "artistic" or the "realistic". In
common with any visual medium, beauty is in the eye of the beholder,
and what pleases one, may do little for others. So as could be expected,
there are staunch supporters in both camps plus a range in between.
Some favour the bright, heavily washed and highlighted 3-D model that
leaps off its display base. I personally prefer a more subtle and, to
my mind, "lifelike" approach that more closely captures the
look of its 1:1 scale counterpart (acknowledging of course that this will
be at the expense of some "visual impact").
I'm not saying that this position is right or wrong. I just simply prefer
the latter and am interested in trying to reproduce it in miniature.
This topic can be incredibly subjective and controversial. It has been
known to polarise camps and create heated arguments. I want to emphasise
that my aim here is not to inflame any passions or start debate, only
to present another ‘possible’ alternative to the traditional
wash & drybrush method.
After experimenting with it, I’ve used it over the last few years
on some of my kits and feel it offers a speedier, more controllable, and
subtle system of achieving convincing results. This method has been unashamedly
developed by "stealing", adapting, and combining all those techniques
that I personally like (which I've picked up from others) along with a
few of my own (often borne from accidents come good!).
This "Post-Shading" approach effectively removes the use of
washes and drybrushing, which many find tough to employ by letting the
airbrush and pastel chalk take over. The traditional W&D methods can
be effective when used conservatively by an experienced hand, but are
often unpredictable and difficult to control and, in my opinion, tend
to unnaturally over-emphasise certain aspects of a model at the expense
of the illusion of reality.
If our aim is to create a scaled-down replica, more subtle procedures
such as airbrushing and pastels are to me, far more suitable. The only
pre-requisites for mastering this system are a good airbrush, references
of the real thing, an eye for detail, and a constant willingness to experiment
with new methods and techniques to best match the original in scale.
As with many aspects of the hobby, the methods outlined below are only
guidelines and not hard and fast rules. Practice and application, personal
tweaking, additions or subtractions, plus finding what works best for
you, is the key.
These techniques are explored step by step step-by-step using a Tamiya
Sturmtiger as illustration.
Equipment
A good airbrush is absolutely essential for this approach to
work. The minimum requirement is one that will produce very fine, feathered
lines with no spatter. I personally favour the Aztec/Testors Model Master
A470 double action gun, almost always using the tan-coloured, fine line
tip. I run air pressure fairly high at around 30 psi. My preferred paints
are Tamiya and Gunze acrylic - heavily thinned with isopropyl alcohol
at a ratio of approximately 70% thinner to 30% paint. It is simply a matter
of closing down the needle to achieve a fine, even spray.
Also necessary is a good quality assortment of soft dry artist’s
pastel chalks, available from art and craft stores. They can be bought
in colour-coded sets or as individual sticks. Shades to look for are whites,
creams, yellows, tans, and light browns for dust, a few dark and medium
browns plus bright oranges for rust, and a finally a black for exhausts,
and muzzle brakes. Ten colours total should really be all you’ll
ever need.
Painting Steps 1-7
This will scare some people but I spray my models after
the kit is totally assembled. This includes wheels and tracks in place!
Major assemblies like turrets and interiors are usually painted separately,
but fine details may be brush painted during the painting process.
The model illustrated in this article is finished in a large dot 3-colour
ambush scheme. However, the basic principles can be applied/adapted to
a wide range of subjects sporting other colour schemes.
The seven steps I follow to obtain a realistic finish are as follows:
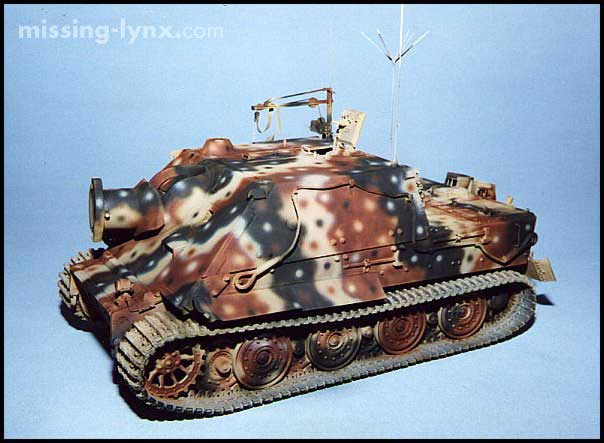
Painting Step 1
The model is fully constructed including wheels, tracks and
on-vehicle equipment.
The base coat is sprayed over the entire model with the airbrush - in
this case a slightly lightened mix of Tamiya XF-59 Desert Yellow. Next
the disruptive Red-Brown colour (Tamiya XF-64) followed by XF-61 Dark
Green are applied. Based on reference shots a large dot ambush scheme
was chosen. As you can see, at this stage it looks terrible! But there
is still hope and just shows that with a bit of weathering almost any
paint job can be saved!! I personally find about 70% of the time I spend
on a paint job is in the weathering stage after the actual base colours
are on.
German armour camouflage is another extremely controversial subject that
can get people worked up into a lather very quickly. In my opinion, don't
get too pedantic about matching paint chips. From studying the few existing
wartime colour shots and the enormous range of variation that exists in
the tones of monochrome photos, plus the variables involved in application
of paint, and its weathering in the field, especially in wartime conditions,
I just don't believe there is a "right" colour, especially in
scale. Once a vehicle rolls out of the plant many harsh and diverse factors
affect it. Sun, snow, sand, mud, field-applied finishes, heavy combat
plus general wear and tear means that almost anything goes. Under these
circumstances RAL colour chips are little more than helpful guidelines.
I generally prefer a filthy finish to my vehicles to mimic the character
of their full-sized cousins. To me, this aspect of finishing is where
the fun is and gives the vehicle ‘life’ and an identity, as
well as an indication of its theatre as well the conditions under which
it served in the time frame depicted.
Painting Step 2
After the base camo colours are applied I substitute traditional
washes with an operation that might be described as "Post-Shading".
I spray a very thin mix of XF-64 Red Brown and XF-1 Flat Black (70/30
ratio brown to black, and c.70/30 thinners to paint), in a fine line
along edges of panels and camouflage colours, and into all the areas
of shadow and shade where a wash would ideally flow. Subtle vertical
streaking is also added with this mix. The tracks too are sprayed with
this dirty brown shade as a base colour for further weathering.
The key to success is subtlety and a fair amount of control, as well
as a degree of confidence in your airbrush. Practice is vital but once
you've got your airbrush set-up right, the operation is very quick. This
step gives a slight depth to the colours and to the vehicle in general.
The benefits of this method over a wash are the soft feathered edge around
all the recesses, thorough coverage of shadow, and the certainty of instantly
seeing the result (instead of anxiously waiting overnight for an oil wash
to dry). There is also no risk of "tide-marks" of washes drying
patchy. If any blemishes or overspray occurs, then it can be easily faded
out in Step 3.
An and/or alternative is "pre-shading" the kit in black first
then carefully building the colours up around the dark recesses . This
is very effective on single colour paint jobs, but on multi-colour cam
schemes I personally find that by the time the last colour is applied
much of the shadowing and dark panel line effect can be lost so I mostly
use the "Post-Shading".
Apply any decals now at this stage. I use Gunze "Mr. Mark Softer"
as my decal solution. This is a fantastic potion that really gets the
decals to bite down after they are on. Either that, or use dry rubs or
spray through photo-etch stencils which give top results.
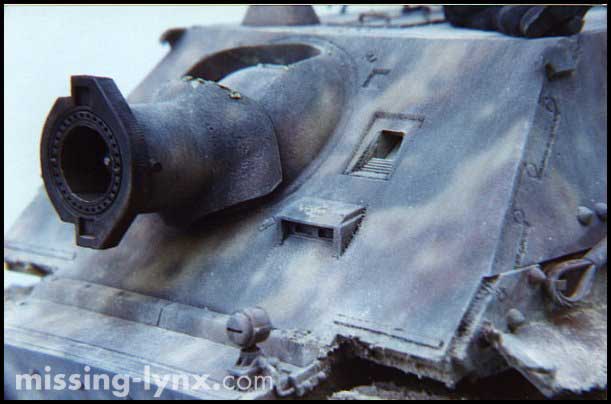
Painting Step 3
To soften or tone down the effect of the "Post-Shading"
and to tie the colours together, an overspray coat can be added at this
stage if necessary. Often a very thin mix of straight XF-64 Red Brown
is enough, but to fade the paint coat and give a weathered appearance,
it is best to use a lighter shade such as XF-59 either after or in place
of the brown, depending on the effect you are trying to achieve. These
coats should be lightly misted on using heavily thinned colours and sprayed
from about 6 inches away in a few steady passes to gauge the amount applied.
For a dusty effect spray a further coat of XF-57 Buff over the lower half
and up the hull sides. Again, subtlety is the key - you have to learn
when to stop, or know what degree of weathering you wish to achieve.
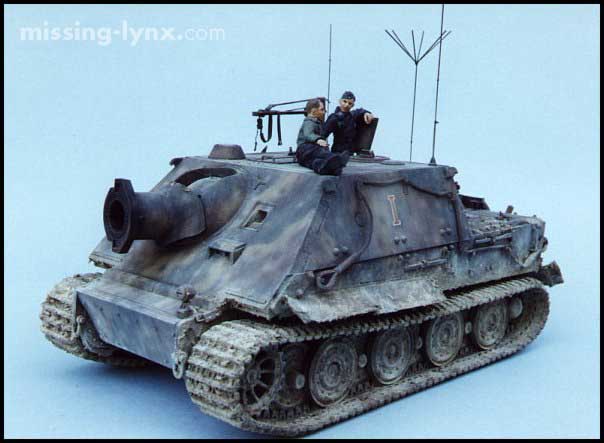
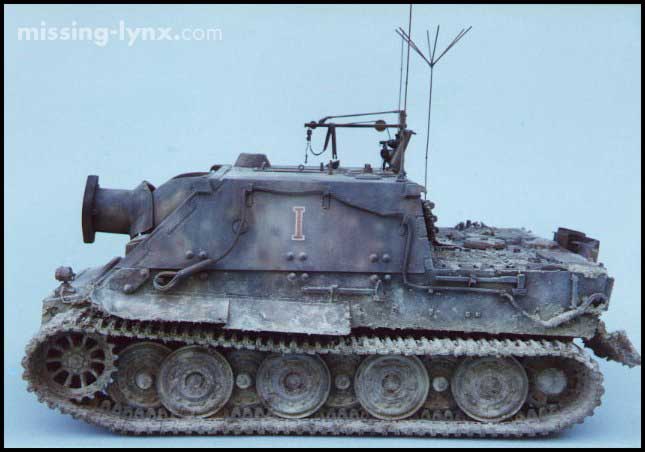
The Sturmtiger depicted is probably at the extreme end of the process.
While not based off a specific vehicle, it attempts to capture the filthy
look of another in the same unit during the campaign around Bonn from
reference shots. For wet and muddy terrain, or where you wish to retain
a cleaner paint job you could go very lightly in the "Post-Shading"
step and skip this one and go to the next. "Rustall" can be
applied to the tracks and exhaust at this stage too if desired.
Painting Step 4
A flat sealing coat may now be applied. I prefer Gunze-Sangyo H-20 Flat
Clear thinned again with isopropyl alcohol and with a drop or two of Tamiya
X-21 Flat Base, which gives an extremely dull finish. Check your references
though. Some vehicles seem to have a slight sheen that you may choose
to duplicate by skipping this step.
Painting Step 5
Mud and gunk is applied to the lower half and running gear. I use a mixture
of either Humbrol 5029 Acrylic Dark Earth for wet mud and/or Tamiya XF-57
Buff for lighter, drier mud to give it colour and body. To this is added
garden dirt or fine grit sand, and static grass and/or mint flakes, all
cut with water so as not to damage the paint. The beauty of using paint
as a medium to stick it to the hull is that it doesn't have to be coloured
later, and by cutting with water the colours beneath face no risk of being
damaged in the process. Pastel can be applied in irregular spots to further
break the colour up and/or dusted over to tie it together as desired.
Painting Step 6
Pastel chalks are now applied to confer a degree of subtle variation
in colour. I use a mixed bag depending on the result and effect I'm after.
Basic pastel chalk colours range from white through various light yellows
and tans plus dark brown and orange for rust. They can either be dusted
on with a large soft brush or applied with a small cut down stump of a
brush, either dragged or stabbed on.
Painting Step 7
Lead pencil is applied last to represent worn and chipped metal. I use
a 2B lead in a draftsman's 2mm clutch pencil. The lead may be applied
to the high points of track's tread bars, as scratches around hatches,
edges and high wear areas.
This completes the step-by-step weathering process. Depending on the
emphasis you give any one of the steps, different effects can be achieved.
As such it comes down to personal taste, and the look you are trying to
capture or prefer, as to how the finish of your AFV kits will appear.
Experimentation is the key.
Conclusion
Although perhaps a slightly daunting way to tackle painting and weathering
for the uninitiated as it is dependent on getting your airbrushing skills
pretty tight, once mastered I’ve found this is a fast, reliable approach
for achieving a realistic finish. It also illustrates that even the most
garish and toy-like initial scheme can be weathered back to reality with
a bit of perseverance. So don’t ever think a paint job can’t
be saved through the weathering process, as the progress shots of this
Sturmtiger show just what is possible!
Feel free to try this technique in its entirety, or use the individual
components that suit your style. Bottom line, never be afraid to experiment,
as to get comfortable with an approach you have got to add your own stamp
to the process, and a lot of times you’ll develop techniques only
through trial and error. This aspect of the hobby is so subjective and
based on personal taste, that the only person who has to be happy is you.
Models, Photography and Article Copyright © 1999 James
Blackwell & missing-lynx.com
|