|
WAAAY back in 1998 Dragon Models Limited released the first in a
new line of Sd.Kfz 250 family of vehicles. (was it that long ago?)
At the time, and to this day, these kits remain one of DMLs most
popular and one of their more accurate releases. DML have released
the /1 APC, the /5 Command Vehicle, the /8 Stummel and the /9 2cm
Aufklarungs (recon) vehicle. These are all based on the 'Neu' chassis,
introduced in October 1943 to speed up production. Almost 2,400 were
produced in up to 12 variants.
By now most people will be familiar with the DML kit, so I wont go
into a huge in depth review of the kit. Briefly, the DML 250/1 is
moulded in typical grey plastic, and comes with the usual DML individual
link track, this time being actually workable with careful construction.
One omission in the kit is the transmission. DML provide the padded
seat thingy that sits above the transmission, but no transmission
itself. Strangely, they did provide a tranny in their /8 and /9 variants.
Building a better mousetrap
The kit has been available long enough for various cottage industry
companies to come to the party with aftermarket goodies for the 250.
Aber is one such company. I love Aber. There was some talk of naming
one of my children Aber but my wife would have none of it. Even
when I highlighted the potential for sponsorship with a name like
that she still didnt want to know about it. No sense of humour that
woman.. but I digress.
Aber have released 5 different photoetched brass sets for just the
/1 APC variant alone. They are:35073 Basic update, 35A73 Front fenders,
35A74 Stowage bins, 35A75 Upper armour and 35A87 Floor panels.
There is a tiny amount of overlap with these sets,
but basically, as their name attests, with the use of all these
sets, all thats left of the original kit is the lower hull, wheels
and suspension, some interior items and the bonnet. This is where
Aber let themselves down. I want to see them do P-E wheels. And
tracks! I'm not going to be happy will I can buy a kit, use one
tiny piece from said kit, and replace the rest with brass!
I started construction by thoroughly reading ALL the instruction
sheets, 6 in all, just to see where exactly I should start. In the
end, I pretty much followed the construction sequence as outlined
in the DML kit instructions. So that means starting with the suspension
and lower hull. This part of the kit goes together really nicely,
but care must be taken aligning all the roadwheels, and they DO NOT
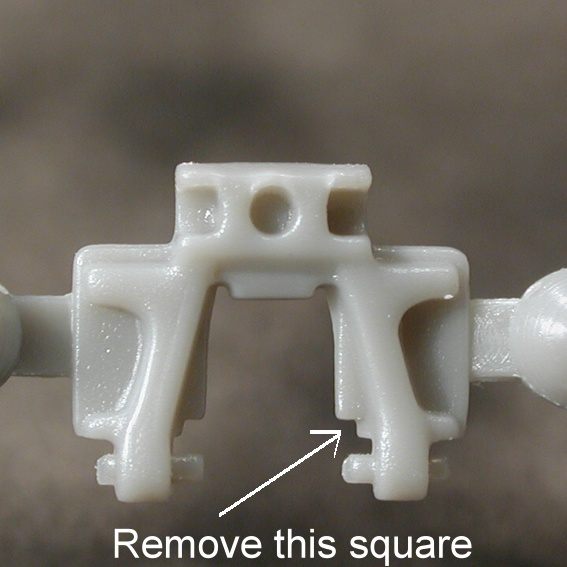
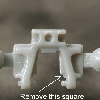
want to line up. I decided early on in the piece to use Anvil 250
tracks on this kit, so I substituted the kit sprocket for the one
supplied in the Anvil set. If you want to make the kit tracks fully
workable all you need to do is remove the tine square of plastic indicated
in this photo, and build the links up carefully!!
The front suspension goes together really well, just make you dont
mount the main leaf springs, part A1 upside down, like I did. Dont
forget to add the valve stem in each of the front wheels; I used a
Grandt Line bolt head.
From this point on, its Crush, Kill, and Destroy; well at least
as far as the original kit parts are concerned. Well ok, more like
Cut, Sand, and Aber! Every step in construction from this point on
entailed first consulting the kit instructions, then the instructions
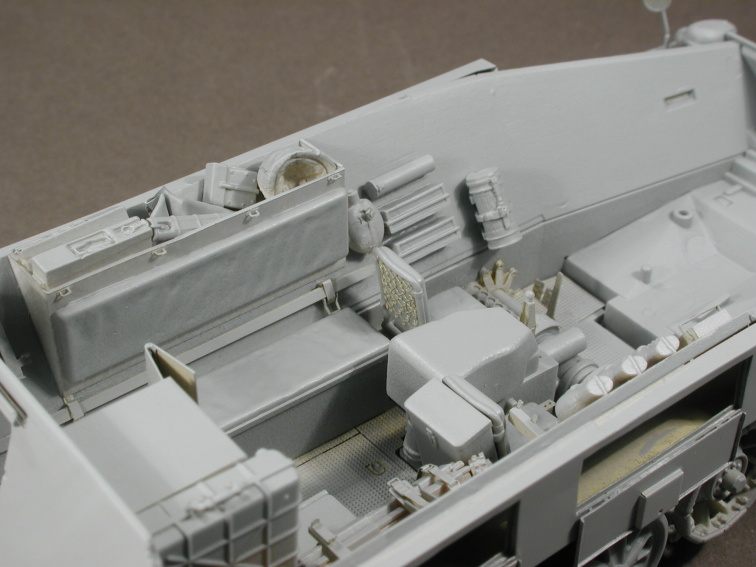
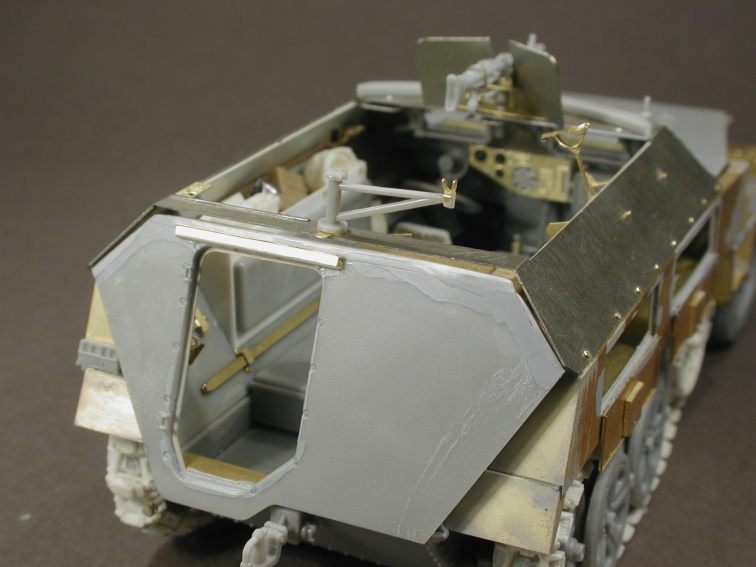
from the 5 Aber sets, 6 pages in all. I started off by replacing the
floor plates, which meant trimming the kit floor, and over laying
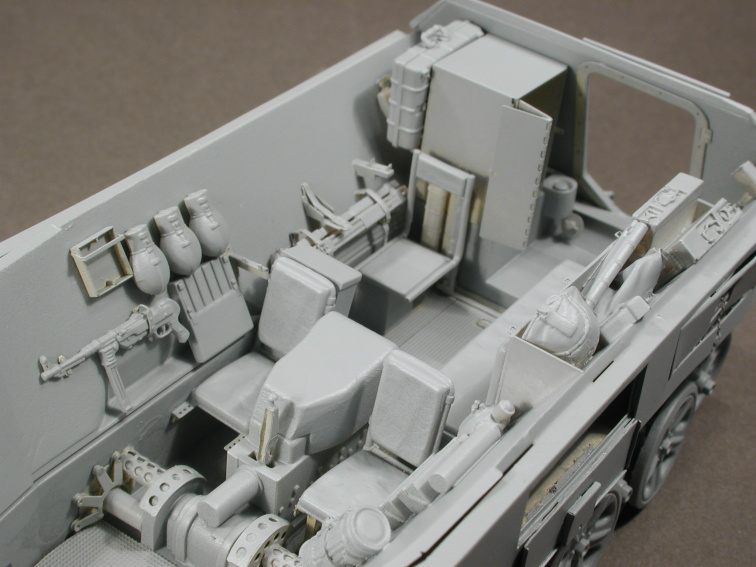
the etched tread plate. The new floor looks the business once installed.
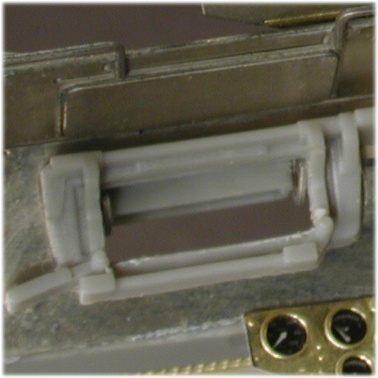
Once this is in, work can start on correcting the drive shaft area
and seat mounts. Although this area is inside the vehicle, you really
can see it from the outside, so correcting this area makes a huge
difference. The kit firewall and steering wheel can be built strait
as per instructions.
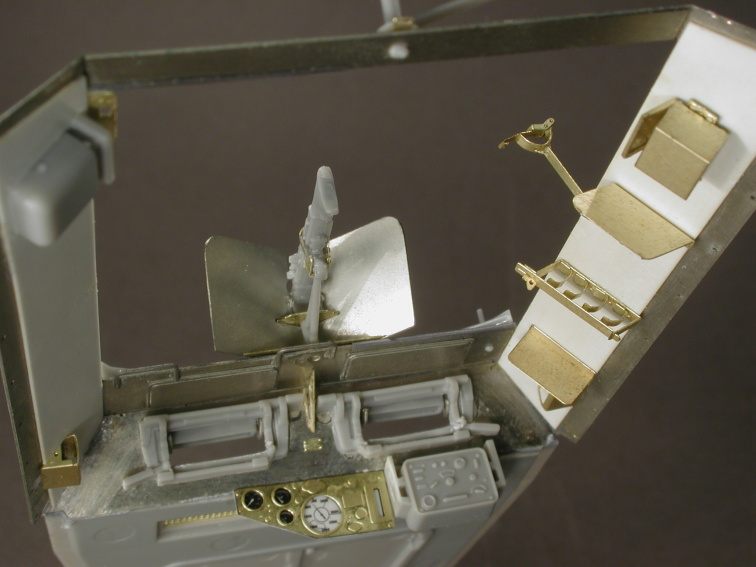
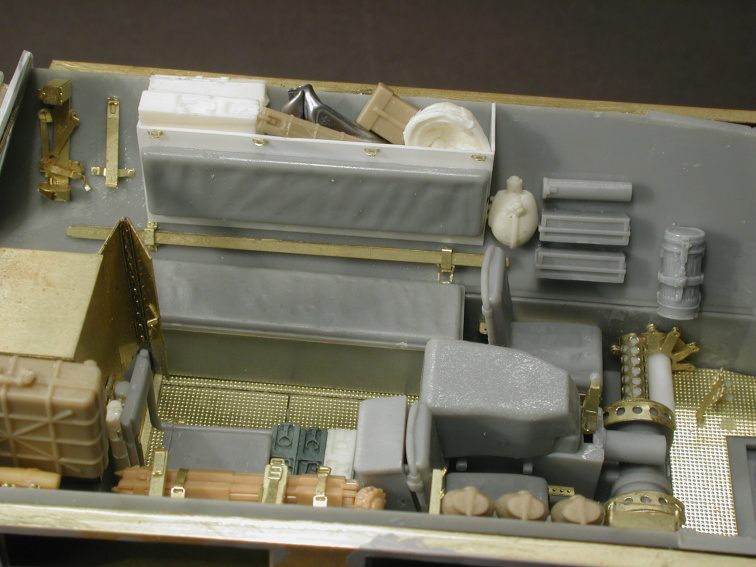
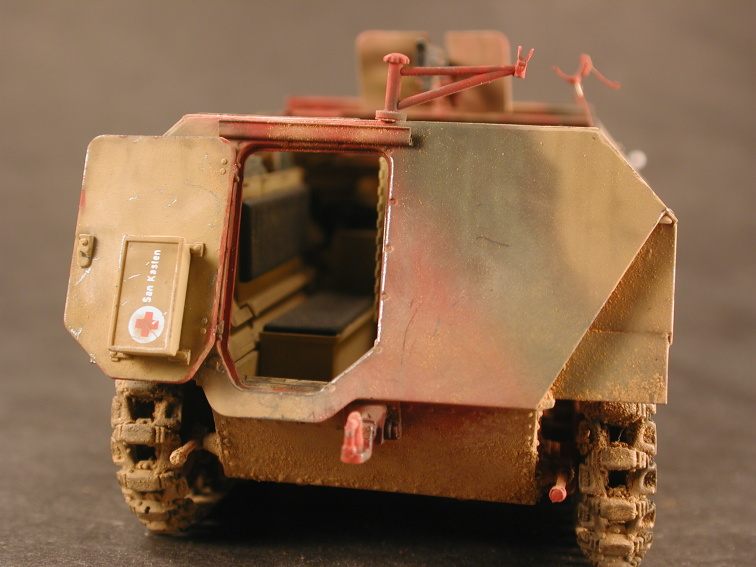
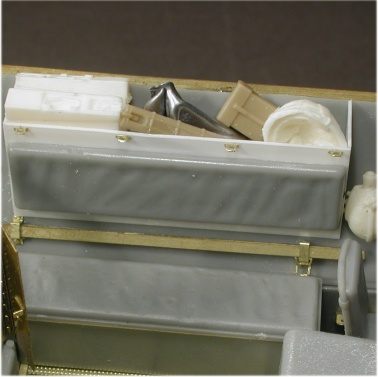
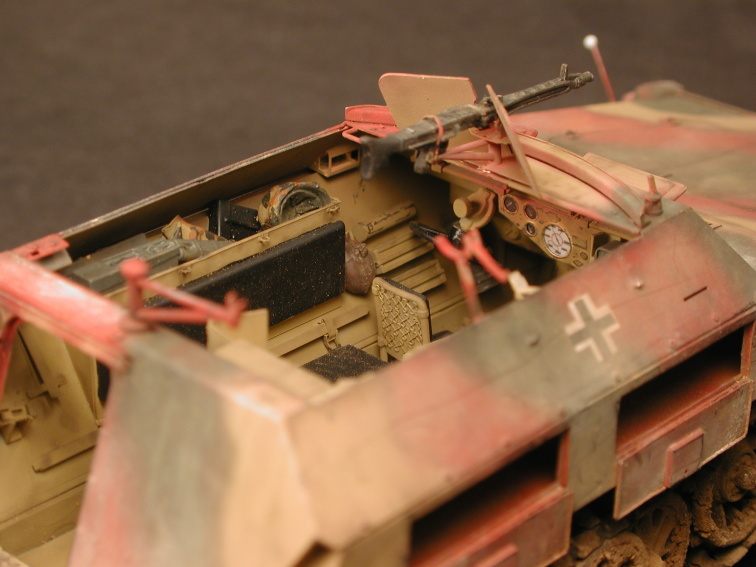
Once again, most of the crew compartment can be replaced with etched
parts, the most significant part being the large stowage box mounted
toward the rear of the vehicle. I'm not entirely sure what was meant
to go into this container, at one point Cran Smith suggested it was
a mini bar! If built carefully, the door to this bin remains workable;
I filled the bin with 7.92mm ammo liners and a Jerry can. The lower
hull sides, parts E1&2 have some hefty ejector pin marks that
need filling before the huge amount of detail in the DML kit and the
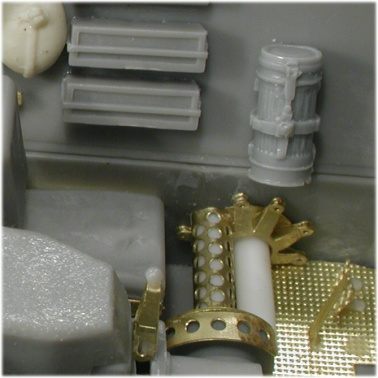
various Aber sets can be added. I replaced kit part C10 with spare
Tamiya and DML barrel containers, detailed with parts from Aber.
I replaced the kit part E34, which is the stowage bin/backrest, with
a scratchbuilt bin, cannibalising the padded part. I filled it with
ammo liners and bits and pieces from the spares box. In fact, I could
go on and on detailing all the parts that were replaced, but its
probably easier just to check out the construction pictures.
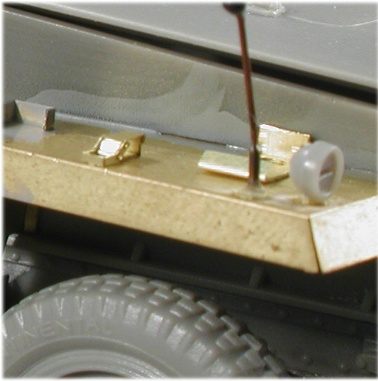
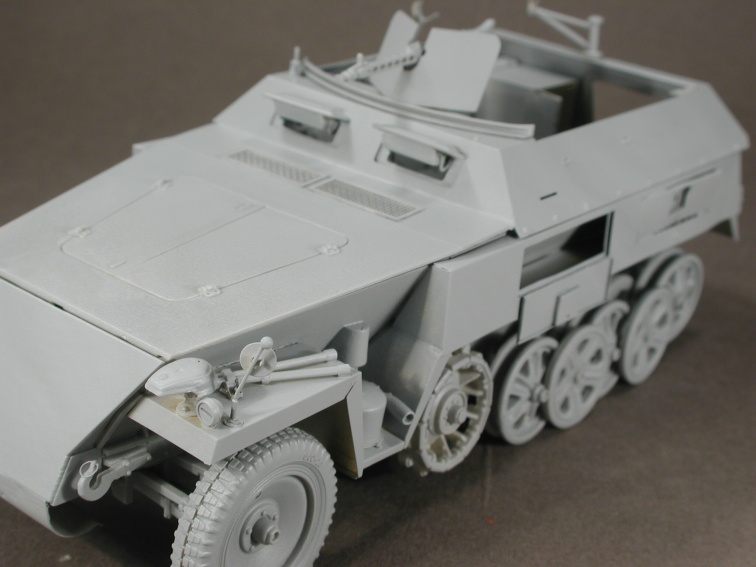
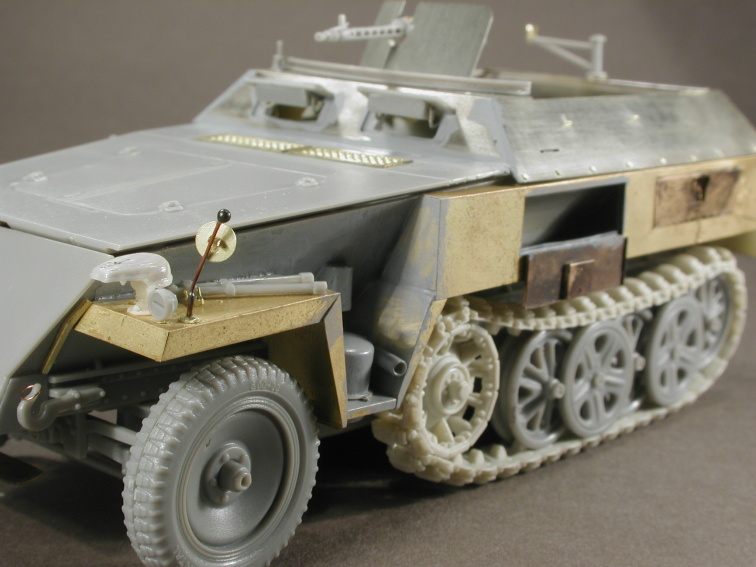
Moving to the outside of the 250, I made a start on the front fenders.
Aber set 35A73 replaced the kit parts. These replacement parts fit
perfectly, and were detailed by parts included in the basic 250
detail set. I replaced the kit Notek Light with one from Anvil Miniatures,
as this is a far better representation on this distinctive light,
right down to the Notek badge on top! Width indicator poles were
made from wire with a .22cal. shotgun shell shot glued on top.
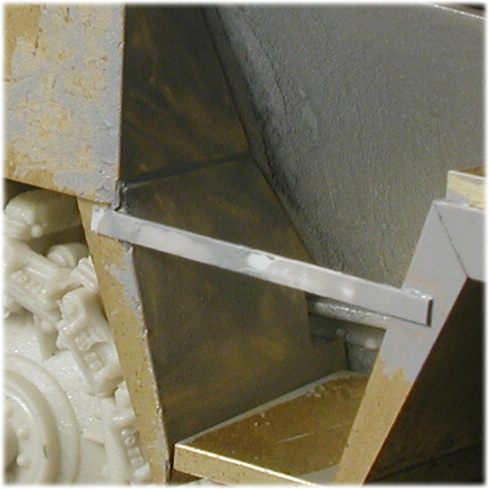
In the process of building this kit (construction started over 2
years ago) I seemed to have misplaced kit part E14, the front fender
stowage bin. DAMMIT! So I simply welded a plastic brace across the
gap, and filled it with a jerry can hello field expediency stowage
bin! I know that this may not be right, but hey, sue me!
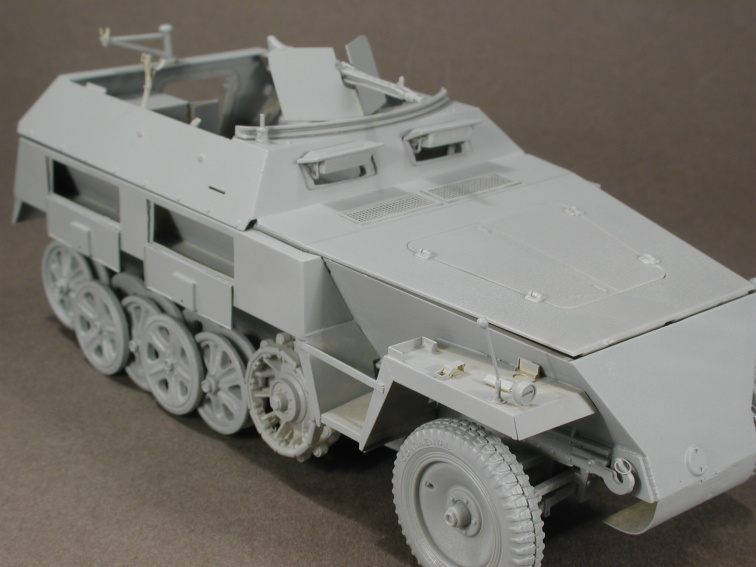
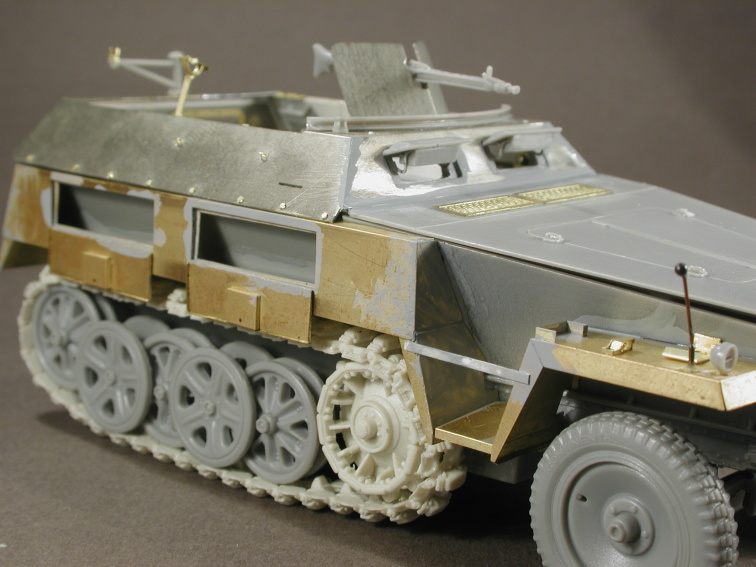
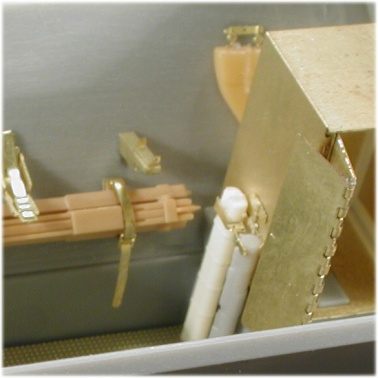
I also replaced the large side stowage bins with Aber set 35A74.
This set allows for these bins to be modelled open, and allows the
modeller to depict them dinged, or with battle damage. These parts
on the real vehicle were only sheet metal, and suffered accordingly.
(See pp9-10 in Concords' 'German Armoured Units at Arnhem' for proof
of this!) So I carefully build these parts up, then bashed them
with a bastard file, just for that 'lived in' look!
Pretty much the entire upper hull, save for the bonnet, can be replaced
with Aber set 35A75. This set is made of slightly thicker etched
metal, not brass this time, perhaps nickel. Either way, the upper
armour folds up out of one piece, and drops straight onto the lower
hull. Using parts from the basic detail set as a guide, I cut open
the front visors and positioned them open, as most wartime pics
show them.
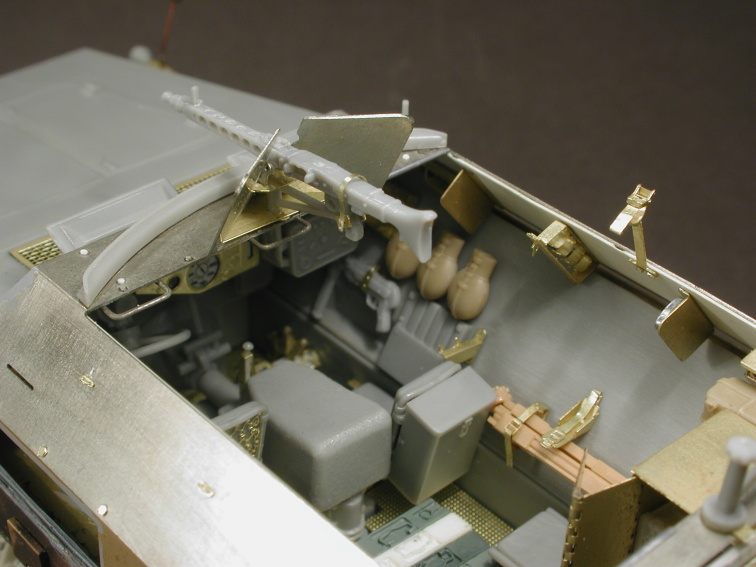
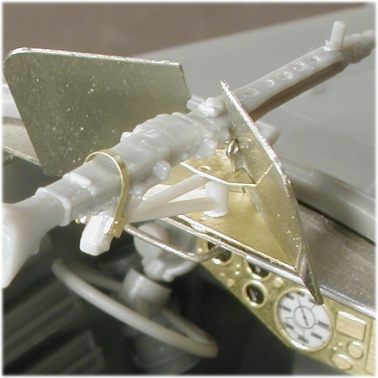
The interior walls of this upper armour can be detailed with parts
from the basic detail set. The entire front MG42 mount and shield
can be replaced as well. I used the kit MG42 here, carefully drilling
cooling slots into the top of the barrel jacket.
Thats as much as im going to prattle on with about construction,
as I could go on for days! Needless to say, I used stacks of Grandt
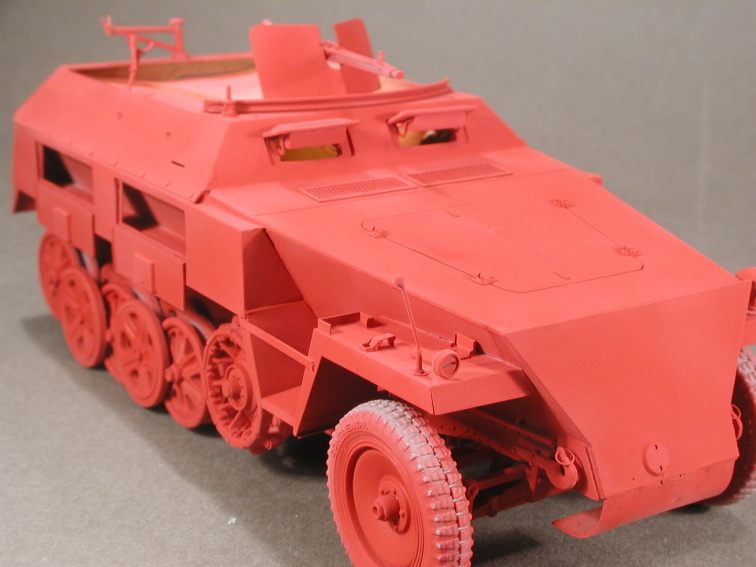
Line rivets and bolts throughout construction. Once final construction
was finished, I gave the kit a good coat of Self Etching Automotive
Primer. This primer coat forms a really strong coating over all
the dissimilar materials used throughout construction (resin, plastic,
photo etched metal), and also provides a uniform colour to lay down
the camouflage colours over.
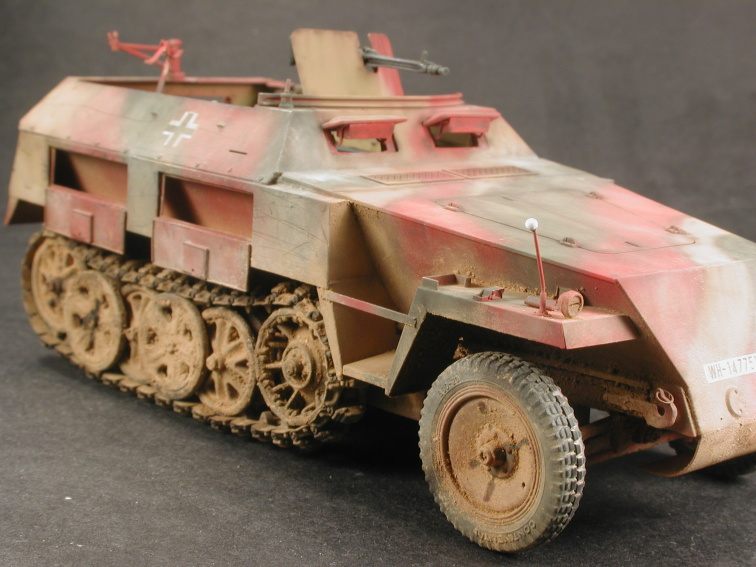
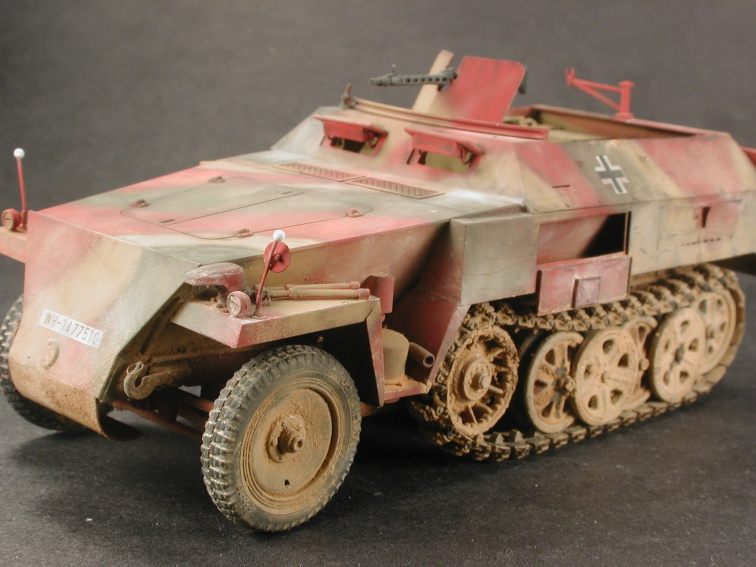
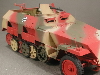
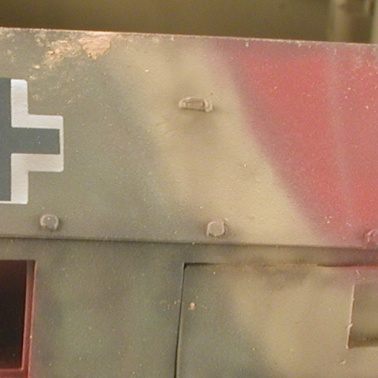
Now, what camouflage pattern to use of this vehicle? Man, that
could be an article unto itself. I wanted to depict a very late
war vehicle, where primer was used as a camouflage colour. So, I
mixed a few drops of Tamiya XF64Red Brown into Tamiya XF7 Flat Red,
loaded it into the Iwata Custom Micron, and let rip.
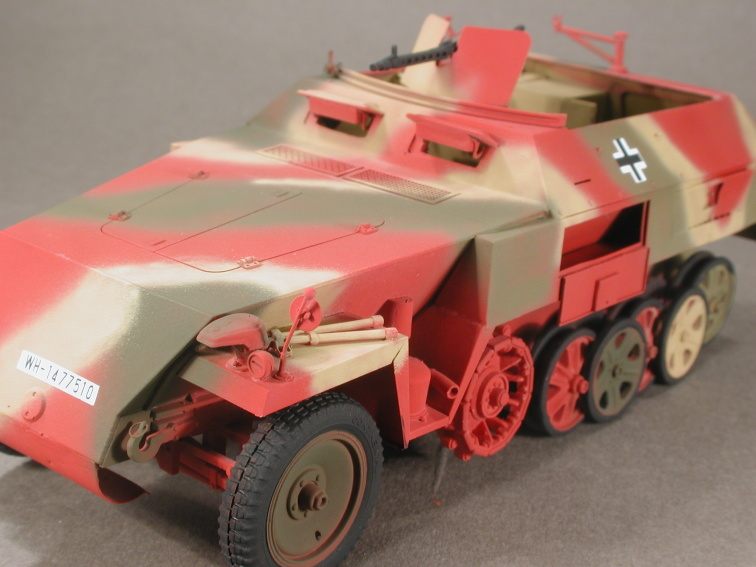
At this point, I was ready to take up collecting Pokemon: what
had I done? The 250 looked like a Fire Engine! Figuring it couldnt
get any worse; I loaded up some Tamiya XF62 Olive Drab, mixed with
a drop or two of Tamiya XF59 Desert Yellow and proceeded to lay
down the green part of the camouflage pattern. Then I sprayed straight
XF59 to form the dark yellow part of the camo. Now I was starting
to scour ebay for Pokemon goodies, the kit looked horrible! Its
about at this stage, every time I paint a kit, where Im ready to
give it all up and take up some other hobby. The paint job invariably
doesnt match the one in my minds eye.
|
|
 |
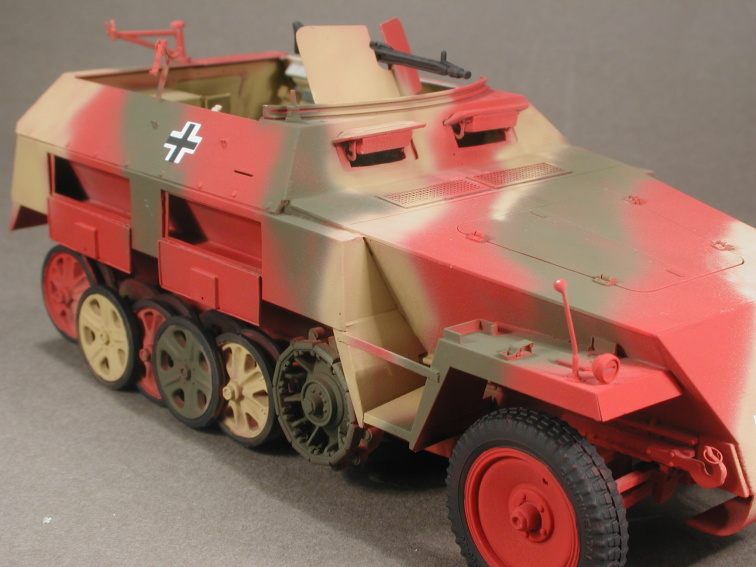
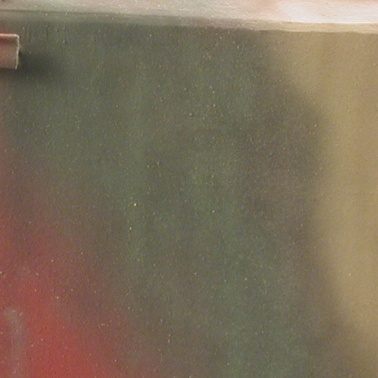
Its not all bad, the next step was to start the weathering process
by applying a post shade. For this I used my Iwata Custom Micron Airbrush,
loaded up with a paint mix of 90% Tamiya thinners, and a 10% mix of
Tamiya XF1 Matt Black and XF64 Red Brown. This mix was laid down into
all nooks and crannies, and around all detail. This mix was also used
add rain and dirt streaks. This post shading process has the added
advantage of adding visual interest to an otherwise flat block of
colour. It basically tricks our eye into thinking that there is more
detail present than there actually is. I also mixed up shades of the
basic camouflage colours, but a few shades lighter. This was airbrushed
very randomly, and also in a streaking motion.
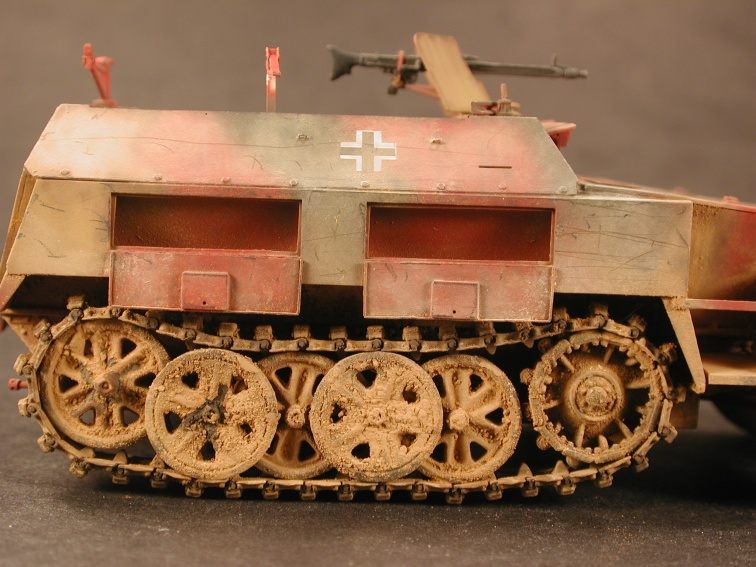
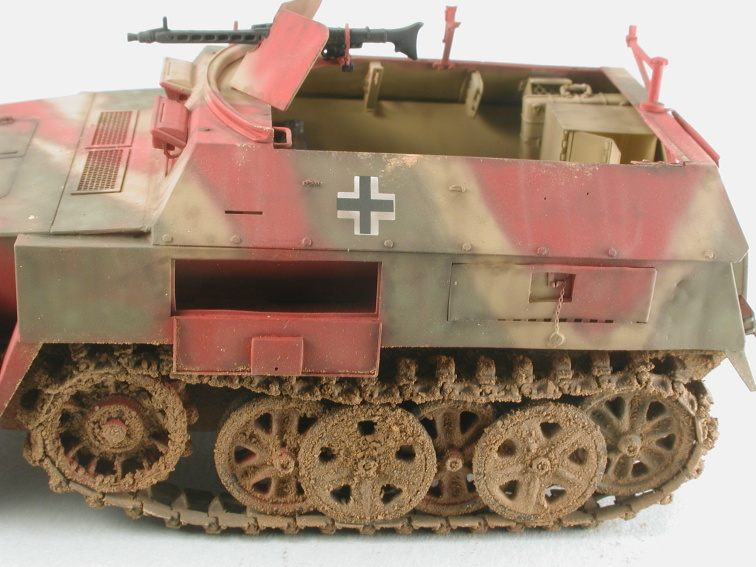
I decided to try a different method of applying mud and grime to
the running rear of this kit. A friend and fellow modeller, Andrew
Vai, pointed out this method to me. Its dead simple. It comprises
3 steps. First, take a brown coloured pastel chalk; which ever brown
is up to you. Grind the chalk up on course sandpaper, so that none
of the original stick of chalk remains, its all fine powder. Second
step: brush Tamiya thinners all over the lower part of the hull and
running gear. I know what youre thinking wont the Tamiya thinners
remove paint? Well that what I thought, but if applied carefully (and
quickly!) it doesnt attack the paint. The third and final step is
to dump all the pastel powder onto this wet thinners. As the thinners
dries, the pastels are essentially glued to the hull and wheels, and
look like dried, crusty dirt.
From here on in, I weathered the kit as per normal, I applied a heavy
coat of light, dusty coloured pastels, and applied paint chips with
a 2b pencil. I tried to blend the dirty colour of the lower hull and
wheels up to the rest of the vehicle with pastel chalks as well, just
for continuity. To me, theres nothing worse than a vehicle that has
heavily mudded wheels and tracks, but the rest of the hull is showroom
pristine.
Finally, a word on the photography used in this article. All the
pictures were taken with a Nikon Coolpix 990. To light the subject,
I used cheap lights with 200w bulbs fitted, to literally flood the
subject with light and fool the camera into taking a good picture.
I taped greaseproof baking paper over the bulbs, just to slightly
diffuse the light. The camera was set to compensate for incandescent
light, and all the pictures seen here havent been doctored by Photoshop
in any way. The only modifications made to the pictures was cropping
and reduction in size.
|