
Backdating Tamiya's M48A3 to an M48A1
Mike Millette
Twenty or so years ago, as a freshman in college, I decided to build a model of my dad's tank as a gift for Christmas. Typical of a lot of young men who have served over the years, Army life didn’t always suit my dad. The one thing about the Army that he really did enjoy was anything to do with "his" tank. At various times in his career, he served as a driver, gunner and finally as tank commander in M-48 Pattons. As the vehicle commander of his last Patton, he was afforded the opportunity to name his tank which he chose to name after my mom. This of course was the vehicle that I chose to model.
At the time that I built that first Patton, I didn't know a whole lot about armor, in fact this was the first tank model I had ever built. Having built aircraft models for years though, I figured, how hard could it be? I picked up an M-48 model, got some coaching from one of the local IPMS armor guys and set to work. As I built & painted it I thought "This will be perfect, he'll love it!". Well, the time came to give it to him and I was half right, he did love it. But not because it was perfect. While praising my efforts to replicate his tank, he pointed out that he had only served on gas powered M-48A1's not the diesel powered M-48A3 of my kit. Other details were also off, but that didn't stop him from proudly displaying above his desk at work for many years.
When he died a few years ago my mom offered to return the kit to me. With the benefit of many more years of model building experience, I looked at this old project that my father had displayed with such pride. Embarrassed at my previous effort I decided that it would make a fitting memorial to try again and "do it right" this time.
Having made that decision, of course, it was quite another thing to actually do the conversion. Converting an A3 into an A1 is no trivial task and I wasn't quite sure how to proceed. Enter Andrew Crutchley's Fine Scale Modeler article on backdating Tamiyas A3 to an A1 and I was half way there. I waited a little while longer and Mr. Crutchley's work was turned into a fine master for Chesapeake Model Designs (CMD) excellent conversion kit. Score!
At this stage I dug out my dad's old Army year book. In 1958, the 4th Armored division produced a year book that covered their activities in Texas and West Germany. Laid out like a typical college or high school year book, it featured group photos of each company in the 4th Armored at that time. It also featured candid photos of various vehicles and people of the 4th during "Operation Gyroscope" the deployment to Germany. This proved invaluable. Lastly, just before I started this project, MMiR released issue # 20 featuring Bill Steinman's "Elvis Tank". Now all I had to do was build the kit!

General construction
Not wanting to even attempt to repeat Mr. Steinman's entertaining and informative article, let me just say that I followed his sequence rather than that proposed in the CMD instructions with a few exceptions.
As is necessary for any version of the Patton built with this kit, the first thing that needs to be done is to fill the holes in the bottom, above the idler and around the sprockets. For the large holes in the bottom I glued slabs of 40 thou plastic sheet into the bottom of the hull and filled the gaps with Milliput. The other gaps were filled with Miliput without any backing. The Miliput was then sanded to match the surrounding contour. I also modified the drivers location to take the wider drivers hatch from the Tamiya kit and installed the fixed periscopes in their little depressions.
I also pondered what to do about the Tamiya kits legendary extra height. I dry fit the kits components and examined it compared to some of the photos in my dad's yearbook. I then modified the suspension arms at each of the four corners to drop the hull the recommended height and again compared them to the pics in my dad's yearbook. Call me blind, call it the difference between a tank rated at 50 tons (A1) vs 54 tons (A3) but the suspension out of the box looks just fine compared tom my primary reference source so I stuck with the kit as is. When it came time to fit the track idler tension arm and its wheel I followed Bills recommendation and left the idler arm loose. This proved the ideal solution as once the tracks were assembled, the tensioning wheel could be positioned in exactly the right spot. I then moved on to the back of the hull where I added the tail lights lifting rings and other details from the Tamiya and CMD kits. I also made the first of several errors that would come back to haunt me later. Following both the Fine Scale Article and the MMiR article, I added the clips to hold the tow cable in place. This may have been used on some early M48A1's but the majority I suspect, at least all the ones in my dad's year book, do not use this method to secure the tow cables. Having added them at this stage, it wasn't until the kit was finished and painted that I discovered my error. Fortunately a little CA debonder was all it took to get them free, but I still ended up have to do some very careful sanding and repainting.
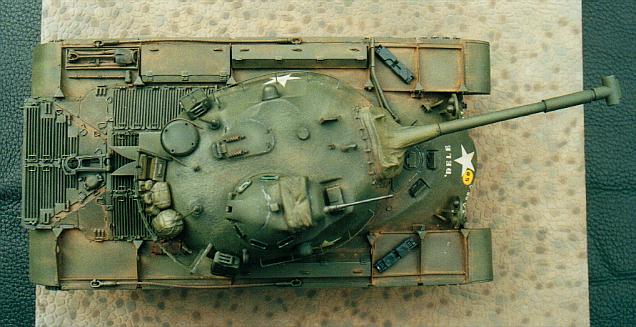
I then turned to the upper hull and fenders where I made the second and more costly error. More recent issues of the CMD kit comes with a very nice fret of PE parts including the fender supports. The fenders are cast with little horizontal vertical grooves that make locating the stiffeners a snap. Being thin brass, they also have a much more scale thickness than the earlier resin components. As is appropriate for the M48 they taper gently out to the outer edge of the fender and end in a short vertical drop. Cast into the outer edge of the fender is another longitudinal stiffener which runs the length of each fender. These are correct for the M48 and early M48A1s from what Bill indicates in his article. They were not correct for A1's used by the 4th Armored division in 1958.
I missed this and didn't discover it until, like the tow cable hooks, the kit was finished and painted. This was a much bigger problem that the tow hooks. I ended up having to debond the tool boxes, damaging part of the fender in the process, the pioneer tools and the stiffeners. In retrospect, I probably could have made the changes to the stiffeners without having to pull them up, another lesson learned. To create an A1, I had to move the tool boxes and pioneer tools inboard from their previous location. Pulling up the larger aft LHS tool box had pulled up a chunk of fender with it. Fortunately even after I mover the toolbox inboard, the damaged area was still completely underneath the toolbox. Whew!
I then had to modify the fender supports by tapering their outer contour so that they met the edge of the fender at a point rather than at a vertical drop as with the kit parts. I then had to sand the longitudinal stiffener on the outboard edge of the fender off and replace them with new stiffeners made from .10 by .40 brass strip. These were located inboard of their previous location, at the break in the horizontal stiffeners. I was trying to accomplish all this of course while trying desperately not to mangle any more of my "completed" paint job than I had to. Keep in mind, these modifications are in no way "errors" in the basic kit. The kit is an M48 conversion, and an excellent one at that. These modifications were simply the result of me trying to do something different with it and not paying close attention to my primary source material!
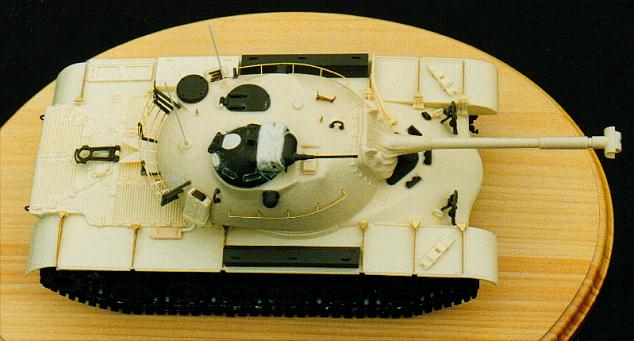
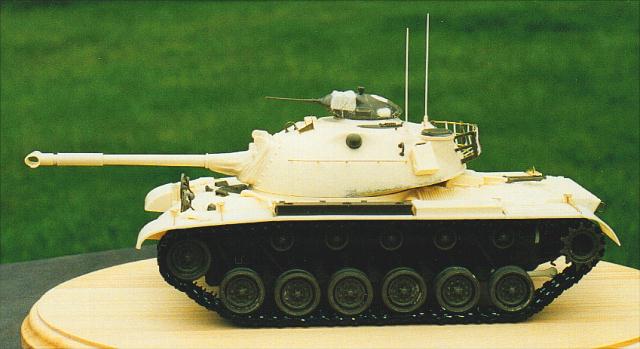
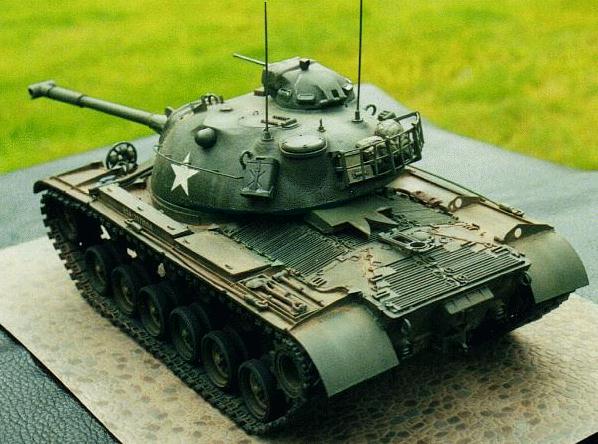
The rest of the kit proceeded quite smoothly. The turret was assembled with CA glue and then the join line was textured with Squadron putty and liquid glue to mach the cast texture of the rest of the turret. The Tamiya turret was used minus it's riser and the back of the commanders hatch was packed with Miliput and sanded to match the appropriate contour for the A1 hatch. The A3 hatch has an extra bump in it, presumably to give the commander more head room when looking through his periscopes. Again as Bill suggested, I used brass wire to replace the Tamiya stowage rack and side stowage rails. This looks a lot nicer than the over scale plastic parts. Periscopes were added to the commanders hatch (they aren't on the A3) and the Tamiya jerry cans were added to the sides of the turret. Antennas were also added along with the gun barrel, PE sight lifting hooks and other details.
I had originally not intended to replace the Tamiya rubber band tracks. I don't know why, it just wasn't part of the plan. Having put all the work into the rest of the kit however and seeing how nice the AFV Club tracks looked in the magazine articles, I decided to go for it. A quick call to R&J got the tracks in the mail and to my door two days later. What a deal. These are very nice looking tracks and assemble pretty easily. The biggest effort was filling in the sink marks on each track and then sanding them smooth. Not really difficult, just a bit time consuming. At this stage I was ready to call it done and proceeded to the paint and weathering stage
Paint & Markings
It was at this stage that things started to really get fun. Initially I expected to paint the kit in Olive Drab. Looking at my dad's yearbook however, the vehicles in the pictures looked a bit dark for straight OD. I noted that the last picture in Bill Steinmans article showed his "Elvis tank" sitting next to an OD M48A3. The A1 looked much darker than the A3. I also noted that in the same issue that someone had written to the editor indicating that his dad's Patton had been painted in a mixture of OD and black. Given that information I took my OD paint and added a few drops of black to the mix. While some of the photos in the yearbook do show some tanks with a bit of a glossy finish, these only seem to be for parades & such. Other photos taken in the field indicate a flatter finish and so this is how I decided to finish my kit.
Turning once again to my dad's year book I discovered that markings varied widely throughout the 4th Armored Division. Marking locations, stencil styles "naming" conventions and other unit markings varied significantly between different Regiments and sometimes even different Companies. Since I did not have a photo of my dad's tank, only a verbal description, I had to sort through dozens of photos showing various bits and angles. Sometimes I would find just the corner of a fender poking out from behind a group photo that held the key to a complete picture of what my dad's tank looked like.

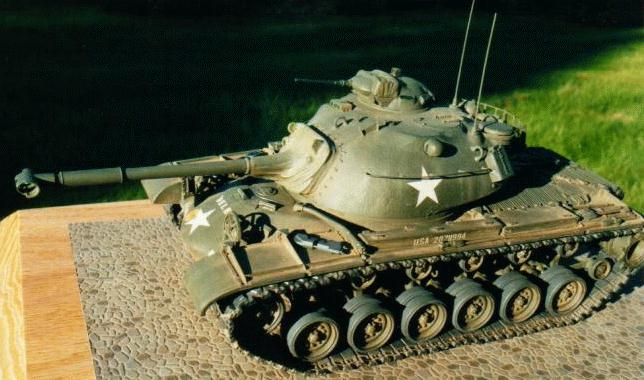
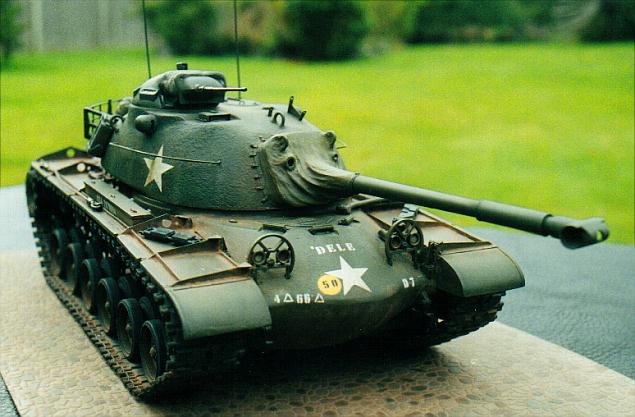
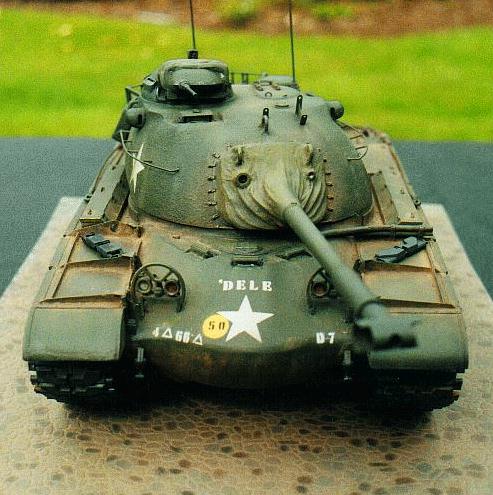
What I was able to determine was, that for M48's in the 66th Armored Regiment of the 2nd Armored Battalion the 4th Armored Division, Divisional and Regimental markings were located on the right side of the nose of the hull in a "standard" stenciled lettering style. The in-Company number was located on the left hand nose of the hull with a the large white star in the middle and somewhat higher up on the hull. Slightly to the right of the star is where the yellow bridge rating "50" is located. In an effort to promote esprit-de-corp, the Divisional staff allowed each of the vehicles to carry a name. Each Regiment seems to have established a different naming convention with regard to types of names, location and even font style. The 66th Regiment established a naming convention based on Company letter. For instance Company A would have vehicles named "Adze", Axe" and so forth, Company B vehicles carried names like "Bambi". My dad was in Company D but wanted to name his tank after my mom whose name, inconveniently, started with an "A". His compromise was to replace the first letter of her name with an apostrophe followed by the rest of her name, hence the name "'DELE". The markings were created using a combination of kit and spares box decals, rub on markings and photo etched stencils. The tracks were painted Aeromasters "Tire Black" and highlighted with Metalizer "Burnt Metal". To simulate the glass of the periscopes I first used a silver pencil to fill in where the glass would be and then cover that with Tamiya's "Clear Green". Weathering was accomplished using lightened shades of the base coat and pastels were then used to complete the weathering process.
As I stated above I had gotten all the way through to this stage when I figured out there was no way for me to attach the tow cables. Digging through the yearbook as well as my newly acquired "M48 in Action" I discovered my errors. I had considered, just for a moment, leaving the kit the way it was but decided the whole point was to "do it right". I pulled the incorrectly located parts off, fixed everything as stated above all without damaging the markings on the nose and tail of the hull. I lucked out in that I had mixed a fair quantity of my base color in a spare paint jar. As it ended up I had just enough left over to repaint the repaired areas.
And that's about it. How does it compare to my original? Well, it's at least the right version of the M481 With the arrogance of youth behind me (u-huh!) I guess I'd have to admit that it's still not "perfect". But I sure bet he'd love it anyway.
| Main | What's New | Articles | Reviews | Gallery | Think Tank | Contests |