Upgrading an Italeri Leopard 2 to a Leopard 2A4 (8. Baulos)
IntroductionThe Leopard 2 MBT was the replacement for the Leopard 1 MBT, which was first produced in 1963. After the abortive German-US Kampfpanzer 70/MBT-70 project, which ran from 1963 to 1969, the German Kampfpanzer 70 was used as a starting point for further development of what was to become the Leopard 2, first produced in 1979. The Leopard 2 underwent a series of upgrades, resulting in various versions, the Leopard 2A1 through Leopard 2A6 EX. The model in this article is a "Leopard 2A4 (8. Baulos, or 8th Batch)". This was the last version of the Leopard 2A4 before switching to the Leopard 2A5. For more detailed development information you can read: "The Leopard series of Main Battle Tanks", and check the references at the end of the current article. Having served on a Leopard 2A4 in the Dutch Army, I want to build my own tank, and wanted to have some idea as to how the kit would go together before going to town on that one. After picking up the new Concord book on the Leopard 2, I decided that I was going to build my "out-of-the-box" Leopard 2 as one of the German vehicles on winter exercise depicted in that book. Out-of-the-box. Right. Not. The more information I dug up, the more I had to add, change, or remove. As the basic instructions in the Italeri kit are good, I will focus on the changes needed to turn the kit into a decent representation of a Leopard 2A4 (8. Baulos), explaining why I changed what I changed as I go along. Changes made Turret
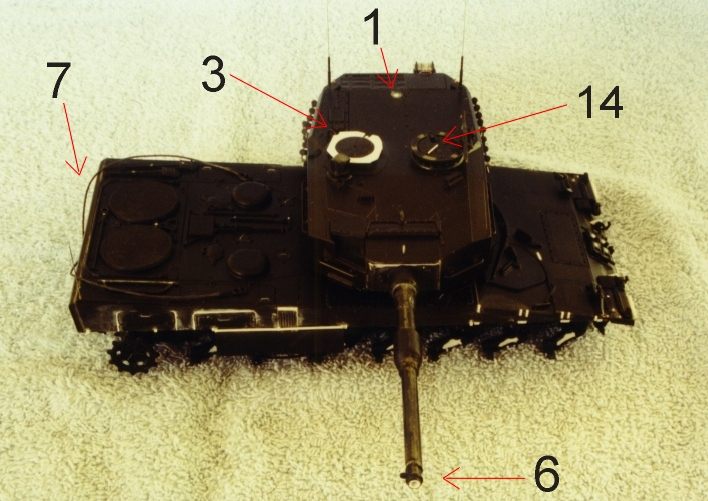
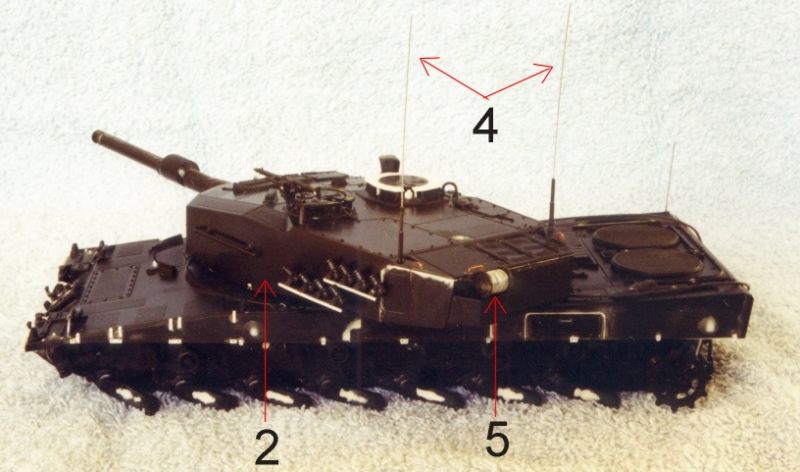
There is a round cover plate on the rear turret roof (1), which was for the wind sensor on the early vehicles. This needs to be removed and sanded. On the late Leopard 2A4 turrets the ammunition-reloading hatch was completely left out, rather than welded shut, so the weld seams on the left side of the turret need to be sanded off (2). The ring for the commander�s hatch is only correct for very early vehicles, and has to be replaced with a scratch-built one, as shown in the pictures (3). I pressed a piece of note card onto the commander�s episcopes, as the new "ring" basically follows the outline of those, and then cut it out, about a millimeter outside of the lines of those episcopes. After transferring the shape I got onto 0.020" styrene, I added the cutouts for the lifting eye and the commander�s periscope, as well as for the hatch and its lifting cylinder. The "ring" was then mounted on short sections of 0.010" x 0.020" styrene strip, cut to size and placed in the locations indicated by the round pins on the old ring. The loader�s hatch had a locking handle added (14). The 8. Baulos vehicles had SEM 80/90 radios, and the shorter antennas that went with those radios (the antennas are made of guitar string (4)). The phone cable reel had wire added to it (5), to cover the rough interpretation thereof on the kit part. The last thing to do to the turret was to replace the muzzle of the main gun barrel with the one from the Italeri Leopard 2A5 kit, #365, and scratchbuild a replacement muzzle reference system, or MRS (6). The last batches of the Leopard 2A4 used the same MRS as the Leopard 2A5, rather than the early version depicted in the kit. We never mounted those old ones, by the way, as they�d only vibrate off.
Hull
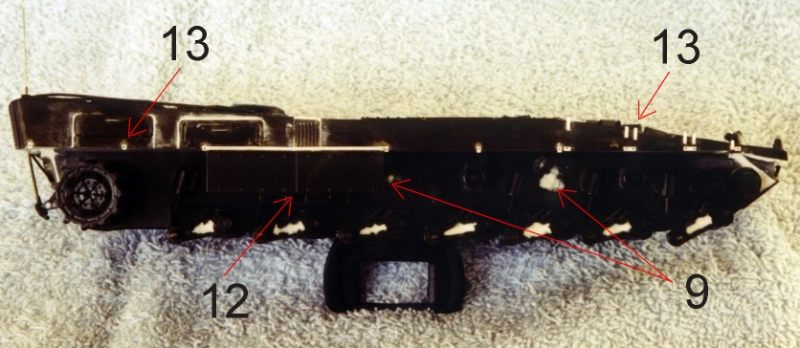
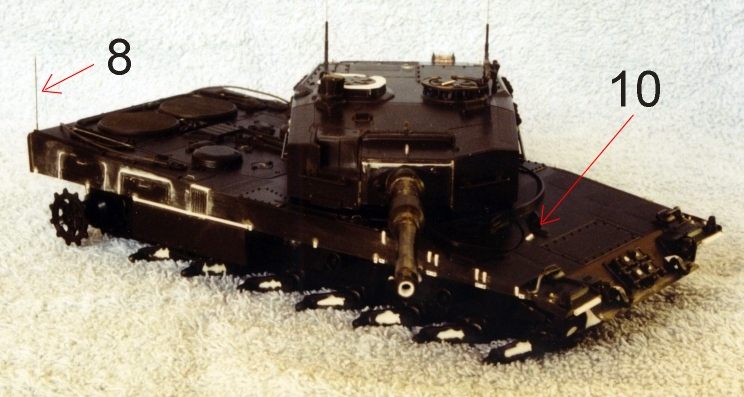
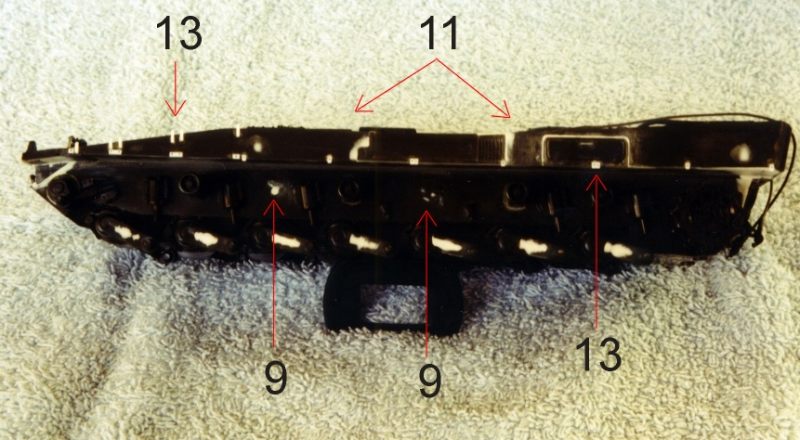
I replaced the kit tow cables with Tru Twist cables (7), using the kit cable ends. I�ve only recently gotten a set of Tru Twist cables from the guy who makes them; they�re beautiful, and really flexible. Later Leopard 2 MBTs have an orientation marker on the rear hull (8), so that the commander can orient himself with respect to the hull. I added the orientation marker on the right rear of the hull (this was made of guitar string as well). The 2nd and 3rd return roller were moved back one station, this was a change made to the suspension after the 5th batch vehicles, in order to better maintain the structural integrity of the return roller mounts (9).
To the left front of the driver�s hatch is a trapezoidal shape, this is the housing for two exterior warning lights, when driving with the hatch open; a piece of styrene was carved and sanded into the correct shape, and added in this location (10).
The NBC door on the left hull side is missing some of its seams; these were scribed on (11). The 8. Baulos vehicles had a newer type of light armored skirt, of the same style as the ones in the Italeri Leopard 2 KWS kit (#260). These differ somewhat in the shape of the steps of the ones in the Leopard 2A5 kit, #365, or the Tamiya Leopard 2A5, for that matter. I only used one section, as the rest were removed on winter exercises (12). I added the hinge for this section, and mounting points for the removed skirts (13). The mud flaps and rear light units were also removed on winter exercises, in order to prevent damage. As the grousers were mounted on the tracks, the grouser mounts on the glacis were empty, and the racks had to be added from styrene. This feature was added after I had taken the pictures of the unpainted model. Hong Kong Creations Workshop Leopard 2 tracks with grousers were used. These are a pain to put together, as you have to remove every piece beforehand (track link, center connector, and two end connectors, with 84 links per side needed according to the instructions), but look great once put together. I think I spent about ten hours on mine, while watching TV (a necessary distraction�). Lastly, I used MV Lenses for the headlights.
General:
In addition to the specific changes mentioned above, I replaced all small grab handles, lifting eyes, and mirror mounts with metal wire. The kit�s decals were added using Micro Sol and Micro Set, after which the vehicle was painted and weathered as follows.
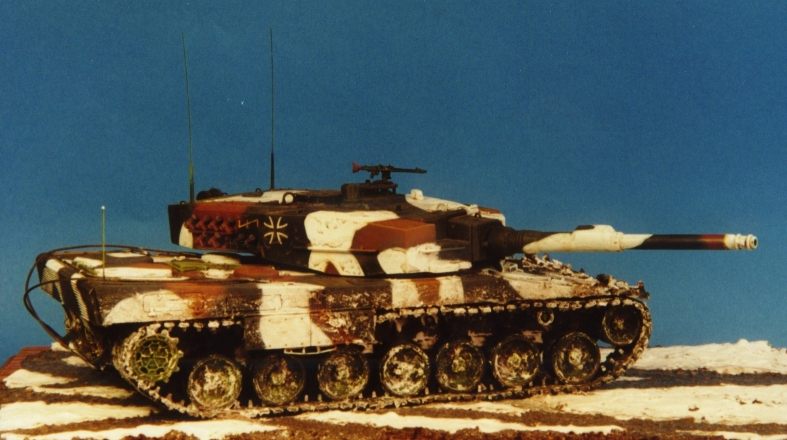
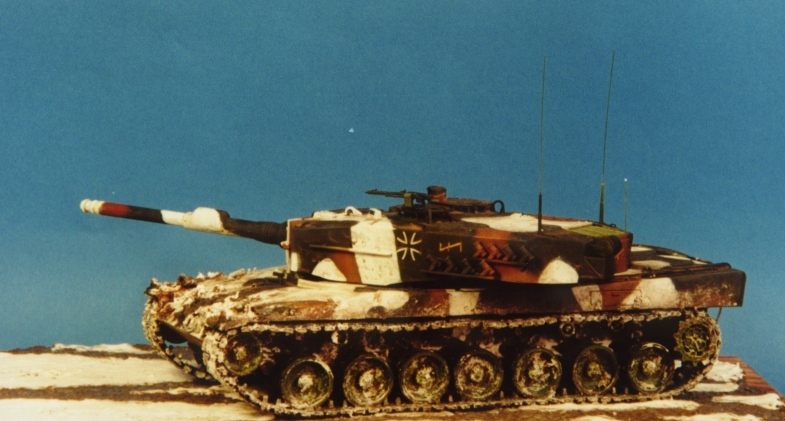
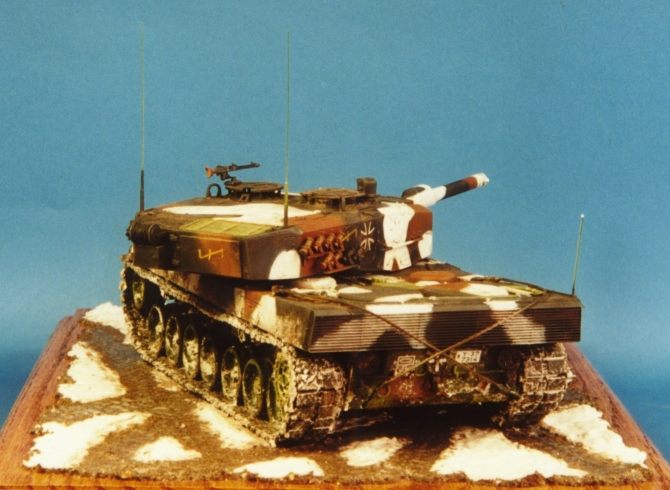
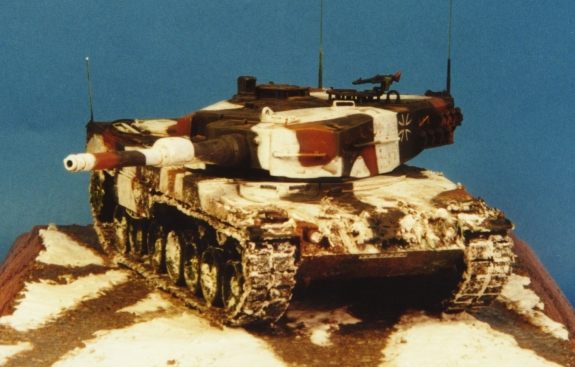
First, the tank was airbrushed in NATO three-tone with Tamiya paints (XF-1 flat black, XF-64 red brown, and XF-58 olive green), and then a white wash added over the green camouflage color with Vallejo white. Based on the Concord book (see references), there are at least three other options for doing this: paint over the brown, the green and brown, or paint in a completely random pattern.
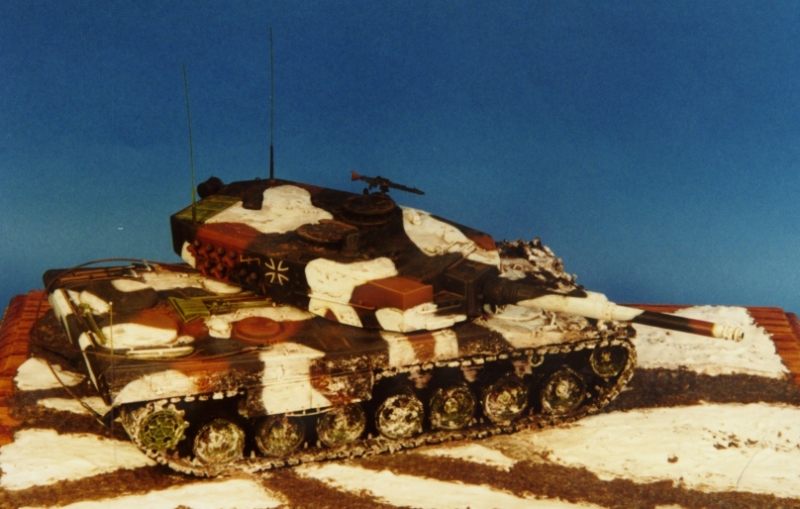
Subsequently, the tank received washes and dry brushing using oils, based on Chris Mrosko�s �Panzer�s Tactics� (see references). The loader�s MG-3 was painted flat black with graphite rubbed on afterwards. I added �Wolf�s angel� exercise markings from Scotch tape, painted yellow (Concord book, see references).
The base was made by Hammersmith Hobbies. The groundwork and mud consists of Hudson & Allen Groundwork with Hudson & Allen Slush and static grass mixed in, the snow is made from Alumilite Microballoons mixed with Liquitex Matte Medium, and the wet mud is a coat of Liquitex Gloss Medium.
Conclusion
As you can see, not much left of the out-of-the-box idea, but it was a lot of fun to build this Leopard 2A4 (8. Baulos). Now that this one�s finished, I�m ready to tackle my Leopard 2A4(NL), "Blake". References
1) Christopher F. Foss, Ed., �Jane�s Armour and Artillery 1996-97�, Jane�s Information Group Limited, 1996. 2) Walter J. Spielberger, �Waffensysteme Leopard 1 und Leopard 2�, Motorbuch Verlag Stuttgart, 1995. 3) Michael Scheibert, �Leopard 2 A5 Euro-Leopard 2�, Waffen Arsenal Special Band 17, Podzun-Pallas-Verlag, 1996. 4) Walter B�hm, �Leopard 2/2A5�, Concord 7501, 1998. 5) Thomas Laber, �Leopard 1 and 2 The spearheads of the West German armored forces�, Concord 1007, 1990. 6) Michael Jerchel and Peter Sarson, �Leopard 1 Main Battle Tank 1965-1995�, New Vanguard 16, Osprey Military, 1995. 7) Uwe Schnellbacher, Michael Jerchel, and Michael Badrocke, �Leopard 2 Main Battle Tank 1979-1998� New Vanguard 24, Osprey Military, 1998. 8) Peter Gudgin, �German Tanks 1945 to the present�, Tanks Illustrated No. 7, Arms and Armour Press, 1984. 9) Chris Mrosko, �Panzer�s Tactics � Painting and weathering military vehicles�, Volume one � World War Two, Letterman Publications, LP 002, 2000.
|
|
|