|
|
| Home > Articles > Other > Let it snow! |
|
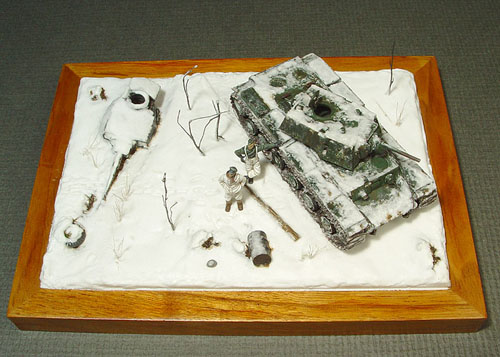 |
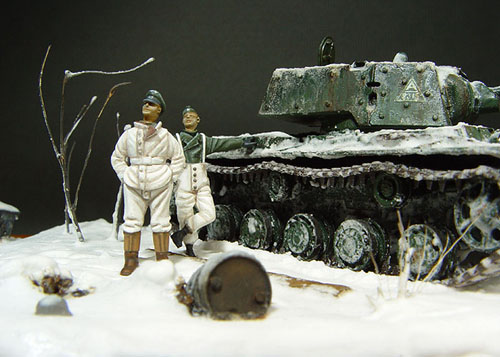
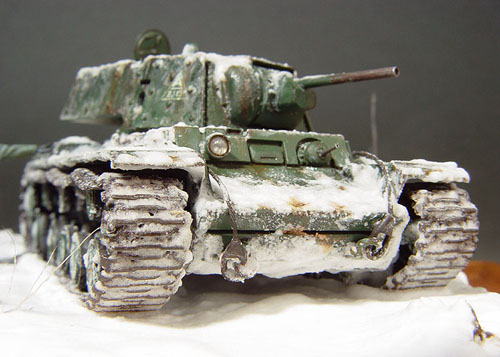
Image 1:Here's where we are heading! This vignette features PST's 1/72-scale KV-1E and Mig Production's 'German Tankers at rest'. There are 3 figures in the kit but I used only 2 . The KV-1E is an early type of KV tank with additional armour and distinctively large bolt heads. The abandoned turret is a 1/72 Pz.IV F2 from Hasegawa's Flakpanzer IV Ostwind kit. |
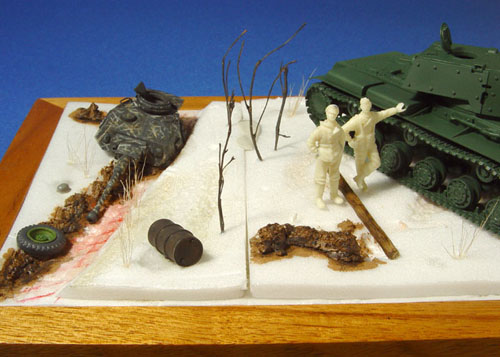 |
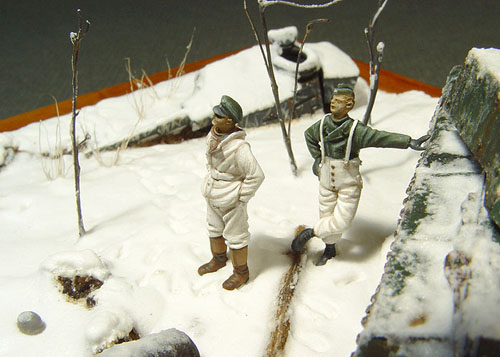
Image 2: Before applyiing the snow effect, I painted and weathered the ground, trees and kit parts. Note that to show the underlying 'wetness' of the main tank in snowy conditions, I painted the KV tank a little bit darker beforehand. |
 |
|
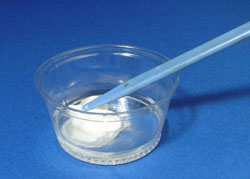
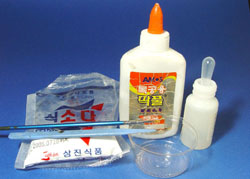
Image 3: Here's how to make the snow mixture. You'll need soda, white glue, water, an old brush, a spatula, and a bowl. You can buy the soda in any grocery store or pharmacy. These are Korean products, but each country will have their own brands. |
Image 4: Dilute the white glue with water and mix it to a yoghurt-like consistency, roughly one part white glue to one part water by volume is recommended. The mixing ratio determines the final form and texture of snow so you need to find your own way on this. I add more white glue to get a more 'transparent' snow effect – suitable for older or melting snow. |
|
|
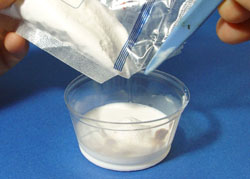
Image 5: Add the soda powder to the diluted white glue and mix it slowly. |
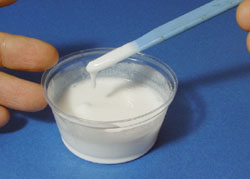
Image 6: The mix is now ready. I call it "soda-shake" because it looks like a "milk shake". A little vibration when mixing is recommended to get rid of any air bubbles. |
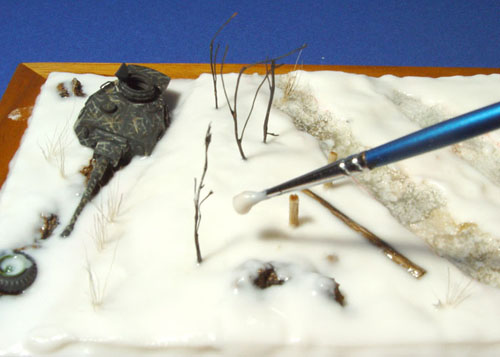 |
Image 7: Pour the soda
mix on to the base and spread it around with the brush and spatula.
|
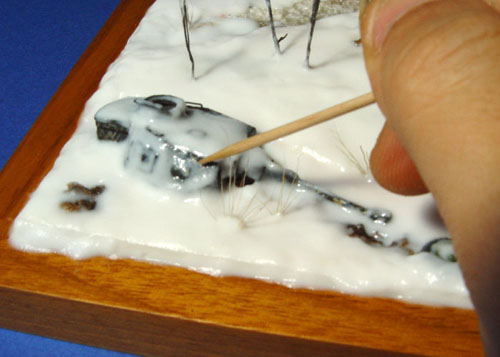 |
Image 8: Although it may
look |
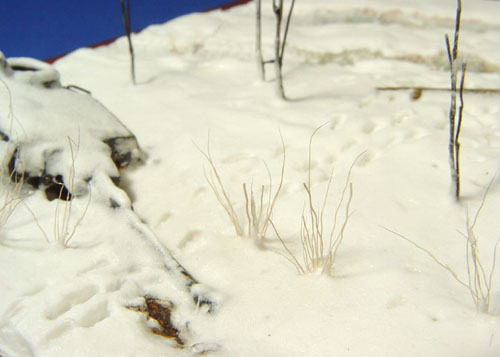 |
Image 9: One of the best aspects of this soda-mix is that you can easily create marks in the snow like footprints and track marks. For the footprints, just place the foot of one of the figures on the terrain, right at the point when the gloss on the surface of the mix is beginning to disappear. Sometimes I use a hair-dryer to shorten the setting time of the mix. |
 |
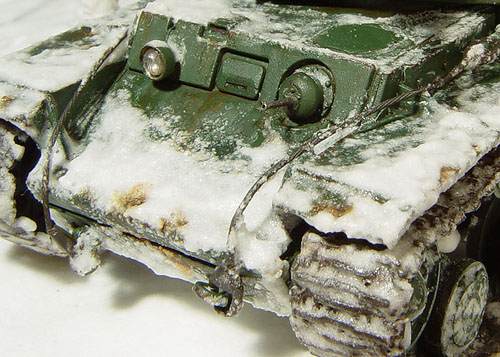
Image 10: When adding the mix to the vehicle, consider the direction of wind and don't cover all of the surface. You can add muddy footprints to the vehicle using oil paints. |
 |
|
 |
|
 |
|
 |
|
Cheehong Ahn, 2004
| |
|
Home |