
Painting Models - Evolution or Revolution?
Jari Lievonen
Two years ago I noticed that the Achilles heel of my
models was their painting. A proof of this was that time and time again I had received
grades between 6 and 8 out of 10 for painting in competitions in Finland. Something had to
be done. The answer was waiting behind the corner even if I did not know it then.
In the autumn of 1998 I was elected chairman of IPMS Finland for the year 1999. Together
with the other board members we decided to put together a special issue of our club
magazine IPMS Mallari about painting models. Originally the editor of Mallari was expected
to take care of producing the special issue but he had to drop it because of demands set
upon him by his employer. As other board members were tied up in other projects the task
fell on me. Now I had the perfect excuse to start learning how to paint models.
DETAILING
Before going into the subject I would like to emphasize the importance of good detailing
of ones models. Good painting will often disguise poor or lacking detail but if the
details are there painting actually becomes much easier. Painting stains of rust in the
middle of Panthers glassics plate may look sexy but where did the rust come from? If you
have examined the photos and added those extra bolt heads you can draw the stains down
from them and gain some realism. You can also add some life to the surface by making
texture to the plastic with a Dremell -tool or sanding paper.
In detailing models I always try to be as accurate as possible i.e. make parts look as
real as possible, make sure they are in scale etc. However, one has to keep in mind that
many parts in the finished product may be very small -so much so that they
"vanish" after the model is painted. At times one is forced to exaggerate in
order to reach the desired effect. A good rule of thumb is "what looks right is
right".
In order to give an example of the importance of detailing the attached pictures show two
basically similar SIG 33 guns. The first on top shows the cannon of my Grille K. The model
is largely scratch built but the gun stems from the Kirin kit. As the gun was very
undetailed I added all the detail I could find from my, at the time, voefully inadecuate
reference photos. The picture below shows the same gun from the New Connection SIG 33
Hetzer kit with excellent and very accuarate detailing.
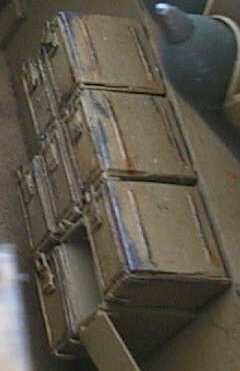
As can be seen the difference in detailing makes a world of difference in painting. In the
Grille gun there is a relatively large even surface without any detail within the gun
cradle. The surface looks dull compared to the Hetzer with it's rivet heads. The same
applies to the self-etched cartridge boxes that were improved before I built the Hetzer.
The grooves on top make it much easier to weather the boxes and even rust looks more
natural in them.

CASE 1: PORSCHE TIGER (P)
One of the first articles received for the Mallari Special was James Blackwell's article
on post shading applied to armour modelling. I had read the article before from the net
but now I had to translate it into Finnish. While I was translating I started to wonder if
I could apply the technique as well. Previously I had thought it exceeded my skills with
the airbrush. But now I was about to recommend the technique to our 600+ club members who
might be unable to use it. There was only one way to find out. I decided to apply James's
technique to my next model -the VK 4501 Porsche Tiger (P). I had decided to build the tank
as soon as I laid my hands on Karl-Heinz Munch's book on Schwere Panzerjägerabteilung 653
and had already etched some stencils for the unit emblem and turret numbers for the model.
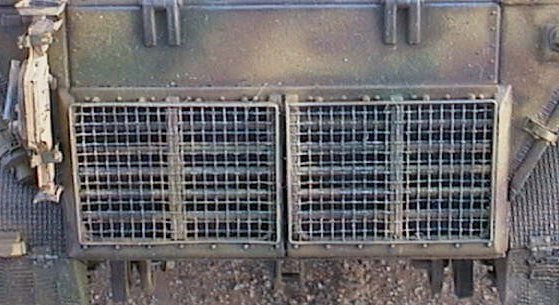
Apart of the Italeri kit I used Aber fenders, Aber Porsche Tiger (P) detailing set and
Friulmodellissimo tracks in the model. I also etched the mesh screens for the air intake
louvers at the back of the engine deck. Zimmerit was done with Zimm-It-Right.
Paint scheme used in this particular vehicle is not easy to determine even if there are
several photos available. All the pictures in the 653 book show a very dusty vehicle,
which makes it very hard to tell how the pattern really looked like. Thus I ended up
spraying irregular stripes on dunkelgelb with green and brown, which I believe is close
enough.
The unit emblem and turret numbers were painted with
stencils to the surface. As the stencils were made out of 0.1 mm copper sheet it was
possible to use them also on zimmerit surface. Any over spray or other defects in the
result were corrected with a small sable brush.
After applying the camo it was time to try post shading. I skipped the traditional washes
and mixed a thin solution of black and brown as described by James. Then as the method
requires I started shadowing all panel edges, welding seams etc. I also worked along
vertical ridges of the zimmerit in order to give some more depth to the surface. After
shading was done I sprayed some dark earth to the wheels and tracks. When painting wheels
and substructure of a tank I prefer using the method that Tony Greenland's describes in
his book "Panzer Modelling Master class". Despite the experimental nature of
this project I decided to use it here as well. Wheels and substructure thus received a
wash with black oil and were dry brushed with a mixture of white oil colour and Humbroll's
dark earth enamel colour. Then the track, wheel rims and sprocket were dry brushed with
oily steel colour. When the steel colour was dry the effect was enhanced with a pencil and
the final touch was given with Tamiya's silver pen.


I also used a pencil to give metallic sheen to the
rivet heads in the glassics plate and frontal armour as well as on tow shackles.
Proof of concept was received in Euro Militaire where this model received a Bronze medal.

CASE 2: SIG 33 HETZER
The second experimental model was SIG 33 Hetzer. I had started this project as a scratch
conversion already back in 1995 but it had not proceeded very far due to lack of reference
photos. Then New Connection produced a conversion kit of the vehicle which I received from
a friend of mine in Germany. As the resin parts in the conversion kit looked extremely
good I decided to use them and replace the white metal parts of the kit with my own
etches. I also used Friulmodellissimo tracks for the model even if they would be partly
hidden behind the schürzen when the model was ready. Surface of the glassics plate
received some dents and scratches with a Dremell -tool.
Painting of this model followed a very different path from the previous one. The technique
used was an application of what Mirko Bayerl described me of his technique in Euro
Militaire in 1998. Unfortunately I did not think of Mirko in time in order to ask him to
write an article about his technique for Mallari Special. But after experimenting with
James's technique it never the less seemed appropriate to test some of Mirko's ideas as
well.
The camouflage chosen was the late war ambush scheme. The model was first primed with
Testors primer where after it received an even coat of Tamiya's dark yellow. Next I cut
masks out of masking tape and covered the areas that were to remain yellow. Then I made an
other set of stencils that covered the areas that were to be green. Dark brown was sprayed
on the remaining areas. Next day masking tape was removed from the surfaces destined to
become green and the brown parts were protected with masking tape. Green was then sprayed
on with an airbrush. Wheels and tracks received a thin layer of dark earth. Fighting
compartment received a light wash with burnt sienna oil colour.


Then it was time to test what Mirko had called
"colour variations". Every colour pane in the model was drybrushed with 4 to 5
different shades of the colour in question. I worked carefully each colour pane dry
brushing pane after pane. To make things easier I made a big blunder with green: I used
gloss green in one round instead of matt colour. At first this seemed like a colossal
mistake but at the end it turned into an advantage. The model received an uneven sheen
that gave it a very realistic metallic appearance. Last step was to paint the yellow and
brown spots with a small brush.
As far as I could recall Mirko had said that no washes had been used in his models.
Instead, he uses pastel powder mixed with thinner. This was something new to me but an
article destined to Mallari Special by Johnny Pedersen came to help. In the article he had
given a brief description how to use pastels chalks. Now it was time to test that as well.
I could not publish anything I had not tested, could I? So I started carefully making
stains and water marks to the surface with black pastel powder. At first the results
looked appalling but after a while I learned to adjust the colour amount better. I also
decided to dip the brush to water in order for it to keep it's shape better. When I was
happy with the shadowing I changed from black colour to different shades of brown and
started adding rust to the model. As this vehicle was almost factory fresh I decided to
keep the rust to minimum. It was thus added only to the most vulnerable parts. Final touch
to the exterior was given with a pencil. I worked all the edges of the superstructure in
order to give them a slight metallic sheen. Pencil always seems to produce some residual
powder that spreads all over the model. This may look bad at first but if it is blown away
gently it will not do any harm. However, one must be very carefull not to wipe it away as
this may ruin the painting of the model. If you feel uncomfortable with the pencil grey
paint could be used instead.

As mentioned earlier the interior of the fighting
compartment received a wash with burnt sienna. When it had dried all corners and parts
where paint easily chips away were treated with a pencil. When "painting" the
edges the best method is to use the pencil on a small part of the edge only and then let
your finger tip glide over the whole distance and spread the lead. Some stains and water
marks were added with pastels as a final touch.
All in all this model was very satisfactory to build. It was also the first of my models
to receive 9's and 10's for painting in domestic competition so it served it's purpose in
this respect as well.
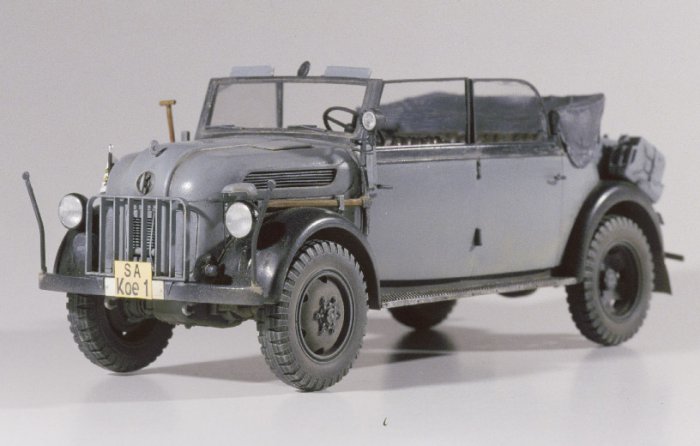
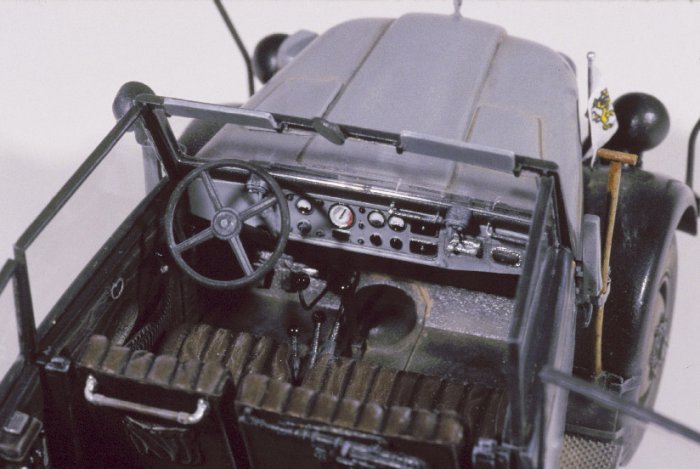
CASE 3: STEYR 1500 A
This project seemed a natural thing to do when Tamiya introduced their Steyr 1500 A
Kommandeurwagen kit. Finnish C in C Marshall Mannerheim had received three cars of this
type as a birthday present from Hitler in June 4, 1942. There were enough photos available
and the painting scheme was a perfect test for one more article intended for Mallari: How
to Polish Paint Surfaces by Juha Airio. As I suspect that most readers have no more or
perhaps even less experience than I with this method, I have chosen to describe it a bit
more in detail than the previous methods. All pictures in this section were taken by my
friend Pekka Nieminen.
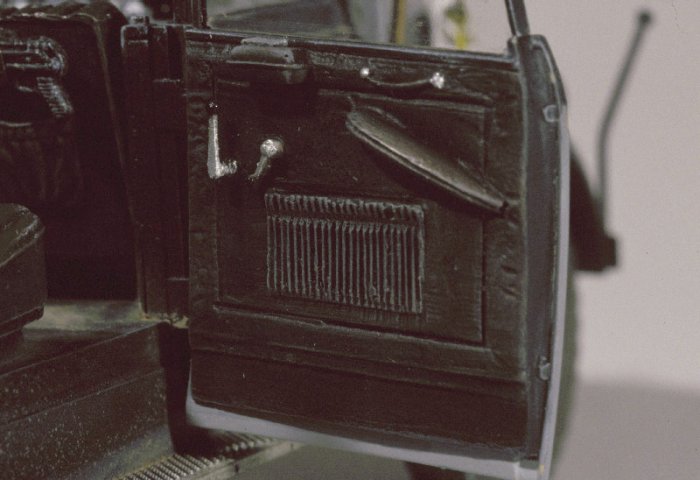
Tamiya's kit was basically correct for this project. However, Mannerheim received cars
that were a bit more luxurious than standard so I had to scratchbuild the interior lining
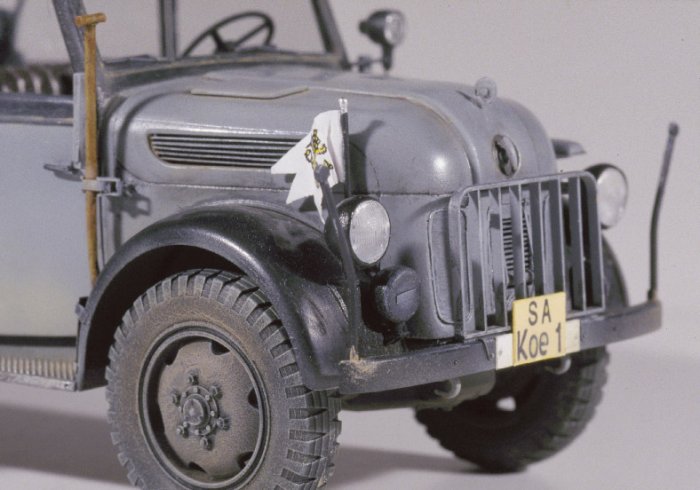
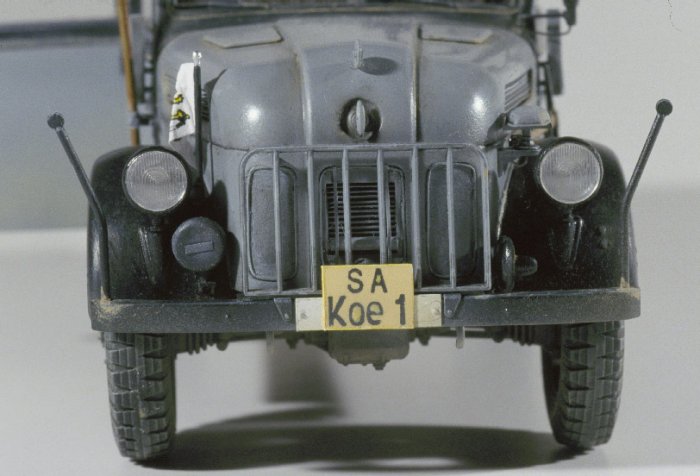
of the doors. Also in the exterior some new bits and pieces like the horn and the extra
lamps had to be manufactured.
As the dividing lines between the colors mainly follow the dividing lines of the sub
assemblies of the kit I decided to paint them separately before putting the kit together.
The car would be assembled first when all parts were painted. The five subassemblies were
1) chassis (wheels off), 2) hood with dashboard, 3) trunk, 4) doors and 5) floor of the
body with front fenders attached to it. All small parts were glued into their positions
before painting. Again, with hindsight anyone attempting to do a similar paint job should
take some time to think at which stage each part is attached to the model. Later when the
paint surface is polished small parts may be on the way and in any case they fall off very
easily.
Instead of pure black I used a mixture that contained
about 90 % of Humbroll water based matt black (5033) and 10 % matt white (5034). When the
color had been thoroughly mixed, 30 % of gloss varnish was added to the paint. The light
grey was mixed out of 65 % of Tamiya sky grey (XF-19) and 35 % of neutral grey (XF-53).
When the paint was mixed 30 % of gloss varnish was again added into the paint. Tamiya red
brown (XF-64) was used for the leather parts. On top of the colors above gloss black, matt
white, silver and aluminum color were used to paint the car. Andrea Colours excellent flat
black (no 26) was used for the tires. Tamiya buff (XF-57) and dark earth (XF-52) were used
for weathering.
During the first painting round all subassemblies except number 5 (mudguards and floor)
were painted light grey. The paint was allowed to cure over night. Then the doors and the
hood were masked so that the black areas of these parts could be painted. They were then
sprayed with black together with the mudguards and the floor.
When the black paint had dried the masks were removed. The doors were masked again in
order to paint the insides red brown. The seats were painted with the same color as well.
Next in turn were the dash board and door details: the rims of the gauges were painted
gloss black, faces of the gauges were painted white. A drop of Humbrol Clearfix was placed
into each gauge to imitate glass. Silver was used for the door handles, radio and ashtray
lids. Running boards were painted silver too.
When all subassemblies were ready I started to polish the paint coat. In short the process
was following: Paint coat was polished with subsequently finer and finer sanding paper
until all defects had been removed from the surface. Grades of the sanding paper ranged
from 3600 to 8000. If you continue polishing long enough you can almost see your own image
from the surface. However, as I was polishing a military vechile , I decided to leave some
variation to the gloss. The edges of the mudguards and engine hood received most
attention, other surfaces ranged from satin to gloss. One should try to avoid overdoing
the polishing, as too much gloss may look unnatural in a military model. Even my Steyr may
be considered to be too "nice" by some.
When I was happy with the surface the car was
assembled. Once the glue had cured the chassis and belly of the car received a layer of
dark earth. Then a thin mix of buff (10 % paint/90 % thinner) was sprayed to the chassis
and sides of the car. Next followed a wash with very thin black.
Dry brushing was done with a mixture of white artist oil paint and the color to be dry
brushed. Then the model was allowed to cure for a couple of weeks and the process was
repeated. Especially the brown shades in the tires desperately needed new dry brushing.
Pastel colors were also added at this stage. Black was used in the wheels and chassis, tan
and brown shades in the sides and to the drivers compartment floor.
The last touch was the flag. It was drawn in PC with Micrografix Designer, resized to
scale and printed to standard copy machine paper with a color laser printer. The paper was
then placed upside down back to the printer and the pattern was printed to the backside
too. The flag was cut off and dropped into a thin mixture of PVA glue. Some wrinkles were
formed into the flag and it was left to dry over night. Finally it was glued to the
flagpole with super glue and the flagpole was glued into its base.

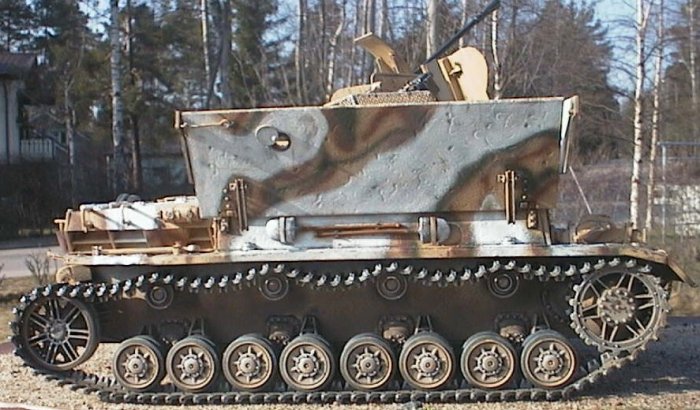
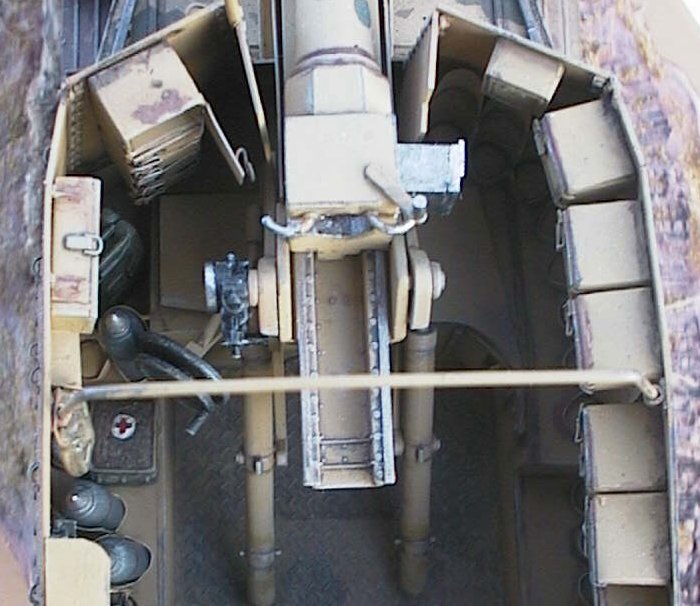
CASE 4: MÖBELWAGEN
Building Möbelwagen was inspired by a discussion I had with Mirko. He, being a Hungary
1944/45 enthusiast, suggested that I would paint my Möbelwagen to Hungary in 1945. My own
idea had been to paint it in winter camouflage so it did not take much to talk me over.
This time I would not have any article to help me out. This was to become a synthesis of
what I had learned with the previous cases.
When I built the model I made all possible detail work. For example I removed all the
locking leavers of the fightig compartment and made them workable. This took some time but
if you compare the ready made model to one where this work has not been done you will
appreciate the difference.
Painting started by priming the model with Testors primer. This was necessary because I
had used Aber's fenders in the model. Then I sprayed on a thin layer of Humbrol's acrylic
dark yellow. The result was awfull. The tank looked like an orange! So I waited a day and
painted the Möbelwagen again with Testors tan. It looked a bit too light to me but I
thought it was probaly nothing. Then I went on painting the red brown and green stripes.
And the result was excellent -the only problem was that it was a perfect specimen of a
tank from the Iraqi army not a German tank from WWII! I had to do it all over again. This
time I mixed Testors wood and tan colurs in about 50/50 relation. This produced a very
nice dark yellow colour that I sprayed over the previous colours. The result was a bit
uneven yellow with lots of variation in the shade in different parts of the tank. Then red
brown and green stripes were painted on top with Tamiya's colours.


Now I encountered a problem. How to paint the winter
camouflage? In my earlier projects I had done it with water colours. As good as that
method is I think it works best on dark surfaces so I had to try something else. I decided
to spray a thin layer of Testors matt varnish to the model. As Testors paints are not
diluted by Tamiy's thinner this effectively sealed the camo from anything I would do with
Tamiya paints in consequent rounds. After the varnish had dried I sprayed on the winter
camouflage with Tamiya matt white. As spraying leaves the edges of the colour blurred I
dipped a brush into Tamiya thinner and started cleaning the edges of the white areas. This
removed any splatter of white and made the edges of white areas sharper. I also treated
some areas in the middle of the white surfaces in a similar manner in order to give some
variation to the colour. Then I left the model to dry for a couple of days.
As the winter camouflage was still too neat I started sanding the white surfaces with wet
and dry paper. This thinned the paint and made the camo look almost translucent in places.
Sanding paper also removed many small particles that had landed into the paint surface
when it was still wet. This produced some very small "holes" to the white which
looked very good.
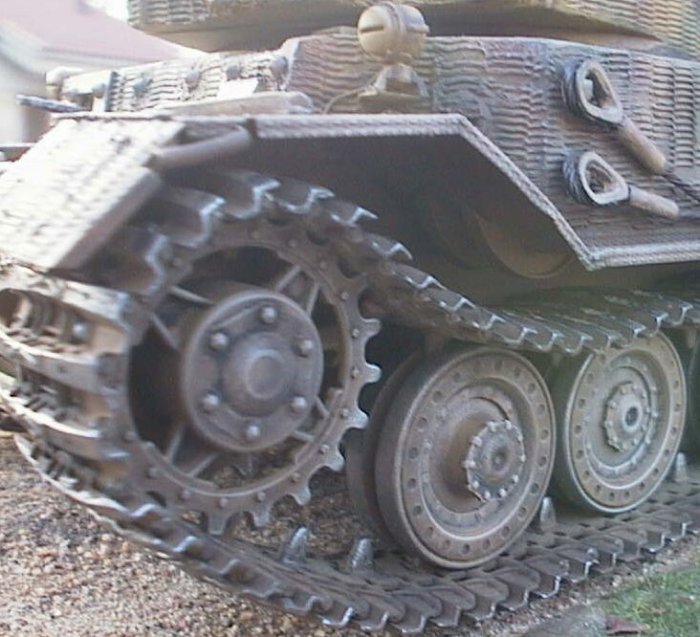
Now that the camoufalge was ready it was time to finish the paint job. Wheels and tracks
were once again treated with the Greenland method. I also gave the model a light wash with
black oil colour but only applied it to the front and back of the hull. Fighting
compartment and gun were not washed at all. Instead I started highlighting the detail in
these parts with a pencil. I had made small dents to the edges of the fighting compartment
walls before painting them. Now it was easy to take out the pattern with a pencil and my
finger tip. The hooks used to lock the fighting compartment walls were treated separtely
as they were clearly parts where paint chips off very quickly. The gun was also
highlighted with a pencil with special attention given to the craddle, loading tray and
hand wheels of the gun. I then went on using the pencil on the mudguards and the drive
sprockets in order to imitate chipped paint in these parts as well.


Final touch was given with pastel chalks. I used black
to make shadows around hindges, in wealding seams, tracks etc. I then diluted the colour
with water and made water stains especially into the inner side of the gun shield and
fighting compatment walls. On the outer side I mixed a bit of brown to the colour in order
to give some contrast against the more colourfull base. Spare tracks and exhaust pipes
were the only parts to which lighter shades of brown and orange were used.
It is worth noticing that I did not use traditional high lighting at all with this model.
I have used it in many models but all too often white has become too prominent so I
decided to skip drybrushing this time. I will leave it to the viewer to decide weather it
was the right thing to do.
All in all I liked building the Möbelwagen a lot. The kit was very good and I had a good
idea of what I wanted to do. It will be interesting to see how it compares to the work of
other modellers if I manage to visit Euro Militaire this year.

CONCLUSION
Now, was it evolution or was it revolution? Given the time I spent it could be called a
revolution. Within a period of less than one year I painted four models with very
different techniques and learned more about painting models than in the previous ten years
put together. On the other hand each step contributed to the next step or steps. So it was
evolution as well.
For me the most important lesson about the whole exercise was that regardless of the fact
that I followed techniques copied from other modellers in the end I always made the models
my own way. I had to, because every methdod I used was an equation where the theory was on
one side and my skills and goals on the other. And these never quite matched as after all
I am not James, Mirko or Juha.
I am also happy that the IPMS Mallari Special has found an eager and adaptable audience in
Finland and other Nordic countries. In the last competition here in Helsinki there was a
remarkable improvement in painting standard which, I believe, is at least partly
attributable to Mallari Special.
| Main | What's New | Articles | Reviews | Gallery | Think Tank | Contests |