
Molding for the Masses
A Beginner’s Experience in Gravity and Centrifugal
Introduction
A
fter being frustrated over missing kit parts, the need to rebuild and reproduce multiple parts, and to produce vehicle variants not yet offered, I decided to delve into the intimidating world of resin casting. My first exposure to the idea was Sheperd Paine’s books that will forever remain an inspiration to other modelers and me. Mr. Paine models in 1/35 while I model 90% in small scale (1/72 and smaller and some 1/48). Braille-Scale is great in that you may save in expensive casting materials though it is tougher to do as everything must be smaller. Getting casting resin into all those small recesses, without air bubbles can be daunting. Below I will go over my experiences and techniques in the hope that others will not be reluctant try molding and casting.Overall these techniques apply to most scales of model resin casting: 1/87 to 1/35, etc. Taking into consideration drying times the whole process make may take a week or so from start to pulling a beautiful casting from your mold. I will not address Squash Casting or white metal casting, which are covered at some of the websites I have listed at the end of this article. I do not cast commercially and am not an expert, so will approach it from that end.
Planning
It is easier to make a number of small molds and casts in one sitting. Since your chemicals are humidity sensitive after opening you will want to use it up before it goes bad (2 to 6 months or less after opening!). From personal experience, do not use anything that has started to polymerize in the bottle. The moldmaking compound will not mix or cure thoroughly and the casting resin compound may cure brittle and fracture in the mold when you try to pull it out. Read any number or articles and directions over several times, and start amassing items to cast, tools, and small containers for mixing and forming molds. Study commercial castings to see how they do it.
Safety
The casting chemicals I use have a low vapor pressure which means they do not evaporate vapors into the air readily, so strong noxious should not be a problem. They will cause irritation to the eyes and skin, so wear proper personal protection, especially eyeglasses. The chemicals should come with a Material Safety Data Sheet (MSDS) and it is wise to read it.
Tools
Molding & Casting products
: There are a number of companies out there producing mold making and casting products. All of them likely produce good products otherwise they would not be around for any length of time. You should stick to one product in the beginning so as to become intimately familiar with its instructions and properties. I use SMOOTH-ON products at this time, as that is what I found on the shelves of the hobby shops in my area, but I will stick with them as they do the job I want them to do well [this is not meant as an endorsement]. They come in two pint-containers per kit and mix in equal measures/volumes (1 part A with 1 part B). Unless you have a scientific gram scale, stay away from the products that need exact measurements based on weight (such as 5 grams Part A with 50 grams Part B!). Some of these latter molding and casting materials do have superior properties though, such as being less prone to air bubbles or making tougher, longer lasting molds.These products work on the basis of a catalyst. That is, a material added to a second material where they interact to form, in this case, a solid. Often this reaction gives off a little heat, which is referred to as "exothermic". Common injection plastic models are produced by the cooling of hot liquid styrene plastic injected into a mold to make polystyrene.
SMOOTH-ON sells a nice booklet titled How To Make Molds & Castings (And Live To Tell About It!) that comes free when you buy a sampler kit. This 40-page booklet introduces the choice of products, methods and covers the most common questions. Besides SMOOTH-ON, other molding and casting products can be acquired though Alumilite Corp., Synair Corporation and Micro-Mark catalog.
Basically, you need
I have tried a resin with a longer (7-minute) pot life and am not really pleased with it. It pours like water and gives off more heat than the resin with the 2-minute pot life, but has tended to froth & expand, and form many tiny bubbles during the curing. Perhaps it is my technique?
For larger pieces, such as a small-scale M4 Sherman hull or 1/35 turret, you may have to build a box around the item to be duplicated. Molders often do this by building a box out of thick Evergreen styrene sheets glued together, or using something like Lego blocks. If using Lego or Duplo-type blocks, use white glue to secure the blocks down to a smooth base and fill in any cracks between the blocks. White glue (i.e. Elmer’s) may take a day or more to dry.
Associated with the mixing containers will be your mixing implements. I prefer jumbo size paperclips or a piece of coathanger wire with a short L-shape at the end for scraping the bottom of the container.
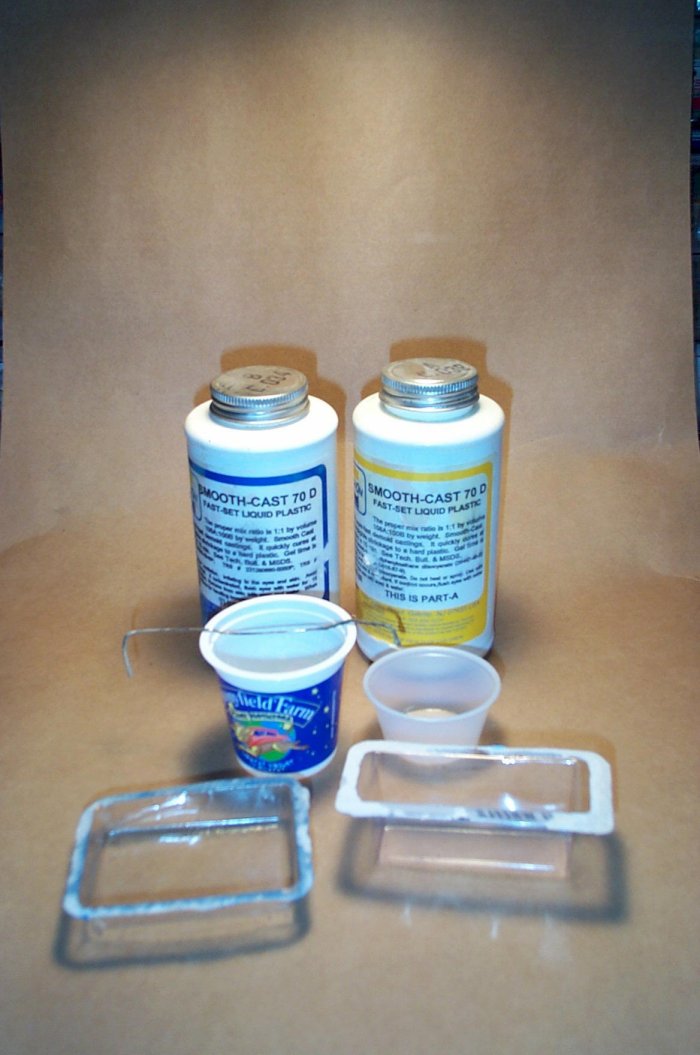
In the foreground are two small clear vacuform containers I like to use as molds. Behind them are two plastic cups scrounged from my kitchen. In the rear are two 1 pound containers of liquid plastic compound (resin). Atop the left cup is my bent paperclip stirring-implement. A bent piece of heavier coathanger wire works better for large quantities.
Making A Mold
Filling large hollow spaces like turrets or tank bodies with soft modeling clay is often necessary to keep the piece from floating up in the liquid resin after poring. The clay eliminates the air, helps the model to stick to the container, as well as adding weight.
Set everything up in a quite clean place to work. Newspaper on top of your worktable will protect from the eventual spillage.
At this stage let me explain that I only make one part molds and have not found a need for two part molds like is used in injection molding. The flexibility of the rubber compound makes it easy enough to remove even complex shapes from a mold.
Making A Cast

The original Sherman hull and turret to be duplicated are to the left and my light-cream colored duplicates on the right. Unfortunately this photo is not sharp enough to compare the overall quality of the duplicates. In the background are the amber molds for these castings. Note the spillage of resin on the outside of the mold. This is not a problem as it easily peals off if you lubed the outside of the mold lightly.
Removing Air Bubbles
After securing the resin filled mold to the box-on-a-string (your Centrifugal Force Contrivance), swing the mold around for 15 to 30-seconds or so to force the still liquid resin in and air bubbles out; and to entertain friends and family. Allow the mold to fall out of the box while swinging and see what a mess you have! Some liquid resin is bound to smear out of the mold so be prepared to add more or spread it back into the mold with a card or wire. When you first pour it will be like maple syrup. You want to work with it before it is like cool molasses.
After swinging allow the resin to cure as per instructions and maybe a little longer. Then carefully pry the casting out of the mold. If it is at all soft, such as being able to dig your fingernail into it, leave it alone. A butterknife and sharp #11 blade may help here to remove it from the mold after curing.
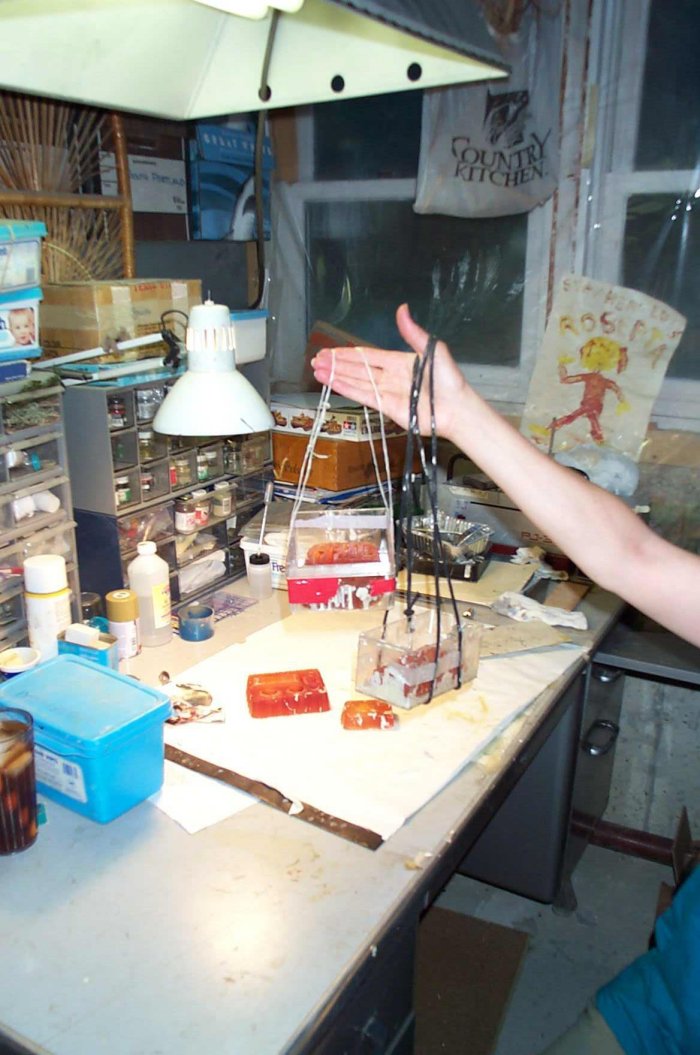
The two Centrifugal Force Contrivances I use, being held over my model-building area from my wife’s lovely hand.
Cleaning & Finishing Up
After popping the newly cast part out of the mold, the release agent needs to be cleaned off previous to gluing and painting. If a light vegetable oil has been used to lubricate the mold then simple dishwashing liquid and light scrub with a soft toothbrush will suffice to clean it. As I use a commercial release agent I have to use a stronger detergent such as a pine oil cleaner (i. e. Lestoil, Pinesol, etc.) or automatic dishwashing liquid. Wear rubber gloves when doing this as these cleaners can be harsh on your skin. Rinse very well and then let the pieces dry. If paint won’t adhere than the part needs better cleaning.
Cutting off small-unwanted parts can be done with a razor saw, Exacto type saw blade and file. Large plugs can be removed with a Dremil type tool or hacksaw. Be careful with the resin dust as it can be harmful to breathe in. Cheap paper dust masks are available in hardware stores, or the resin can be cut wet to minimize dust. [Blocks of scrap resin need not be thrown away! Broken into the right size pieces, it makes great building-rubble for a diorama.]
Pinholes in the resin can be filled with regular model putties that come in a tube. Large bubble holes are best filled with good quality epoxy putty that has greater strength and can be filed to shape. On some areas the epoxy putty may need to be glued in with a little super glue to keep it from falling out.
Solvent model glues will not adhere to polyester resin so you need to turn to cyanoacrylate glues (Super Glue, Crazy Glue, etc.) and two-part 5-minute epoxies to assemble your parts. The epoxy will form a stronger bond in my opinion though takes longer to dry. White glue also has its place when you want a light bond or are gluing on a clear windshield that will be crazed (fogged) by the cyanoacrylate glue. Experiment and use what is best for you and the circumstance.
Before painting the model its finish color, I highly recommend a primer to help the pinholes; defects and blemishes show up. I prefer a light gray auto primer though this may depend on the color of your final topcoat of paint. For example, if you are doing a late war Panther in factory primer, just use a red-oxide primer.
Prior to using the mold again, be sure to clean out your mold of any dust and debris is may have collected. My experience is that a polyurethane mold may survive in good shape from 15 to 20 castings before it wears out. The simpler the mold, without corners and overhangs, the longer it will last.
For further information and articles about the world of resin casting I recommend you check out the following web sites:
www.Alumilite.com (The Alumilite Company, molding & casting products)
(The Smooth-On Company, molding & casting products) (Synair Corp., molding & casting products)miniatures.de/english.html#Beispiel der Bemlung
(Military Miniatures Magazine website)www.multimania.com/modelnet/index.htm
(Miniaturezone, Military Miniatures Webpage)www.track-link.net/articles/shorts/scasting.html
(Track Links website)ourworld.compuserve.com/homepages/HvOerle/
(1/76 AFV Workshop website) (Micro-Mark small tool specialists)| Main | What's New | Articles | Reviews | Gallery | Think Tank | Contests |