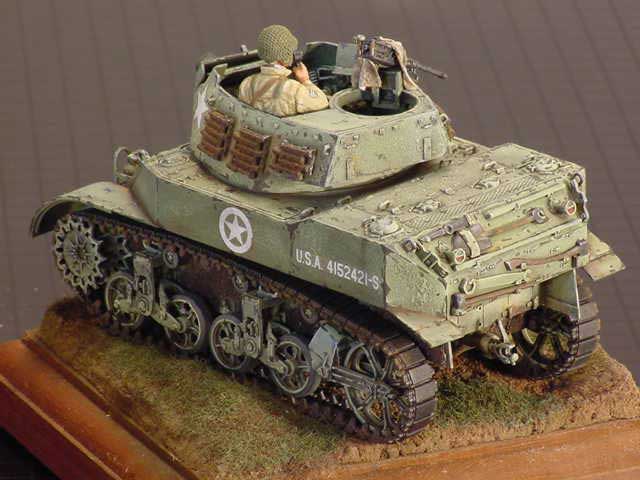
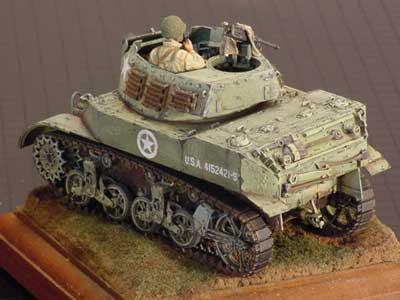
M8
75mm HMC
by Don Porter
A Little Introduction
In 1941, the U.S. Army saw the need for a vehicle that had enough firepower
to be effective against fortified targets, but fast and lightweight enough
to keep up with reconnaissance units. This would really come into play
in '44 as Airborne Units raced across Europe.
An order was placed for two experimental armored vehicles. Armament
would need to be either the 75mm or 105mm Howitzer. The first was based
on the M3 half-track and the other on the M3 Stuart Light Tank using the
75mm main gun. Because of the need for an "All Terrain Vehicle"
that had a sufficient amount of protection, the light tank was chosen
and after some consideration, the order was changed to the M5 light tank.
The Cadillac division of General Motors received the contract for the
M5 and used two V-8 automobile engines (Thats the only thing that resembled
its luxurious cousin). There had been a lot of skepticism over the reliability
of this system. To dispel any doubt, the first M5 prototype was driven
500 miles from the factory to the proving grounds
. that took the wind
out of their sails. The M5 Chassis proved a very reliable choice for the
M8 HMC. The turret was not able to withstand the recoil of the higher
caliber, so the turret ring was expanded and the turret was left open
at the expense of the two hatches on the main deck. These were replaced
with four small vision ports and the hatches moved to the front glacial
plates.
As the Allied forces converged on Normandy, the M8 would be used for
the first time in significant numbers. There were a total of 1778 produced
from September of 1942 until production stopped in January of 1944. The
French were the only other force to use the M8 through Lend-Lease.
Construction
Easy Does it
I must admit that there isnt any earth shattering tidbits to be found
in my construction of this model. The kit is from Tamiya and it was excellent.
I spent some time researching the M8 and was really pleased with the accuracy.
I divided the kit into five sub-assemblies: the turret, the upper deck,
the under carriage (along with the interior), the wheel assemblies and
the tracks. All Gun barrels are drilled out. This Article is really on
Finish so lets get down to business.
Adding the Scales to the Dragon
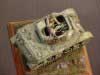
All Rolled Steel and Cast Steel have some amount of texture. To bring
this to life on the M8, I applied Testors model Glue to a small area that
I wanted to texture. If youre not careful it begins to dry and get very
stringy
. what a mess! Continue in small sections until you satisfied.
Make sure you leave fenders and other sheet metal panels smooth. The contrast
will make both smooth and rough surfaces stand out as in this photo. Test
the glue method on a scrap piece or better yet if you have an old model
lying around.
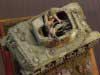
Making Mud Pies
Mud pies havent been this good in years. I took Squadrons Green Putty
and caked it all along the bottom of the under carriage. Next I took
sand and small pebbles and embedded them into the putty. It gives a nice
contrasting surface that shows up nice with dry brushing.
War Paint
Giving the Glue and the putty plenty of time to dry and cure ( 48 hours)
I left the five sub-assemblies apart for painting. The first coat was
an almost black-brown using Poly-S paint. After this was given enough
time to dry I over sprayed the entire kit with Poly-S Dark Green. The
tracks are painted black and then a dark brown along the outside rim of
metal links.
The Wash
I personally like the Dry Wash method for the shading effects. I would
completely destroy a base coat 1 out of 5 times with a wash over the entire
model. Dry wash is when you apply a mixture of Artist oil paint mixed
with Turpentine (30% paint-70% Turpentine) to panel lines, recesses and
Raised areas only. The mixture will gather around the raised detail and
will be more defined than if you wash the entire model.
The Highlight of the Evening
Now I assemble all the sub-assemblies and the dry brushing will now commence.
I start with the base color and just a shade of white. The white is acrylic
artist paint mixed with the Poly-S Dark Green. I never use Artist Oils
for highlighting for one reason
they make the model look like its had
icing smeared over it. Thats O.K. if it attacked a bakery! Oils seem
to build up quickly but artist acrylics have the thickness that you need
but dont seem to overtake the details. I know there are those who use
Oils very effectively. Im just not one of them.
Usually, I apply about 6 to 7 shades of dry brushing, adding a little
more white each time. The effect of each proceeding time should not be
too noticeable. I add a hint of yellow to the last two coats to give it
more of an olive tint to U.S. Vehicles. The one effect I want to achieve
is faded paint. Yes, I want to bring out detail, but I also desire the
stone washed look of sun faded. As other washes and chipped or worn
paint are added, they really show up well.
Details
Details
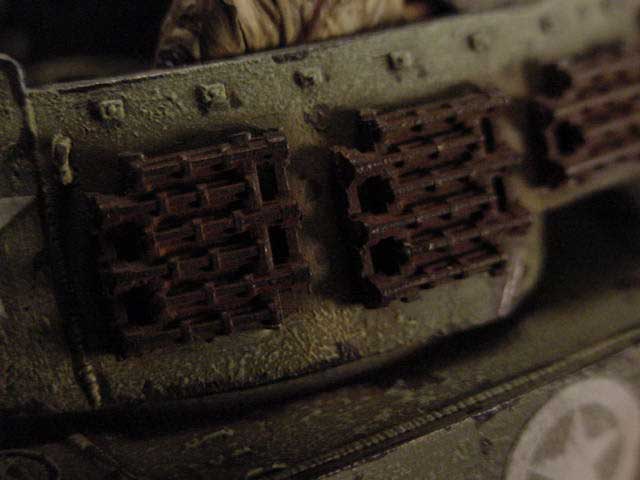
Painting all details such as tools, the 50 cal., the rubber on the wheels,
spare track (they are really grousers that give traction in mud and
snow), and the caked mud on the under-carriage. These are all shaded and
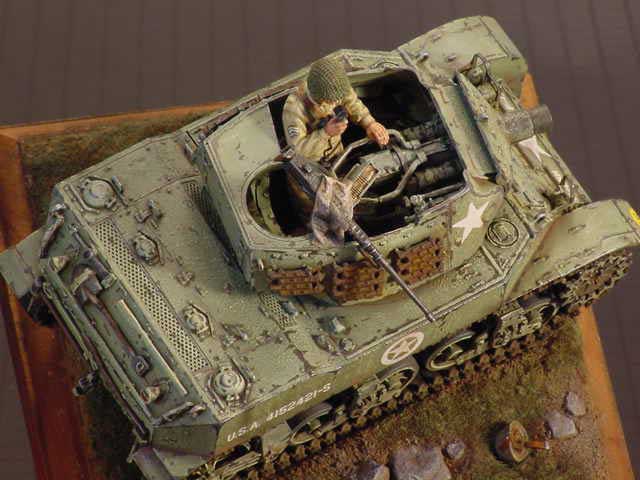
highlighted. The cloth covering the .50 cal was made of facial tissue
that was wet and formed to the gun. The figure is from Dragons U.S. Tank
Crew and painted with acrylic. Usually I use Oils but not on this guy.
The netting on his helmet was made from cheesecloth stretched over the
helmet with a layer of glue applied then the underneath was ground off
with a Dremel. The Decals are applied from the kit.
No worse for wear
This is my favorite part. As you can see, I love making the worn
areas in as many places as possible. Its the best way to make light,
fragile plastic look like heavy, clumsy metal that I know! I started with
Dark Brown Poly-S Paint and then a 00 Windsor & Newton red sable.
Paint along all the exposed areas that look like they would be scraped
and worn. Also along panel lines where rust would typically start and
paint would chip. The Shapes must be very definite and irregular to be
effective. The M8 received a bigger dose of the worn & chipped paint
effect than I usually give. The normal rule is
A little dab will do you.
Make sure the shape remains full color. If the color is showing through
or not very definite, the paint looks like what it is
. paint.
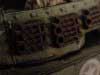
Pastels (so subtle but yet so effective.)
I used to be freaked out by this powdery substance, but now I cant live
without it. The Grouers on the sides of the turret are a perfect example
of what can be done. Tracks are not painted so they are the first to rust.
Heres what I do. The tracks are painted brown. After they dry, apply
a brown pastel color liberally. Then take Orange pastel powder and highlight
it. The orange really makes a tremendous effect. Do the same with the
lower tracks but keep the orange to a minimum. Black pastels are added
to the muzzle of the 75mm cannon, around the gas caps and sparingly in
other areas. Along panel lines and crevices I add a brown pastel to simulate
dust and a little orange for rust.
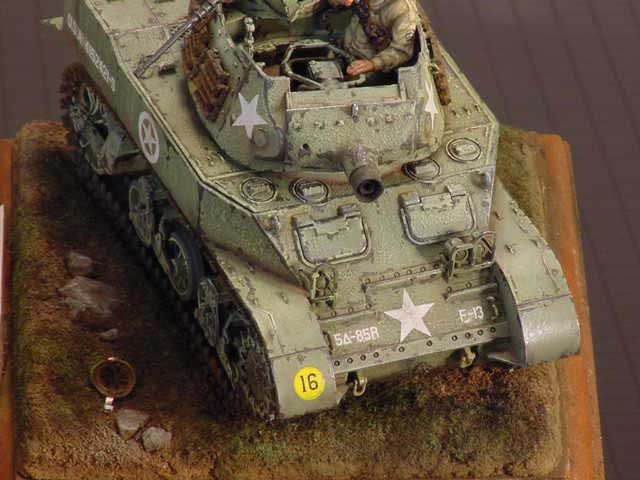
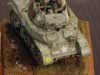
The Foundation
The wood base is hardwood and custom made. Why spend all that time working
on your project and not set it on a proper base! I used Cell-U-Clay
for the groundwork with various rocks and sand. Static Grass was added
and everything washed and highlighted. The helmet lying in the grass is
a Verlinden German helmet with liner and the straps are yellow electric
tape.
The End
Overall this kit was a lot of fun. Isnt that what its all about!
References
-
M3
& M5 Stuart Light Tank 1940-1945 (New Vanguard 33), Osprey
Publishing, Steven J. Zaloga, 1999
-
The Worlds Great Tanks from 1916 to the Present Day by Roger
Ford 1997
-
M8 HMC: Tamiya Model Kit Description & instruction from Kit #35110
|