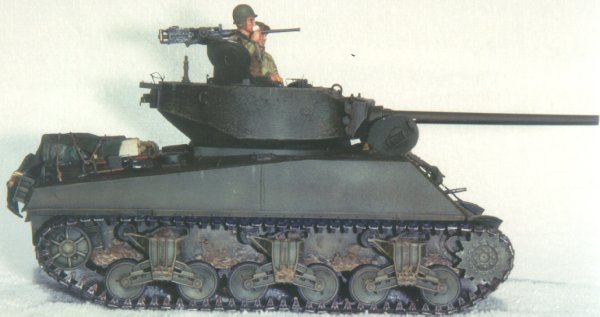
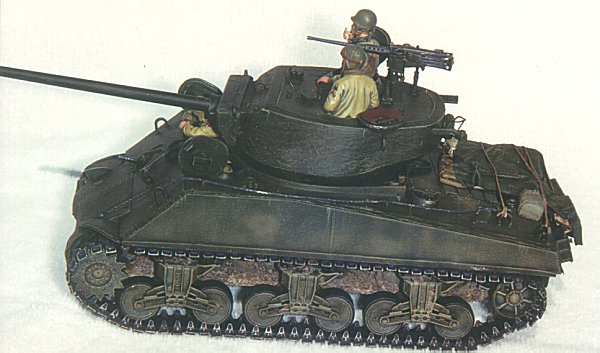
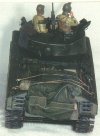
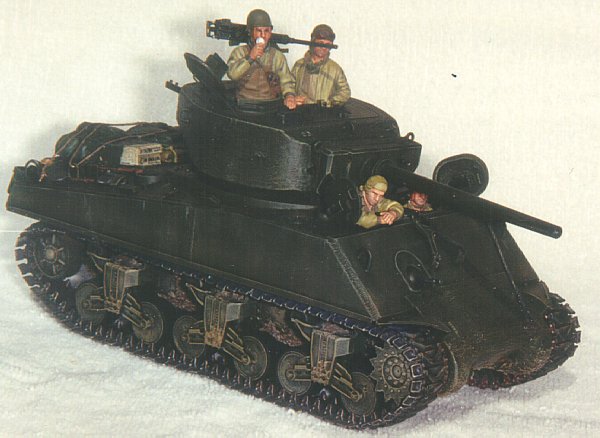
M4A3E2 Sherman Jumbo
by Jeff Brooks
A Brief History
Prior to the invasion of Europe, combat experience in North Africa and
the Mediterranean had shown the weakness in the thin armor of the M4 Sherman. With
progress on the T-14 assault tank going nowhere, it was decided to up-armor a standard
late model 75mm M4A3 Sherman. This tank, nicknamed "Jumbo", was classified as
the M4A3E2.
Starting in May 1944, Fisher Tank Arsenal had modified 254 vehicles to
this configuration by July 1944. These modifications included adding 1.5 inches of armor
plate to the glacis and upper hull sides. This increased the front from 2.5 inches to 4
inches and the sides from 1.5 inches to 3 inches. The differential housing was also
replaced with a casting of 5.5 inches, increasing the thickness by 1.25 inches. Except for
a minor alteration to the transmission, the deletion of the lights and siren, and taller
gun travel lock mounts, these were the only modifications to the hull.
The turret, however, was a completely new design. It closely resembled
the T-23 turret used on later model M4s equipped with the 76mm gun. In fact, this turret
used the same 3.5-inch M62 gun mount (with an additional block of 3.5-inch armor welded to
the front) as the 76mm T-23 turret. Initially, all tanks were armed with the 75mm gun M3
with the belief that the 75mm gun fired a better high explosive round than the 76mm gun
M1A1. The cast turret sidewalls and rear consisted of 6-inch armor with a 1-inch rolled
plate for the roof welded to this, leaving a prominent weld bead.
As stated earlier, all the original tanks were armed with the 75mm gun
M3. In March 1945, the U. S. Army issued orders approving the installation of the 76mm gun
M1A1. However, it is my belief that this modification was done at field level even
earlier. As the mantlet and trunnions were virtually identical to the 76mm guns, it only
required a slight adjustment for installation. I have seen photos in February 1945 of
"Jumbos" with 76mm guns. It also appears that of the 76mm-gunned tanks, about 50
percent were armed with the 76mm M1A1 and the other half with the M1A2 gun with threaded
muzzle brake caps.
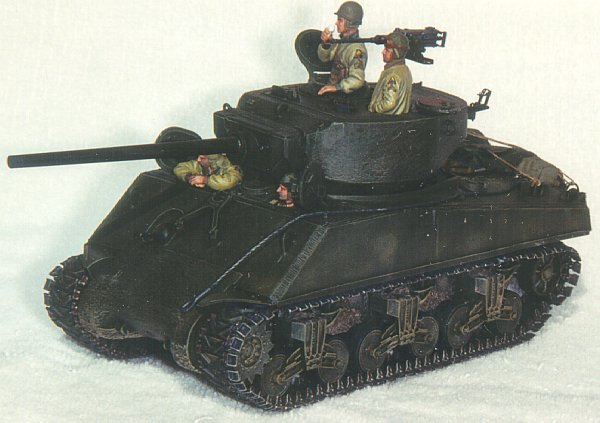
Since the overall tank weight increased from 34.8 tons to 42 tons, all
"Jumbos" were permanently fitted with extended end connectors, commonly referred
to as duckbills. Fuel economy stayed the same with a range of about 100 miles, but speed
decreased by 4 mph to 22 mph.
All "Jumbos" were used exclusively in Northwest Europe from
July 1944 until the Armistice in May 1945.
Construction
I have always been fascinated by the "Jumbo". After toying
with the Tamiya offering about 10 years ago, I opted to build the Tank Workshop conversion
this go round. Ultimately, this decision was based on the fact that I didn’t want to
make the necessary corrections to the Tamiya kit.The Tank Workshop M4A3E2 conversion is an
excellent kit. It consists of the upper hull, transmission housing, pressed idler wheels
with grease fittings and detailing on both sides, late model dished road wheels with
grease fittings and the turret. The turret includes mantlet, 75mm turned aluminum gun
barrel, loader’s hatch, machine gun pedestal, and three pieces for the machine gun
stowage components. The upper hull has raised weld beads around the upper surface, raised
gun travel lock posts, and nice detailing of the added armor plating. The only omission is
the two welds that run vertically about halfway along the sides that I added with epoxy
putty. The upper hull had a few air bubbles that needed filling but the rest of the kit
was defect-free. I used the Tamiya M4A3 kit as the basis for this conversion. All the Tank
Workshop parts are drop-in replacements for the Tamiya parts.
Lower hull and suspension
Construction started with the suspension. The kit road wheels were
replaced with the Tank Workshop items. Grandt Line nuts and bolts were added to the return
roller skids and under the bogie housings. The four mounting holes for the reversible
return rollers were drilled in the front of each bogie assembly. A little celluclay was
added to simulate dirt. The Tank Workshop idlers are the only products I have used of
theirs that I have a complaint about. They are not square (they look like the Leaning
Tower of Pisa); use extreme care in sanding them. With the exception of the Tank Workshop
transmission housing, the lower hull was built as per the Tamiya kit instructions.
Additional detailing included drilling the front and rear tow lugs and inserting bent
brass wire in the front. A "comb" device of sheet styrene was added to the
transmission housing, and body putty and crushed cat litter for caked-on dirt. Sheet
styrene was also added to fill the open sponsons.
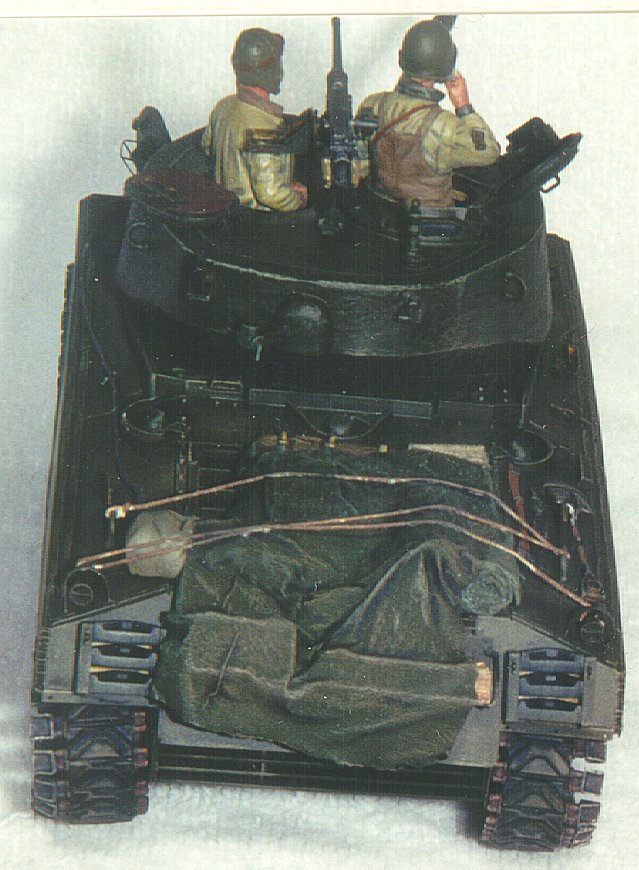
Upper hull
The upper hull doesn’t require many parts from the Tamiya kit. You
will only need the hatches, .30 caliber machine gun, lifting lugs, gun travel lock, tail
lights and light guards, ventilator cover, pioneer tools, extra track block assemblies,
rear stowage rack assembly, and exhaust.
Detailing consisted of drilling drain holes in the turret and fuel
filler splashes, drilling out the .30 caliber machine gun barrel, adding the weld beads I
mentioned earlier to the side of the hull, sheet styrene engine hatch hinge brace plates,
and small wire for the power leads to the kit tail lights. I used the spare track block
racks from Italeri with T-48 rubber chevron track blocks from Tamiya mounted to the rear
hull. I got lazy when it came time for the pioneer tools. I cheated and used the Tank
Workshop items in place of the Tamiya tools. I also added a tow cable clamp from Tank
Workshop to the rear hull.
I purchased the Aber brass photo-etch detail set primarily for the
front fenders, but ended up using the thinned down fenders from the Tamiya kit. Has anyone
ever had his wife lose something?? Other Aber items that I did use were the rear stowage
rack, tail light guards, filler cap retaining chains, skirt mounting strips and empty tool
brackets.
The two drivers’ hatches had the most detailing for their size.
Both included brass wire handles inside and out, Aber photo-etch base plates, foot guards,
and those little triangle pieces. The driver’s hatch includes a resin periscope and
open periscope lens from Verlinden.
Turret
The only parts required from the Tamiya kit for the turret included the
commander’s hatch, antenna mount, lifting lugs, and the .30 and .50 caliber machine
guns. If you use the Tamiya M4A3 kit, you will have to scrounge the front lifting lug; the
Tank Workshop instructions are for the Tamiya M4A3E2 kit. The only snag I ran into during
construction of the turret was when I tried to add the two angled brackets to the rear of
the turret. Careful sanding was required to achieve a parallel fit.
Extra details to the turret included plugging the hole for the
searchlight, the addition of brass wire handles for the hatches, a turned aluminum 76mm
gun M1A1 from Jordi Rubio, and Verlinden resin antenna mount and commander’s hatch
periscope. The Aber photo-etch details included auxiliary sight, .50 caliber machine gun
travel lock, loader’s hatch clamp, periscope guard, and the stowage brackets at the
rear of the turret. A disc of sheet styrene and a piece of bent wire were added to the
machine gun cradle stowage bracket to finish off the turret construction.
Tracks
The tracks on this model were left for last. I have been unable to find
any photos of a "Jumbo" with anything but the T-48 rubber chevron tracks with
extended end connectors. At the time of construction, Accurate Armour made the only set of
T-48 tracks with extended end connectors, but these weren’t detailed enough to suit
me. I also HATE trying to put together link-to-link tracks. I decided to discard the steel
chevron tracks from the Tamiya kit and use an extra set of Tamiya T-48 tracks from my
spare parts box. First, I took a new X-acto blade and shaved off the "pins" from
the Tamiya tracks. Next, I spent two happy evenings cutting and sanding the extended end
connectors off my set of Accurate Armour T-48 tracks (a present, I didn’t have to buy
them). These were glued on individually in the correct locations. I left a few off and
glued some on crooked to simulate wear and tear.
Painting and Weathering
I airbrushed Tamiya XF-62 Olive Drab as a base coat for the model. I
normally use Model Master enamels, but wanted to try something different this time. The
base coat turned out darker than I wished so I attempted a modified post-shading
technique. Instead of repainting the tank, I started dry-brushing with Model Master Olive
Drab. Since there is a large difference in the two hues, I obtained a good shadow effect
without a wash. I then lightened the olive drab with white artist oils and made one more
pass over the model. I decided to leave the tank with a drab appearance and omitted all
markings. The model was allowed to dry for about two days before I started the weathering
process.
I consider detail painting to be part of my weathering sequence. The
rubber parts (road wheels and track blocks) and metal parts of the tools were painted with
Polly-Scale Black. All other metal parts were painted with Polly-Scale Scale Black. This
color is kind of charcoal colored and I use it for a lot of things. The steel parts of the
tracks were then dry-brushed with a mixture of Model Master Rust and Raw Sienna. To me,
this gives a nice feathered effect to the tracks without adding too much rusty red color.
The wooden parts of the tools were painted Model Master Natural Wood. I have a
fifteen-year-old tin of Humbrol brown that I use for dirt. On olive drab it has a slight,
reddish tint that I like. I used toned down olive drab and the Humbrol brown to paint
assorted streaks to simulate water run-off. All the periscopes and glass were then painted
with the Polly-Scale Scale Black. The model was allowed to dry for about a week and then I
applied two coats of Model Master Dullcoat to seal it. Model Master Steel was lightly
dry-brushed on all the metallic parts and four coats of Polly-Scale Glosscoat were applied
to the glass.
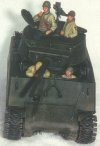
And lastly…
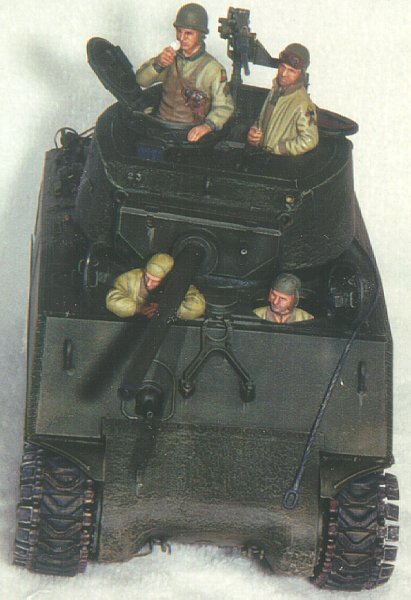
The crew members was taken from the DML and Verlinden kits and were
built stock with the exception of moving the driver’s head. They were painted with a
combination of artist oils for the skin tones and Model Master enamels and Tamiya acrylics
for their clothing. Incidentally, as these were only my second set of figures to ever
paint, they were painted before construction of the tank so I could decide whether to
leave the hatches open or closed. The crew-served .50 caliber machine gun on the turret
comes from Cal-Scale. It is a little big, but I liked the detail it has. I added the Aber
photo-etch ammo box tray to complete this assembly. The crew duffel was taken from the
spare parts box and consisted of C-ration boxes and ammo crates with a few tissue paper
bedrolls thrown in. A piece of tissue was then soaked in white glue and draped over the
equipment and model ship rigging string was used to secure it.
In Conclusion
This wasn’t intended as a review of the Tank Workshop M4A3E2 conversion, but for
the modeler who is timid about attempting a conversion, I highly recommend it. It has very
little flash and superb detailing. The Tamiya kit is an older offering, but is still up to
par with newer kits as far as detailing and ease of assembly. With the inclusion of the
Aber photo-etch set, it renders an accurate and unusual variant of the Sherman family.
Parts used:
Tank Workshop- M4A3E2 Conversion #TW0073
Tank Workshop- M4 Sherman Hull Detail Set #TW0074
Tamiya- M4A3 Sherman #35122
Aber- M4, M4A1, M4A3 Photo-etch Detail Set #35032
Verlinden- M4 Sherman Update Set #VP 0204
DML- U.S. Tank Crew (NW Europe 1944) #6054
Verlinden- U.S. Tank Crew WWII # 0134
Jordi Rubio- M1A1 Turned Aluminum Barrel #TG-42
Reference:
Sherman- A History of the American Medium Tank, R.P. Hunnicutt, Presidio Press,
1978
The M4 Sherman at War, Steve Zaloga, Concord Publications, 1994Modeler’s
Guide to the Sherman, Pete Harlem, Ampersand Publishing, 1999
M4 Sherman, Wojciech J. Gawrych, Wydawnictwo Militaria, 1994
Sherman in Action, Bruce Culver, Squadron/Signal Publishing, 1977
|