
Centaur Dozer
Ian Hanratty
This kit is again cast in white metal (as are all M.M.S. kits). Early on I had decided to show this vehicle with the crew hatches open to do this require that the moulded closed hatches have to be opened up , to do this I first of all drilled a series of 0.5thou pilot holes around the inside of the hatches, next the opening was cleaned up using a jewelers file. When I was happy with this I added a false floor from plastic card. The hatches were built from thin plastic card, detailed with micro strip and miliput.
On the engine deck there are four small circular plates that on the real vehicle have a hole in the centre, and are surrounded by four rivets each. These rivets where shaved of a AIRFIX WW1 Tank kit. They where then glued onto the kit using kristal klear floor polish.
On this model the track units and dozer arm support frames where filled in with metal flash that had to be cut and drilled out. When this was finished I added the track units to the hull sides , then I added the support frames, then I built up the dozer blade and support arms, these in turn where added to the hull side support frames. Then I built up the dozer blade a frame support structure on the hull front. I then finished of the model construction by adding all the small fittings including the lights, d shackles, light guards, lamps, tow hook.
I left of the dozer blade control wires and antena wires until after the model was painted. On this kit I decided to use crew figures from the excellent wargames south west range of white metal figures. The figures I chose were wearing the late war pixie suit.
The crew stowage was again can from a mixture of sources, the can net and tarpauline where made from a mix of miliput and plastrecine which was rolled out flat in a plastic bag dusted with baking soda. the tarpauline was then drapped over pieces of plastic strip, resin boxes, and white metal fuel cans. The folds where worked in using cocktail sticks and scalple blades.
The can net was rolled out and positioned on the hull with foldes again worked in with cocktail sticks. The model was then painted and weathered as per the SHERMAN kit of the above. The leaves where now added to the cam net using dyed tea leaves which where sprinkeled on to neat wood glue on the cam net. When dry this was given a top coat of kristal klear.
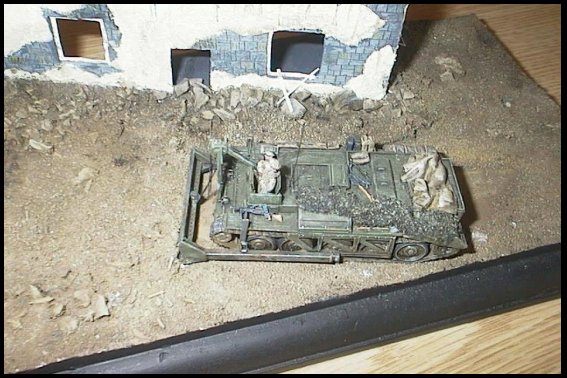
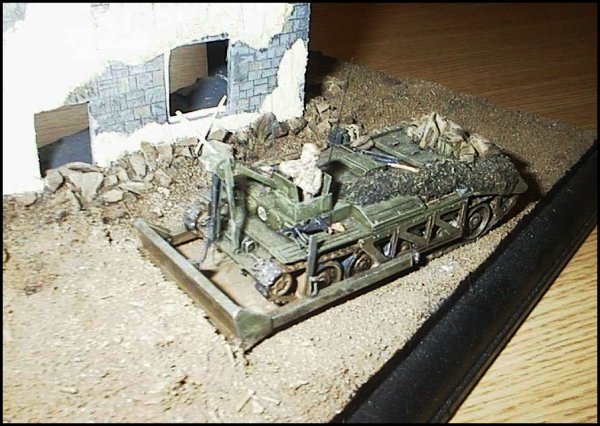
Decals where from the BW MODELS range, MATCHBOX CHURCHILL AVRE kit. And depict a vehicle of the 26th ASSAULT DOZER SQUADRON, 6th ASSAULT REGIMENT ROYAL ENGINEERS, 79TH ARMOURED DIVISION. DURING MARCH 1945. And was set in a diorama base depicting the vehicle in the prosses of clearing a way throught the rubble of a ruined GERMAN town.
The model was then painted in a mix of artist and vallejo acrylics. The building was then given a wash of dark brown water colour.When the model was finished I added the final touches in the from of a BREN gun and bushmans saw from the excellent C.M.S.C. range.
| Main | What's New | Articles | Reviews | Gallery | Think Tank | Contests |