| |
Rain marks
by Mig Jemenze
It is easy to find a modeller who call "rain marks" to a wash
or conversely since, until a few years ago, the modelling vocabulary was
reduced to its minimal expression. Anything that could be done with a
paintbrush and diluted paint was commonly called wash. In this way, we
were in a serious language mistake, as at the time of disclosing the different
techniques that coud be learnt by any modeller it appeared the obstacle
of the lack of language.. In this way, the wash was everything!!
In order to be able to create an accurrate model as like we have it in
mind, it is necessary to be as much careful as possible to decide which
techniques are going to be used instead of anothers. The combination in
greater or minor measurement of those diverse techniques will give us
as result the most exact scale model that matches the original idea or
will take us so far away from it irreversibly.
What is it?
The rain marks is an technique inspired by the atmospheric effects that
act on the objects. Its application and execution is on the contrary,
as it is the most opposed to the reality. It is, therefore, a falsification,
an imitation of that natural effect.
What does it symbolise?
The powder and the dirt fallen on a vehicle or any object in a regular
way, it is dragged in vertical lines by the action of the rain and the
humidity fallen after. That dust dragged by the water tends to dry itself
and to draw some peculiar linear shapes of different width and opaquenesss.
That is just what symbolizes the rain marks, solely that.
Of course, the rain marks can be originated also on horizontal surfaces,
therefore it would happen to draw some shapes again but homogeneous and
circular, without being appraised great changes in its general draw.
How is it doen?
We can follow diverse ways to the time to executing a rain mark. Some
are more effective and some other more difficult, but all are valid and
each modeller can use his own method. I advise you some ways that I use
to apply to my models
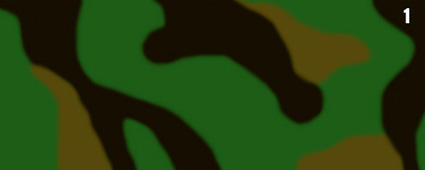
Acrylic rain marks: following the rain marks table that
I present you in those illustrations, we begin from a base color, with
or without any decoloration, as this is not relevant and it has no influence
on the final result. (1).
If it is enamel based or trupentine based filters have been applied underneath
before, we will apply a subtle, thin and almost inapreciable Tamiya dust
colour airbrush layer so this helps to the rain marks to take hold suitably
to the surface (2).

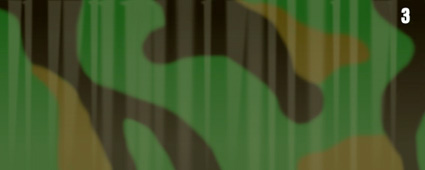
Over that thin airbrushed coat we begin to draw the first rain marks
lines with an medium, soft, round and pointed paintbrush, working with
a colour mixture of Tamiya Buff with a 90 % of water. This color has the
property that when still wet it looks like transparent, but when we let
it dry we will observe how it turns lighter and opaqueness. Much CARE
WITH THIS!. It is very important to keep it very diluted in water if we
do not want to loose the previous paint work, so it is worths to go step
by step and to repeat this process as much times as necessary (3).
Once the first irregular rain marks undercoat of different width and
forms coat dries, we will give a second layer with the same dissolution
but triying, this time, that the new lines that we paint do not cover
the previous ones and being superposed creating a kind of vertical grid
(4).

Finally we unify the works with a soft and thin dust, with, again, Buff
color airbrushed, as illustrated (5).

Greasy rain marks: there is another way, if we want to
be successful and we are looking for a stumped and smooth effect but,
at the same time, more evident. Drawing directly with enamels, we trace
the colour lines and then we will mix and stump them with a clean paintbrush
and trupentine, melting them until a smooth effect is obtained. But letting
some zones more opaque and other more intense.
Dry rain marks: this represents exactly just like the
two previous ones but it is made directly with pastel chalk in powder
or directly from the bar. With a medium paintbrush we catch the chalk
powder and we drag it in a lateral of the vehicle, attempting to draw
a line. We clean the paintbrush and then we try to soften that stain tightening
with the paintbrush. For best result, the surface must be matt finished
or the chalk will not be wrapped onto the surface. The final result is
not so accurate as the previous, but remain no doubt that it is a perfect
complement as it reaches to hidden corners or hard to cover zones where
the acrylic rain marks turns out of control.
Tricks
It will be very important to practice before in any other surface, since
at the beginning usually you do not tend to leave the lines perfectly
rigth and perpendicular. Once taken the trick to the paintbrush, already
we can go over the model. Monitor the painting dissolution, since this
is the key to get a real looking finish. If you do not get the best results,
you can repair it with some dust airbrushed, splashed mud or similar effects,
but do not discouraged as it will be needed to spoil a pair of models
before to get satisfied with the results.
Use it to...
...Unify complex camouflages, to represent armour or vehicles in commonly
rainy areas, to be the perfect base to larger mud or dirt effects.
Be aware !!
You have to be careful that your vehicle don´t looks like a zebra. This
is a complementary technique, that is to say, that alone does not work absolutely.
Neither it is necessary that it will be very evident nor that will be present
in all the surfaces of the vehicle. And that´s all. Now I believe that you
are late to start with a paintbrush and to practice in in that flaming model
that take you 3 years to assembly it. With this sacrifice...modeling Lords
will be pleased. I promise you.
MIG - 1999
|
|