| |
Trumpeter Challenger 2 MBT
by Neil Whiteley-Bolton
Enough has already been written about this vehicle and its history, for
me to forsake any introduction, other than to say that this an out-of-the
box review of Trumpeter's 1/35-scale kit of the Vickers Challenger 2 MBT,
currently in service with the British Army.
Whats in the box
The kit contains separate upper and lower hull and turret pieces plus
5 sprues of parts, all moulded in a soft, dark green plastic dark; a sprue
of clear polycaps for the road wheels; a pair of single-piece, 'rubber
band type' tracks; and a comprehensive decal sheet. The instructions,
in a style similar to those of DML-Dragon, are straightforward, but include
a painting and marking guide for just one vehicle – additional references
will be needed by anyone wishing to make good use of the kit's decals.
Commander's loader's and driver's hatches can all be fitted in either
the open or closed position, and optional parts are provided for the loader's
machine gun - original 'Scarff Ring' mount, or the more common pintle
mount. The front section of the engine deck is supplied as a separate
piece - so there is scope here for aftermarket manufacturers to provide
a partial (?) power pack. The up-armour pack, fitted to Challengers serving
in both Kosovo and Iraq, is not provided, but the Thermal Exhaust Cowls,
designed to reduce the vehicle's thermal signature, are. There are no
crew figures.
The Hydrogas suspension units are separate pieces that attach to bosses
moulded on the lower hull. This is fortunate considering that the positioning
of these units is problematic – but I will get to this later. Cutouts
in the suspension units 'key' with lugs on the road wheel arms to ensure
that the wheel height is correctly set, but these can always be removed
by modelers wishing to depict a vehicle traveling over uneven ground.
So what's the kit like? Well, pretty good actually. It's not Tamiya quality,
but then again this kit sells for one-third the price of a Tamiya kit!
Moulding quality in general is OK – think Italeri, but some pieces
are worse than others. The really good news however, is that the kit is
pretty accurate, in fact with the exception of a few minor problems, nearly
all of which can be easily fixed, it matches all of the references I have
to within +/- 1mm.
Speaking for myself, I would rather have a kit that, with a little extra
work / expense, can be brought right up to today's standards, than one
which is beautifully detailed, but so inaccurate in terms of basic shape
and size, that all of the major components have to be replaced in order
to make an accurate kit – e.g. Academy's Merkava III.
Quality Issues
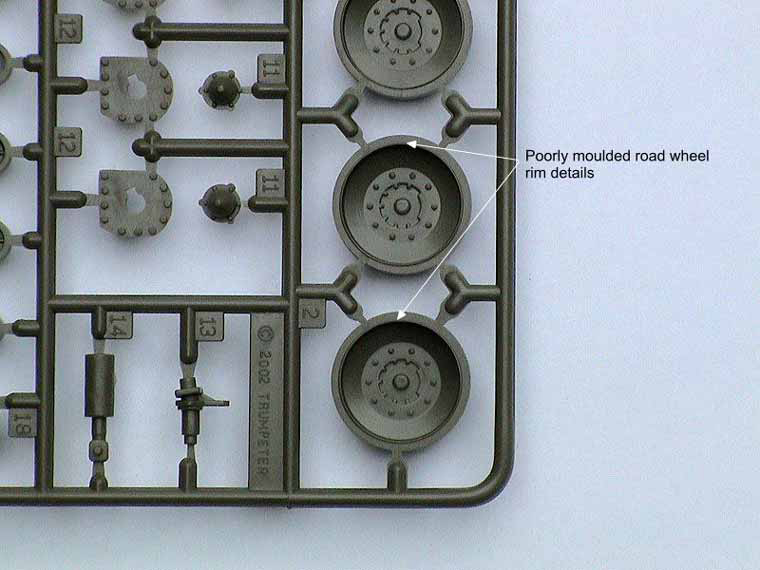
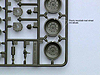
The poorest parts are, without a doubt, the road wheels. In my kit every
wheel has a rim that is not only too thin, but varies in both height and
thickness around the wheel's circumference (see Figure 1). I have heard
that some examples are even worse.
The tracks are pretty poor with, as noted by other reviewers, poorly defined
end-connectors. Parts such as the 'bazooka plates' and TECs are overly
thick, and will need to be either, thinned down at the edges, or replaced.
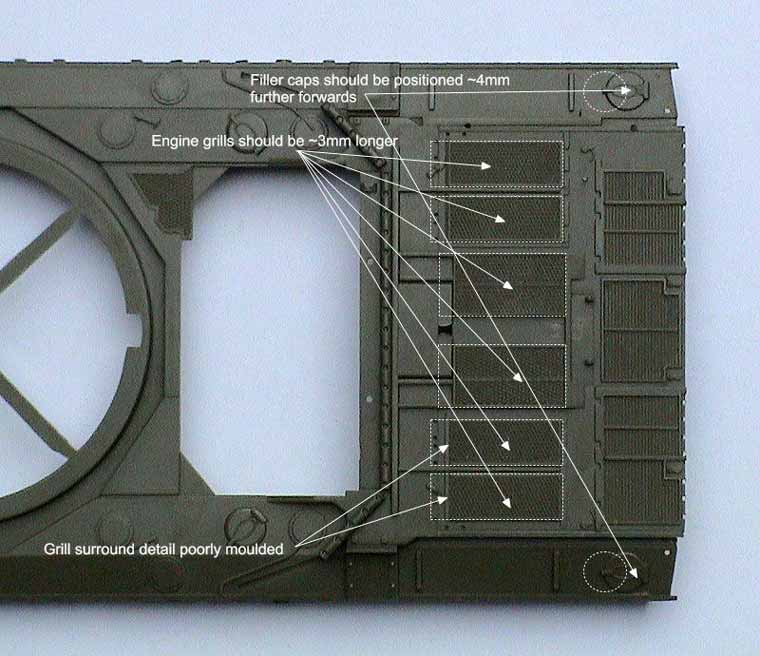
The mesh surrounds on a number of the engine deck grills have not survived
the moulding process
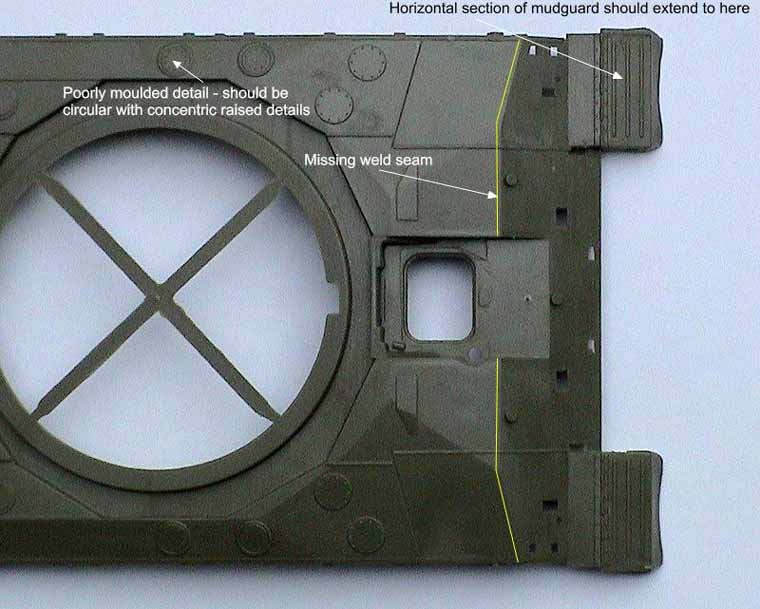
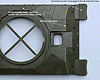
A number of the circular cover plates on the upper hull, adjacent to
the turret, show details that should be concentric but aren't.
Accuracy Issues
Turret
Trumpeter has faithfully captured the shape of the Challenger turret.
Recessed bolt details on the base of the commanderâs cupola have
been represented simply as holes – as this is a separate piece we
might expect to see the after market manufacturers offering a replacement.
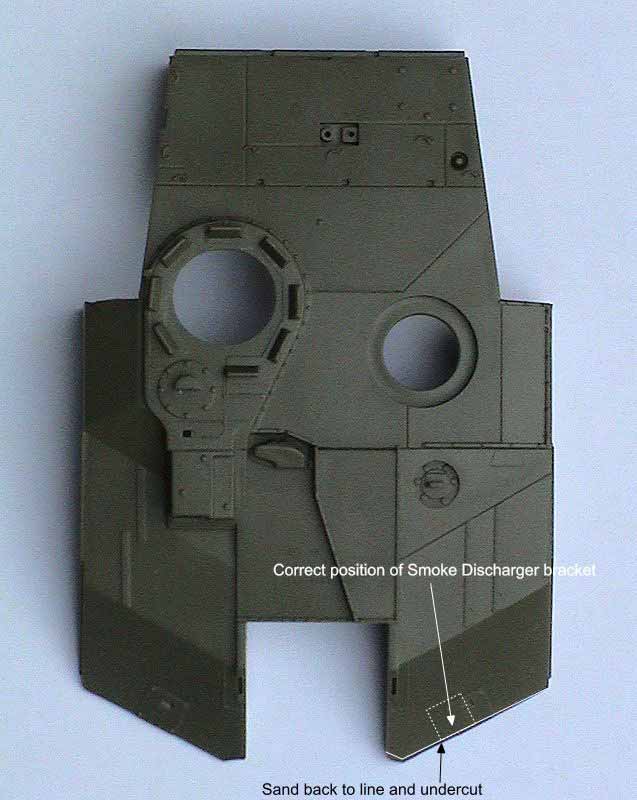
The smoke dischargers need to be repositioned inboard of the location
indicated by Trumpeter.

This will require the modeler to rebuild the mounting plates, but no
big deal – even I can do this.
he purists among us may wish to add an undercut to the lower edges of
the turret front plates, simultaneously reducing the height of the plates
by ~0.75mm closest to the mantlet – I hope figure 4 makes clear
what I mean.
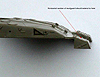
Upper hull
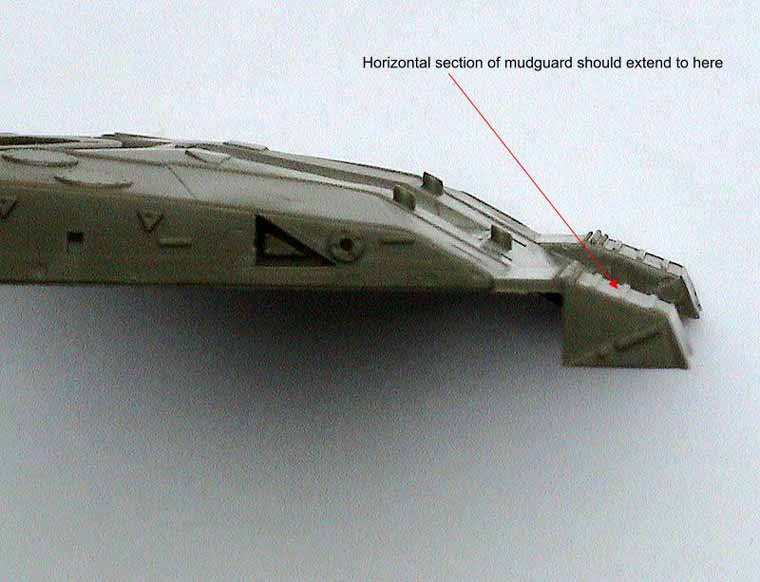
There is a minor dimensional problem with the front track-guards. Although
the overall dimensions are correct, the point at which the track guards
angle down from the horizontal is flush with the front of theglacis, whereas
it should be ~3-3.5mm further forwards.
There should be a weld seam, running across the glacis, just aft of the
point where the glacis angle changes.
The filler caps at the rear of the hull, both left and right, are located
to far aft, and should be positioned much closer to the rear hull stowage
bins .
The engine deck grills are too short, and should extend further forward
.
I do not have measurements for the TECs, but my 'number 1 eyeball' tells
me that they are 'iffy' to say the least.
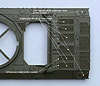
Lower hull
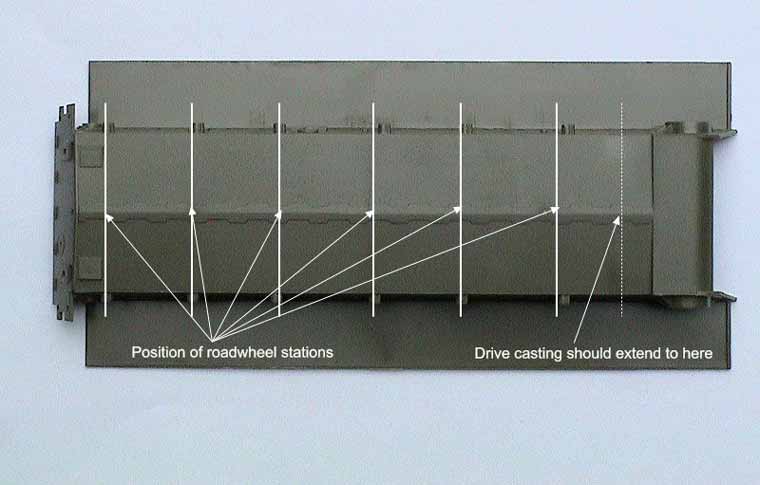
This is the real problem area. Not only have Trumpeter staggered the road
wheel positions (as per torsion bar suspensions), but the drive casting
is inaccurate.

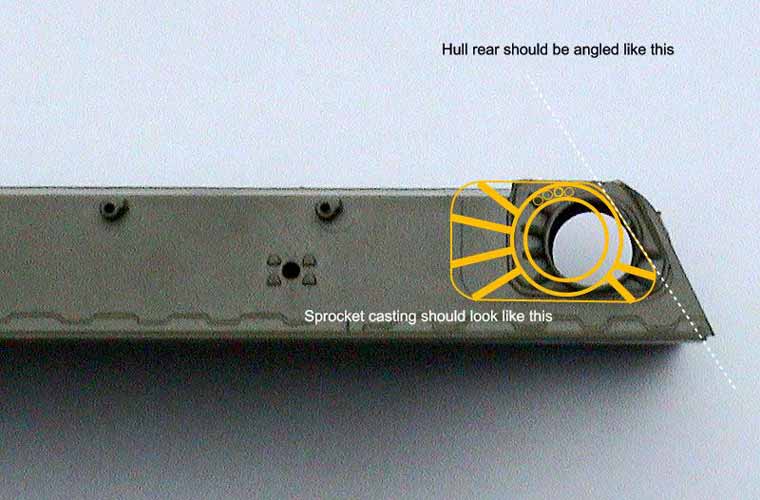
This casting makes up the entire rear section of the lower hull, and includes
6 radially disposed (4 directed to the front, and 2 aft) strengthening
arms on each side where the drive shafts exit the hull. The forward facing
strengthening supports are far two short, as is the entire casting, and
to make matters worse, Trumpeter have positioned the drive shaft exits
too far aft, consequently the rear hull face is angled too steeply –
this is probably the root cause of the poor fit between the rear hull
plate and the lower and upper hull. Interestingly, there are signs that
Trumpeter modified the moulds in this area - ironically the original size
and position (as suggested by the raised lines on the lower hull sides)
would have been much more correct.
This is the only problem that is going to be difficult to resolve. The
appearance of the actual casting is unlikely to be an issue for many people,
but having the drive sprocket positioned ~4mm too far aft probably will
as it really affects the appearance of the finished kit.
Repositioning the road wheel stations should be no big deal, and I have
indicated the correct positions below.

Accessories
There are already a number of plastic, resin and etched metal accessories
out there to improve this kit, and by all accounts there are more on the
way. As I do not yet have any of these accessories, and have not seen
them in the 'flesh', I will not attempt to review them, but provide only
a short description for completeness:
Accurate Armour – Challenger 2 Wheel Set (A073)
Cast entirely in resin these look fabulous.
Accurate Armour – Challenger 2 Track Sprockets (T68)
Resin tracks with white metal drive sprockets and what appear to be resin
rings to detail the drive casting.
Armour Track Models – Individual Track links with resin idlers and
drive sprockets (TK-13)
Having only seen these on PMMS I must say they look great.
Eduard – Challenger 2 (35565)
from the photographs on the Eduard web site it is clear that this is a
comprehensive etched detail set. Amongst the replacement parts provided
are both track guards and engine grills, but the extent to which they
address the accuracy problems I have highlighted is not clear –
I guess that I'm just going to have to buy a set.
Apparently, both Cast-Off and AEF designs have announced OIF up-armour
sets, but I have no further details.
Accurate Armour have stated that they will be producing a number of additional
upgrade sets – including a replacement turret, and Gordon Brown
of Cromwell Models is likely to produce a number of correction sets.
Conclusions
This kit has been criticized by a number of people, rather unfairly in
my opinion. Perhaps itâs because Trumpeter's kits have been getting
better and better, and this kit represents a step backwards, quality wise,
from their IS-3 or M1 Abrams kits. Nevertheless, it is basically accurate,
and sufficiently cheap that the wheels and tracks can be replaced and
you will still have spent less than you would on a Tamiya kit. I like
it, and plan to build a number. The fact that I already have 4 resin models
of this vehicle means that I am happy to wait to see what correction kits
appear before actually building one.
|
|