|
Ferdinand Painting, Color Modulation Style |
|
 |
| by Mike Rinaldi |

Introduction
Sports. We have all experienced them at some level or another, even if just as a spectator. One binding factor involved in athletics is the term—practice. “Practice makes perfect!” coach used to tell me. How many of us have heard that one? A lot, I’m sure. Today my “sport” is our hobby and I have always liked to paint more than any other “event”.
Because of that, painting has become a top priority over the past few years. I relish the chance to try new techniques and products whenever the opportunity arises. Looking back, I can remember when I first discovered Missing Links, having recently returned to armor modeling. Browsing thru the many Galleries definitely made an impact. Ever since then, I strive to push my own work to greater heights and pay close attention when new ideas and methods emerge. Recently, such an event occurred and I had no choice but to dive right in and see what all the commotion was about.
Introduced by my friend Adam Wilder, “Color Modulation”, is a new way to execute the finish of a model via a variety of painting processes that lead to an extremely unique final presentation. Since then Mig Productions has released a DVD showcasing Adam and his Color Modulation (CM) style, and it did not take long for me to get my hands on a copy. Naturally, when it arrived I immediately watched the DVD a few times to get a feel for what Adam was teaching. With inspiration in hand, I was ready to get started on my own project, however, coach was still echoing in my head—“practice, practice, practice”. Hmm, I should stop and plan out a test project for the purpose of learning CM before I apply it to a fresh box of plastic.
This is the story of my test project. During the painting process, I put up a blog-style thread on the Mig Productions forums and from the encouragement there, thought it would be a great idea to summarize the work here on Missing Links. I think that is only fair. The articles presented here by Mig have inspired and encouraged many of us to strive for much higher levels of finishes in our own work.
Preparation
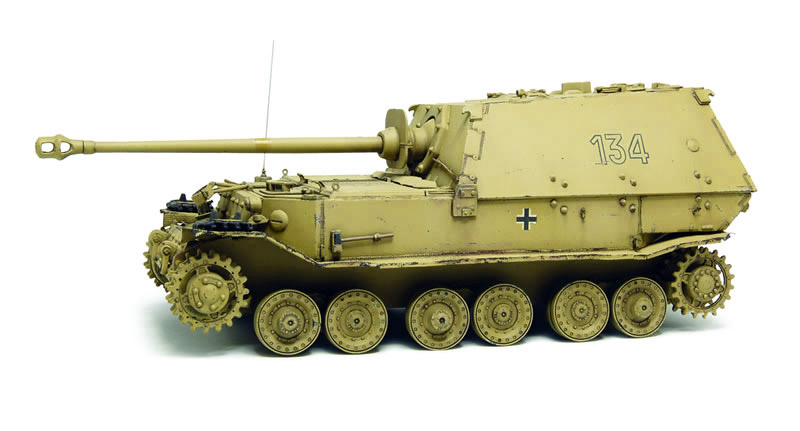
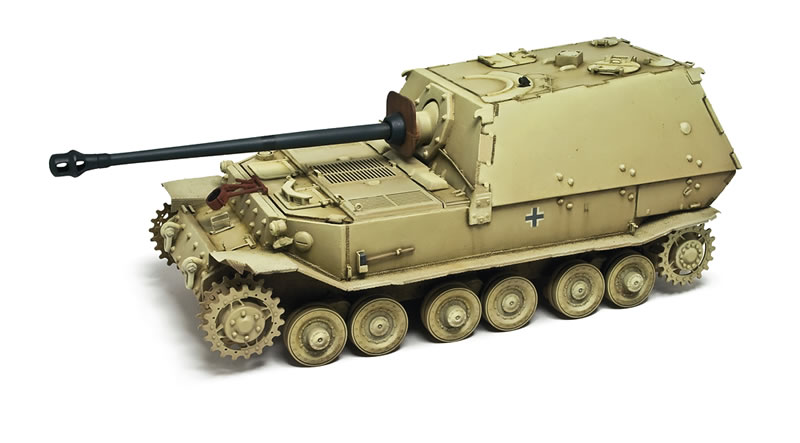
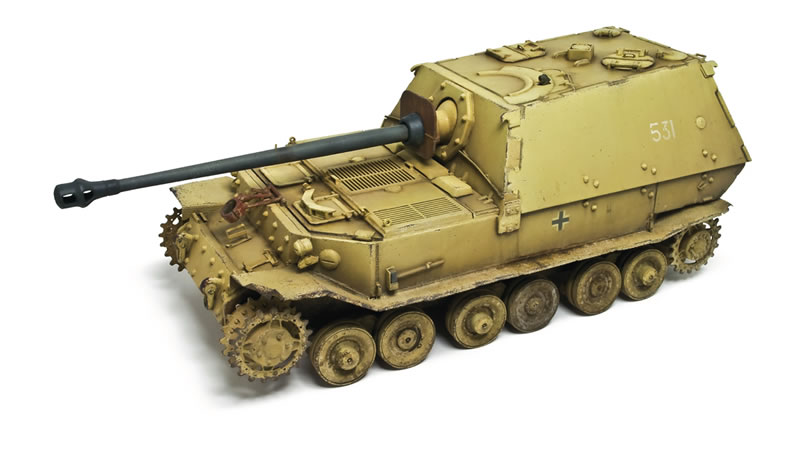
I will need a guinea pig to use for this project. Luckily, sitting on my shelf like a queen was a half-finished 1/35 Dragon Ferdinand tank destroyer. Purchased years ago already built on eBay; it wore new PE parts and came equipped with Friulmodel tracks but had enough imperfections to be a perfect choice. Its large slab-sided structure was just right, since I plan to follow along with Adam on his DVD as he paints a similar size Jagdtiger. I bought the model with the intent of repainting it, and had gone so far as to give it a new base coat and markings, as seen here:
With the model ready to go, I collect the various paints and products necessary to make the transition to the new paint job. My primary goal was to learn, so I will use the same range of Tamiya paint colors that Adam uses on his Jagdtiger, with one minor exception. I will not pre-shade the model in gloss black prior to applying the new base coat. I regret that choice and now wish that I had, because the shadows from the black create more contrast in the end, but ultimately having that knowledge was still very useful regardless.
After viewing the DVD several times, I begin to understand the principles Adam was discussing and please allow me to summarize them before presenting my project. The goal of CM is to artificially enhance the model so the viewer sees more than what is really there. This is nothing new to us; figure modelers and 2D illustrators have been using this idea for years. Verlinden-era dry-brushing and even current post-shading trends dance around this same idea. But, no one has ever attempted to fully realize the 3-dimensional volumes during the painting of a military scale model. The basic processes and techniques involved are designed to enhance the 3D volumes and details of a model by playing up the balance between dark vs. light, shadow vs. highlights and so forth. Executing this goal is accomplished primarily with an airbrush by applying gradations of color to give the model more depth. This is then followed by brush painting smaller fittings in a contrasting color to illustrate their presence and enhance their appearance on the surface. To break it down even further, the fundamental theory of CM is based upon using a singular light source, and the level to which you take this idea is inherently flexible. One of the beauties of CM is that you can add a little, or a lot of it to your model. For my Ferdinand, I intend to use the full battery of techniques during the multi-step painting process.
So let’s take a look at how this study in painting turned out…
Airbrushing Stages
I will say up front, get ready for a lot of airbrushing. CM requires three main levels of color (light, medium, and dark) to achieve proper gradations between the values, which are broken into stages as you lighten each progressive step. Here I will use four stages of airbrush application to realize the final base coat, but first I must choose a source from which the lighter areas originate. I decide to keep it very simple and intend to have the light coming from the center upper frontal area of the vehicle, and will also work well with the downward slope of the top hull.
Stage 1
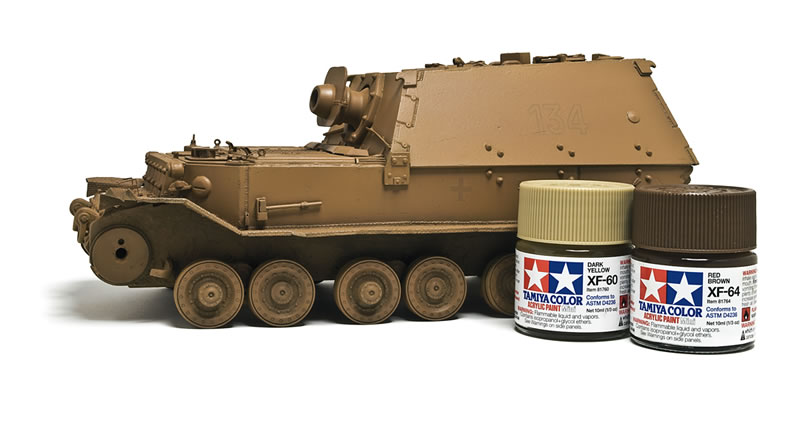
Because of the subject itself, the model is predetermined to have a base coat of dark yellow, which is convenient for my goal of following along with Adam’s Jagdtiger. Thus the first layer of color I apply is a coat of Tamiya XF-64 Red Brown with a few drops of XF-60 Dark Yellow added. (I thin Tamiya acrylics with lacquer thinner in a simple 50-50 ratio). I spray the darkest recesses first, gradually working my way up to the lighter upper surfaces. You can already see the intentional spray pattern developing from the darker lower right to the lighter upper left areas. I will maintain this pattern throughout the entire painting process to preserve continuity with the light source.
Stage 2
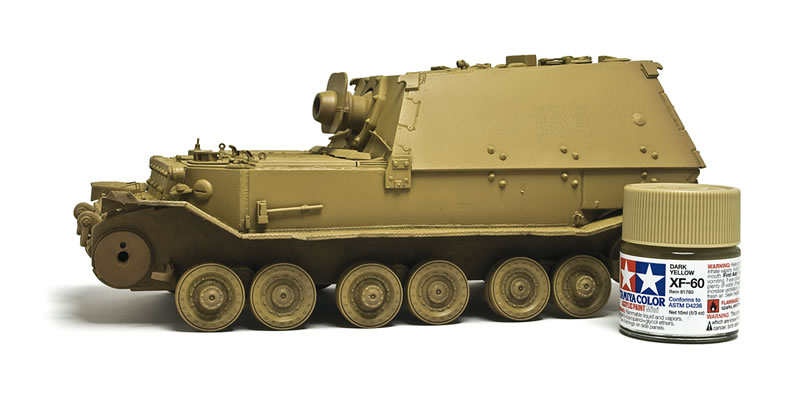
The subsequent spraying sessions will continue to utilize XF-60 as a base to varying degrees because it is the source of the dark yellow. I will gradually lighten the model with each successive layer as the CM painting continues, so the second layer of color is based upon straight XF-60 as the middle (or medium) layer of the base coat. Note that the darker lower areas receive less paint as the colors are carefully blended together, as seen above.
Stage 3
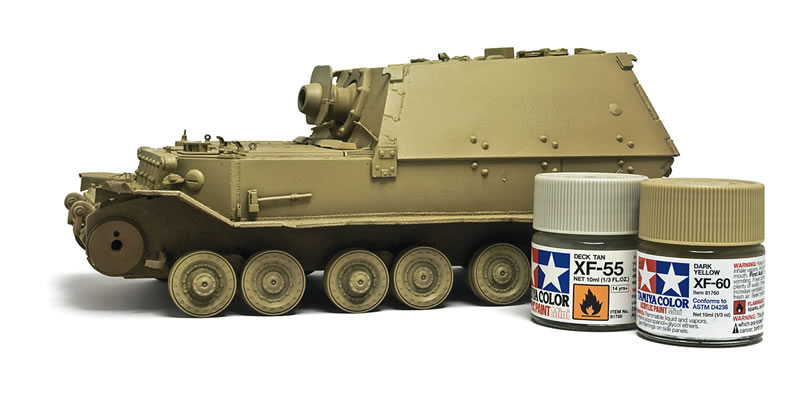
For Stage 3, I add XF-55 Deck Tan to the mix to lighten up this stage of paint application, being very careful to always follow the established gradation pattern. The contrast between light and dark is also starting to become more apparent here.
Stage 4
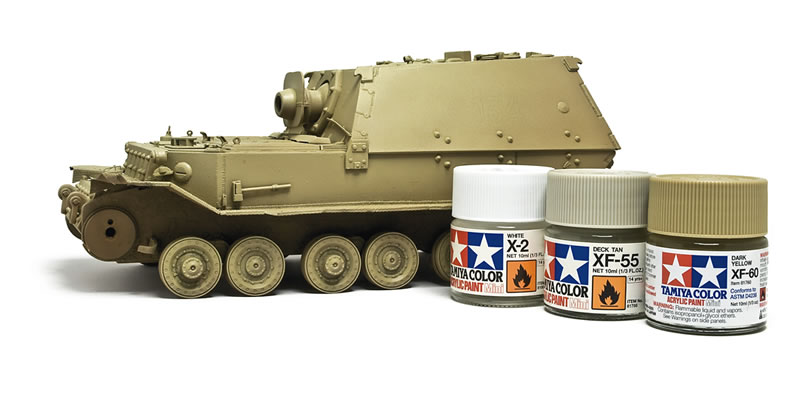
The final airbrushing stage requires another round of lightening with the addition of X-2 White into the mixture. The paint is thinned to a 60-40 ratio to allow for finer levels of gradation. By this time, spraying only occurs on the upper half of the model; the lower areas remain at the value show and are not lightened further.
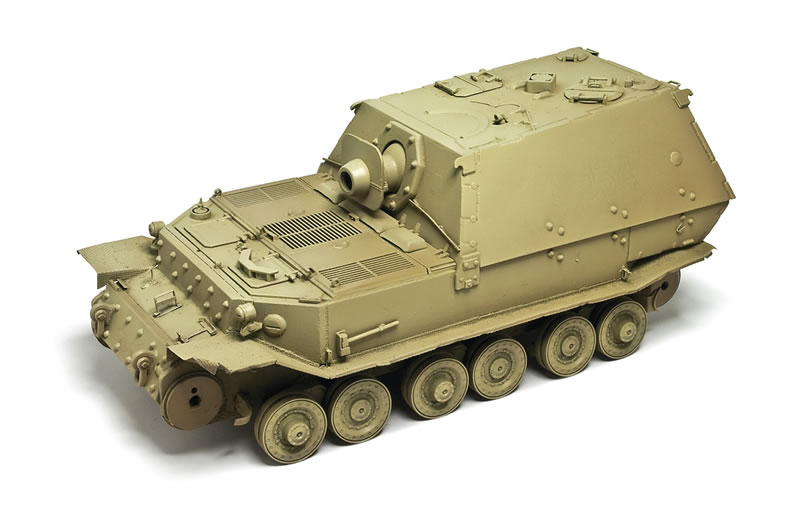
The above photo illustrates the completion of the initial airbrushing stages. It took approximately 3 hours to complete this painting process, factoring in the time to clean the airbrush periodically. Also note that the addition of X-2 White adds a semi-gloss sheen to the paint, which I incorporate into the base coat to facilitate the application of washes and oil paints to be applied later.
Detail Modulation
The next step is to paint all of the smaller details like hatches, covers, vents, grilles, etc. with various lighter yellow and tan shades in an effort to bring out these smaller details--the intent of which is to enhance them for the viewer. The contrast between the colors for these details and the base coat should be related and within reasonable limits.

For this step, I use Lifecolor acrylics because of their exceptional brush painting qualities. I make multiple mixes from Light Stone, Italian Sand, and Yellow, and brush them onto the many small surface details present, applying the lightest colors to the upper front areas, and going progressively darker as I move to the rear of the model. I also paint the gun barrel, mantlet, and travel lock at this time. (These are subjective choices and only intended to provide variation from the large amount of yellow.)
This step is the second main painting process of CM. Once the base coat gradations are airbrushed, the rest of the painting is handled in this manner. Throughout the entire project I am mindful of the contrast that was built up, and it is this contrast that makes CM work properly--too little and the subsequent weathering will make it all but disappear. That is also part of the reason I chose to practice on this model first; to get a feeling for the right balance between the light and dark areas, and the surrounding surface details.
Enhancing Detail with Oil Paints
When CM made its debut, a few modelers jumped at the chance to paint their own models the same way. Upon further review, I notice that most of them were skipping an important step. On the DVD, Adam explains the process of adding oil paints to the light and dark areas to provide another level of gradation and surface breakup.
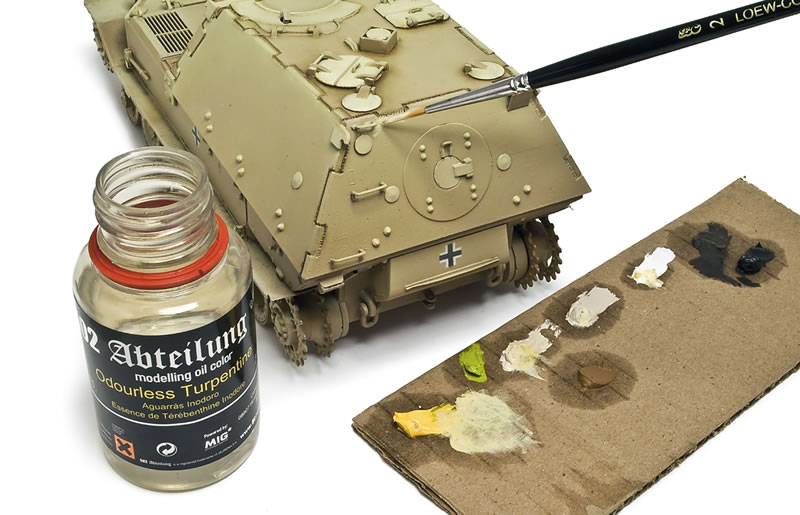
I prepare a cardboard palette of oil paints. (Cardboard is used to soak up the linseed oil so they will dry matte). For the lighter areas, I use a blend of Yellow and Buff oil paint and apply it directly to the area I want to emphasis like the upper edges of the hull.

I blend these in with a clean brush and a touch of thinner. Do not use too much thinner or it will turn into a wash, the goal is to create another blended layer of color to provide a little more contrast and depth to the finish.
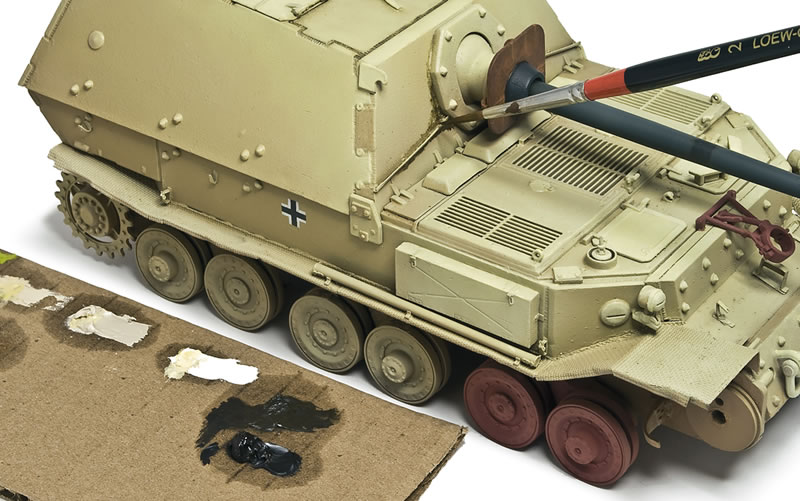
The shadows and darker areas also receive the same treatment. I enhance these darker areas with Industrial Earth and Shadow Brown, Again I apply each color directly to the surface of the model.
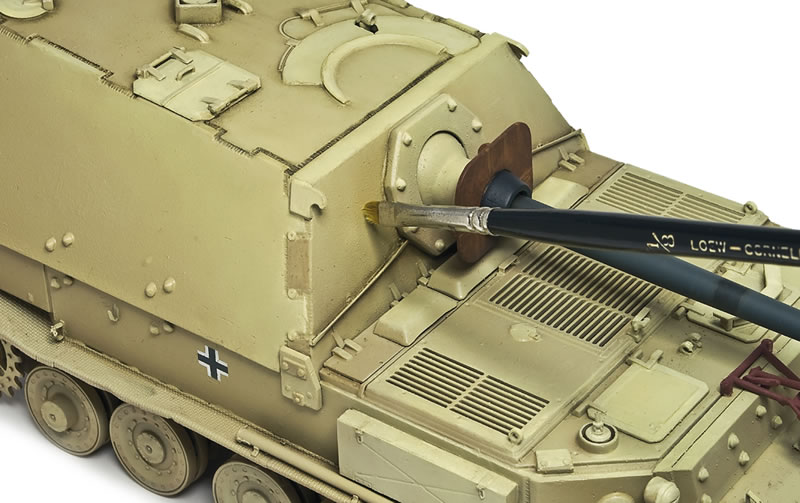
I blend these oils in the same manner as the light colors. I also start to add dark shadow recesses to the prominent weld joints, which I continue around the entire model. I find the oil paint blending stage to be quite involved, yet absolutely necessary. It truly does add a lot more depth to the paint, and in addition, it is very important after these steps to let the oils fully dry over a few days time.
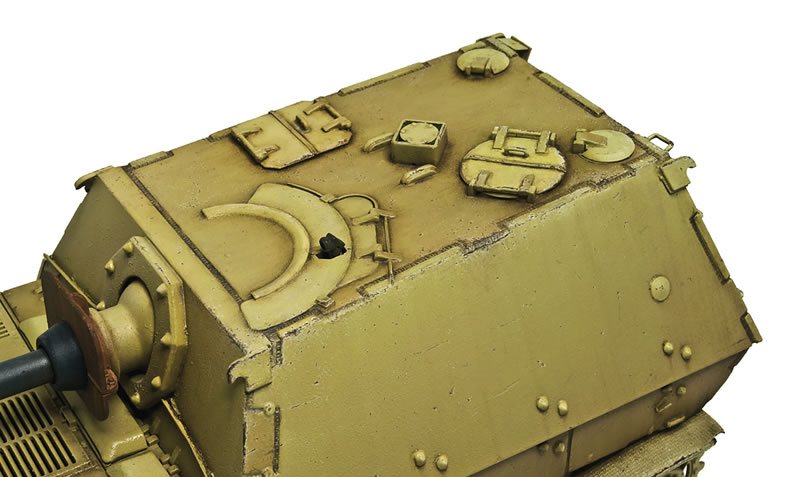
Here is the result of the painting stages to this point. The oils are completely dry, and the modulation has taken hold and presents a very different model to the one in the first photo at the beginning of this article.
Clear Gloss and Yellow
Because of the use of both dark yellow and red brown for the base coat, the resulting dunkelgelb color is not quite true to the correct hue. This is easily corrected by spraying a very thin coat of X-24 Clear Yellow over the model.
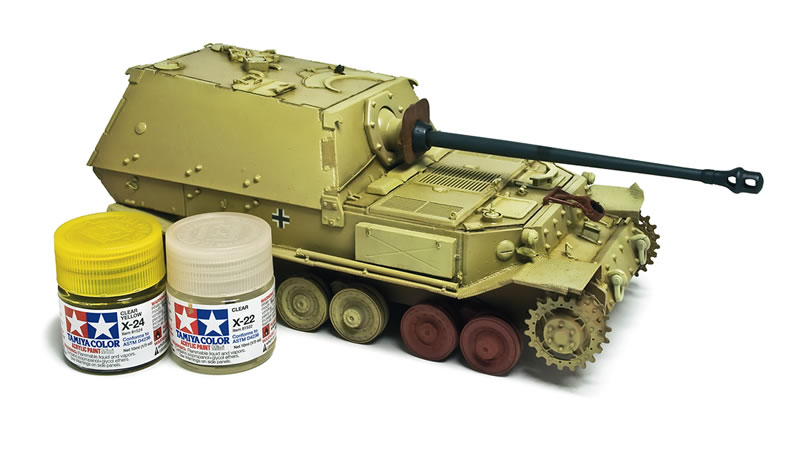
This has the effect of re-establishing a proper yellow to the base coat. I follow with a thin layer of X-22 Clear to provide a smooth gloss varnish in preparation for the washes and oil paint fading due up next.
Chipping
This is always a subjective step, but since I was following along with the DVD and Adam’s purpose is to use chipping to increase separation between surfaces, I feel it was necessary for me to fully utilize this step of the process.
Step 1 – Lighter color
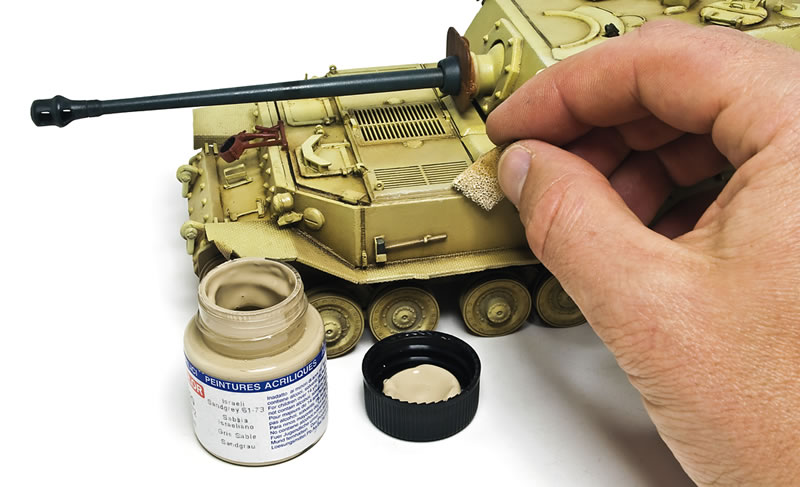
I use a small sponge with a light tan color, LC Israeli Sandgrey 61-73, for this step. I apply the chips to all of the sharp edges, and any detail that would see such wear. I prefer to use a sponge for the randomness and shape of the chips it creates, but this is only a matter a personal preference. A new fine tip round brush would also work fine here.
Step 2 – Steel color
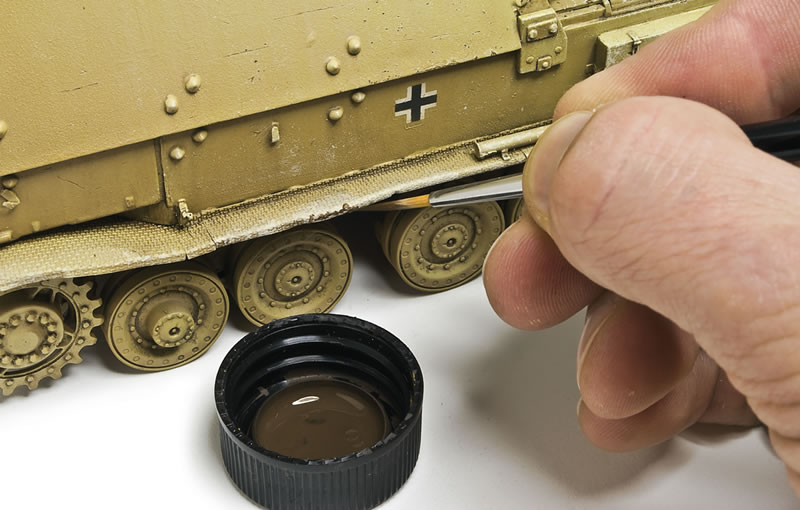
Once I finish with the sponge application, I switch to a new fine tip brush and use a dark brown color to paint in the center of each chip in order to replicate exposed metal. You can also use a red primer color, if you like.
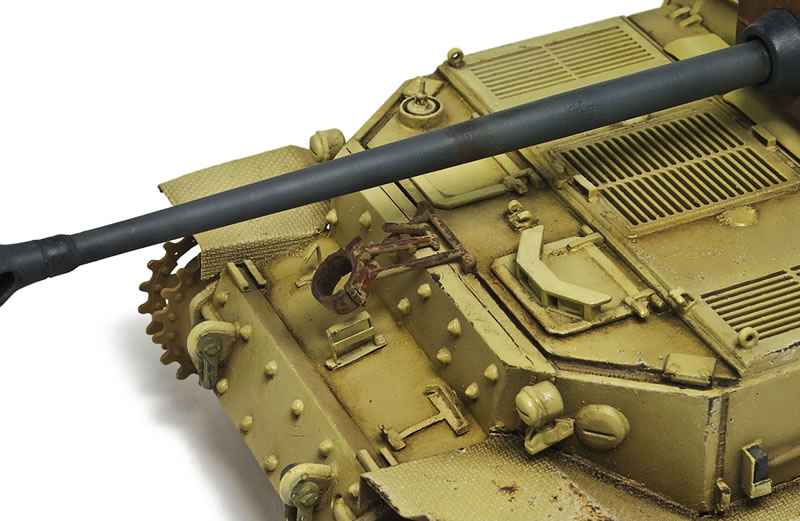
Here is the result of the chipping process. Notice that the modulation is already starting to fade a little, but the break up of the individual components is still clearly evident. This is intentional, as the weathering steps take precedent and begin to harmonize the paint job.
Washes
I apply a pin wash to all of the surface details to create false shadows around each one, and any excess wash is blended into the surrounding surface once dry.
Efforts are made to begin streaking the rain and dirt marks at this time. Notice that the gloss sheen is already starting to dissipate under the wash stages, and on a large model like this one, it can be a long process to completely go over the entire surface. To reinforce the CM, I use a darker wash color on the lower areas—all per the DVD sequences.
A Quick Layer of Hair Spray
In an instance of breaking away from the procedure set forth by Adam, I decide to take the opportunity to work over some of the details not covered with CM, namely the right front road wheel station and the gun travel lock.
Each was previously painted with red primer, but feel they are not up to the rest of the model’s paint job. So I give them a quick layer of hair spray and then spray them with XF-60, which is followed by some serious paint chipping.
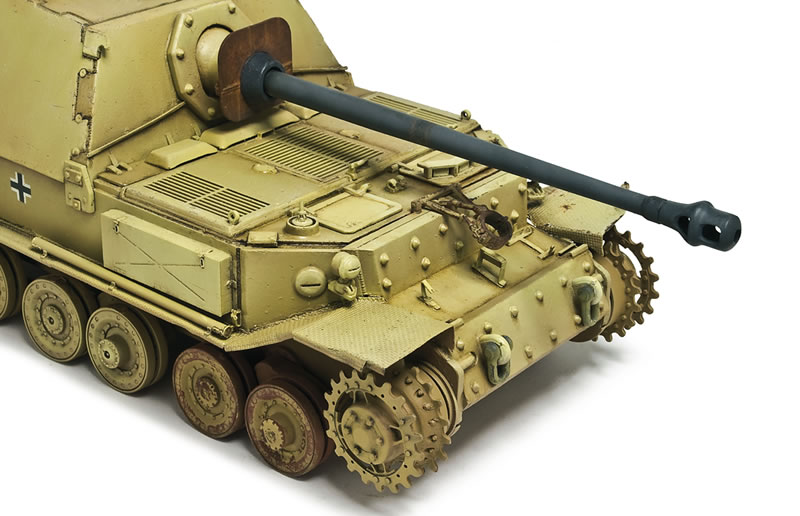
Time to Get the Model Dirty
At this stage of the process, I can now add some pigments to the lower chassis. As luck would have it, Mig Productions introduce two new valuable products in the middle of this project, “Oil and Grease Stain Mixture” and “Wet Effects and Damp Earth Mixture”, which I buy right away in order to apply both at this step.
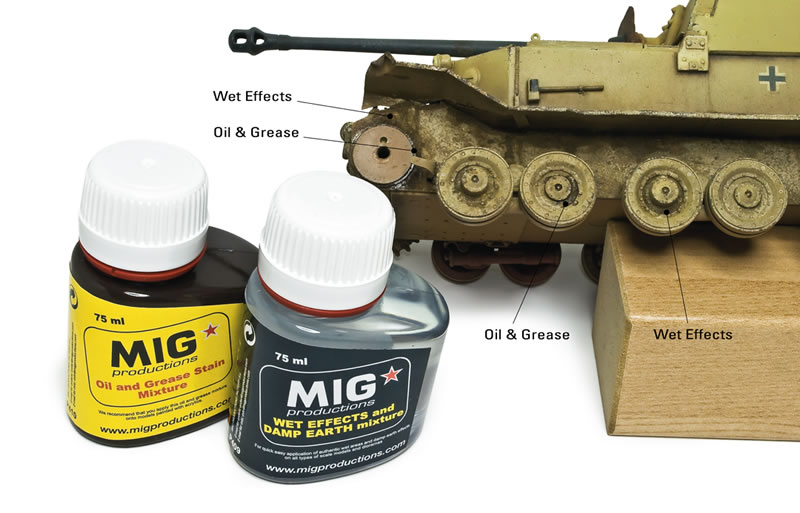
Once received, I set about applying them as instructed on the bottle. I find them easy to use and only require simple brush applications to be effective, and more importantly the results are what I was anticipating. I really love the darker, damp look to the pigments seen in the upper corners of the lower hull as a result of using these two new products.
How About Adding Camo?
The bulk of the CM process is completed now and most of what is happening is just standard weathering practices; the only difference being the use of darker values down low to maintain the established contrast. But part of me wanted to try more. I wondered how would it look with camo applied. Since this is a practice model, there is no better answer than to try it and find out.
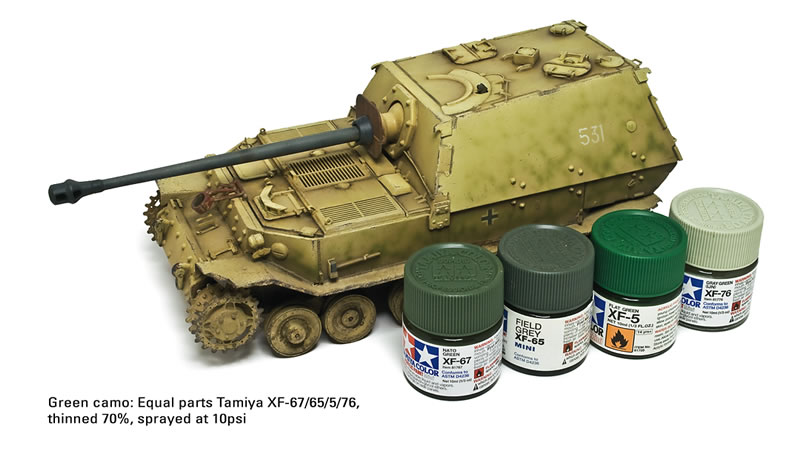
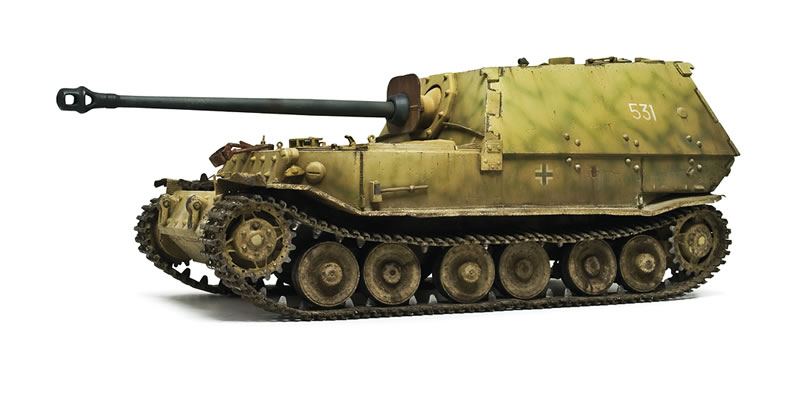
I decide to add a typical 654 Abt. spider web camo pattern to the model. (I am obviously wrong in how “531” was painted, so please excuse any historical inaccuracy at this point.) I spray the green mix in stages; very lightly at first, and then I add more opacity to the green the further down the sides I go.

This is a bit of a deviation from the CM manual, because I am working with opacity vs. lightening the color.
Final Elements and Thoughts
From here it is just a matter of adding the tracks and final pigment dusting. Any remaining fuel and oil stains, rust streaks, and dark washes are also added to finalize the weathering.
Overall, the above step-by-step process illustrates the rather dramatic transformation of this model from a simple dunkelgelb paint job to the far-more-interesting final result seen here. I had a great time and learned a lot, which was my primary goal; plus I saw first hand what the minor variances between each step is and how they affect other areas in the building of contrast and highlights. The entire process is quite involved and stages like the oil paint blending take time, both in application and drying. I will say that if I had continued to paint this model as seen in the first photo, it would not have captured nearly as much feeling and interest as using the CM style has done. For that alone it is definitely worth learning and utilizing on future projects. Like I said previously, its application has the ability to be incorporated to varying degrees and to your own choosing. It is inherently flexible and thus will be a valuable tool in your repertoire of techniques.
Because of this project I would highly recommend the purchase of the DVD, even though this is not a review of it per se. But to be able to watch it beforehand really made a difference in how I went about applying each step of the process to my model and think any of you wanting to try CM on your own project would benefit in the same manner.
I believe a special thanks needs to go to Adam for graciously introducing this new painting style to us. I always respect those that push themselves to achieve new and unique presentations, and in the evolutionary process of painting, Color Modulation will be a very important step in the ladder for us to climb. My thanks also go to Brett Green for allowing me to provide Missing Links with this article, even though it was only for the purpose of getting in some much needed practice.
Model, Images and Text
by Mike Rinaldi
Page Created 14 June, 2009
Page Last Updated
14 June, 2009
|