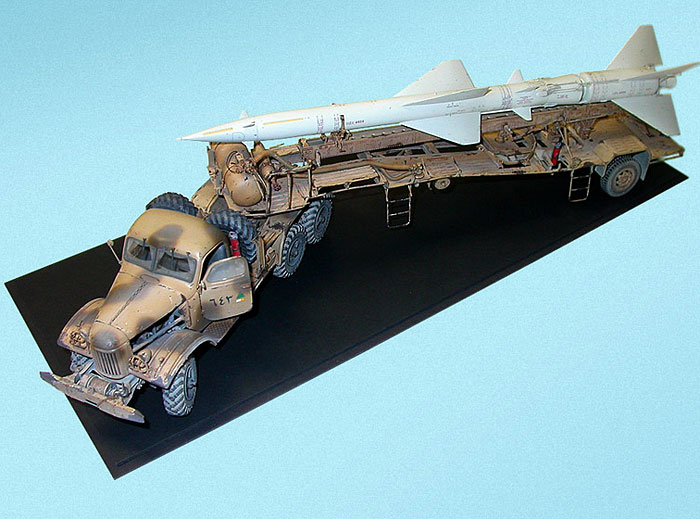
Although mainly an aircraft-builder I also venture into armour very
occasionally, and this Trumpeter 1/35 kit appealed to both sides.
However it wasn't until the RMMC
Model Club in Calgary ran a 'Four- plus wheels' contest that I
finally got motivated to start it. It's a huge undertaking- there
are literally hundreds of parts on 13 sprues, plus photo-etch,
tubing, rubber tyres and a nicely packaged cab. The plastic is
softer than, say, Tamiya's, but nevertheless the parts carry some
impressive detail. Since I know virtually nothing about the real
thing I decided to build it out-of-the-box.
Trailer
Because of my low threshold to
boredom I reversed the build sequence suggested in the instructions,
beginning with the trailer and finishing with the most interesting
element, the truck itself. The trailer begins with the chassis, and
although it's not particularly difficult it is worth ensuring that
the cross-members and the sides are perfectly square to each other.
To this framework attach the two large tanks, for which lengths of
copper wire are supplied which must be cut and bent to fit. The
parking wheels can be assembled in parked or travelling mode. I
chose the latter.
The rear wheels/suspension is
straightforward enough.
Although moulded in black rubber,
all the tyres look a little toy-like so I painted mine in a dark
grey colour.
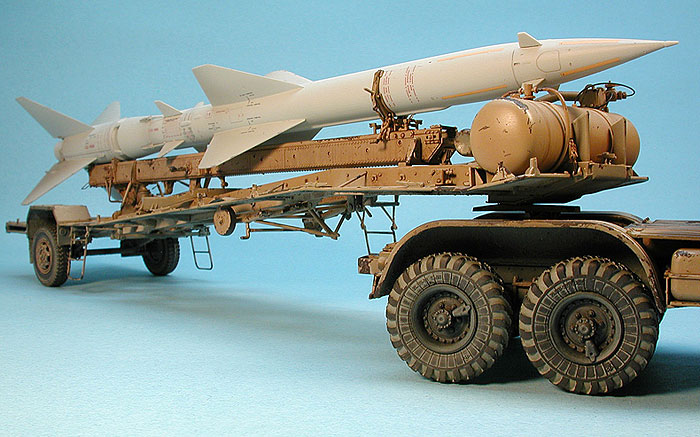
The loading rail on which the
missile sits is very nicely detailed, some of the tinier parts need
some fiddly clean-up but the finished assembly really looks the
part.
Perhaps the biggest deficiency of the kit is the number of ejector-
pin markings that affect many of the parts. True, many will be
concealed once assembled but some are much more apparent. The worst
affected part is the swivel (part J28); because of its complex shape
it's really difficult to eliminate the circular marks through
sanding, so I used a combination of sanding and re-skinning with
thin plastic card. Incidentally a photo-etch rail (guard-rail?) is
supplied for this part, made up of 8 parts (PE3, PE4). Mine resisted
all attempts to bend smoothly and eventually sprang apart, hurling
the supports into oblivion. It's currently missing off my model
until I get around to scratch-building a plastic replacement.
(Which, in all honesty, isn't likely to happen).
Missile
After completing the trailer I
began work on the missile itself, which was a pleasure to build. I
was dubious about getting a smooth seamless circular section but all
the halves of the various stages fitted extremely well and required
minimal sanding. I was less happy with the fit of the main fins
(M20) which left quite a noticeable gap. My aircraft building
instincts kicked in and I filled and sanded them smooth.
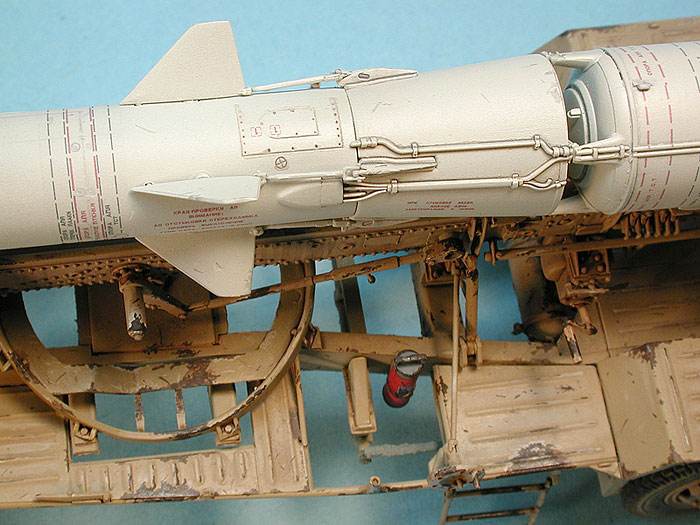
The biggest challenge I found was
ensuring the booster section aligned with the missile since it's
attached with only four small spigots, and I knew the slightest mis-alignment
would prevent the missile from lying on the loading rail. I drilled
and inserted small pieces of wire into the spigots (part M1) which
enabled me to slightly adjust the alignment after assembly.
The missile was painted light-grey
and then decalled. The decalling directions are hopelessly
confusing, since the identifying letter for each decal doesn't
correspond with the instructions; although it's possible to make
educated guesses about some of them I still got a few wrong.
Oh well.
My excuse is that I don't read
Russian.
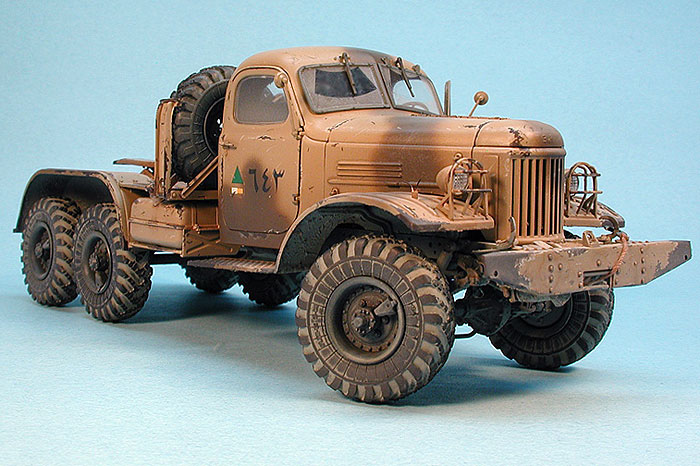
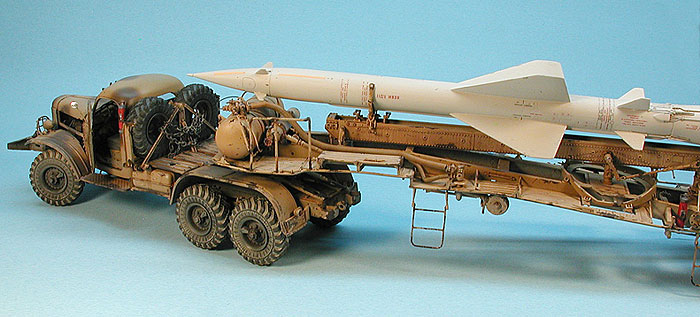
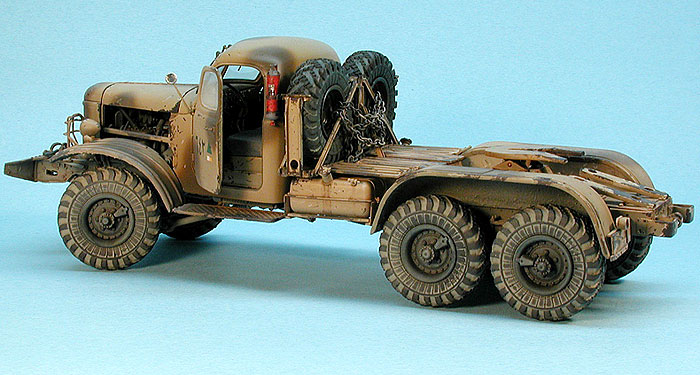
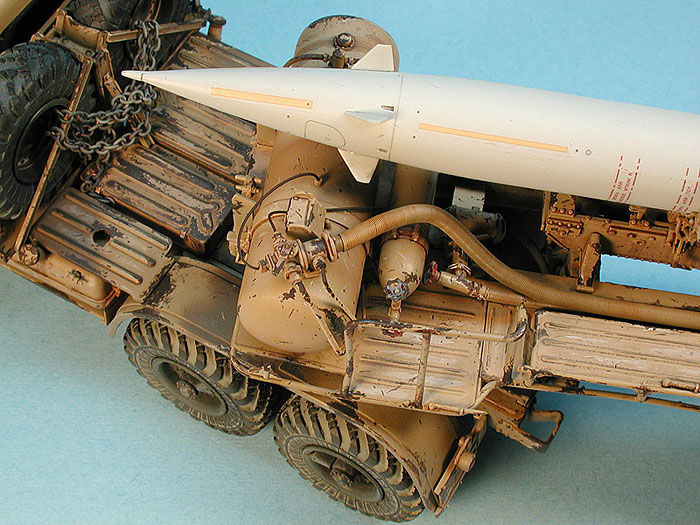
Truck
With the SA-2 and trailer complete
I made a start on the truck itself.
What a kit. There's a complete
engine, transmission and chassis which are all but invisible once
the model's put together. To give you an idea of its complexity,
there are over 40 parts in the front axle/wheels assembly alone. I'd
strongly recommend adding the springs (parts E51, E52, C11 and E21))
to the chassis before commencing with the rest of Stage 8 in the
instructions; I followed Trumpeter's directions and found that I'd
glued on the springs slightly askew.
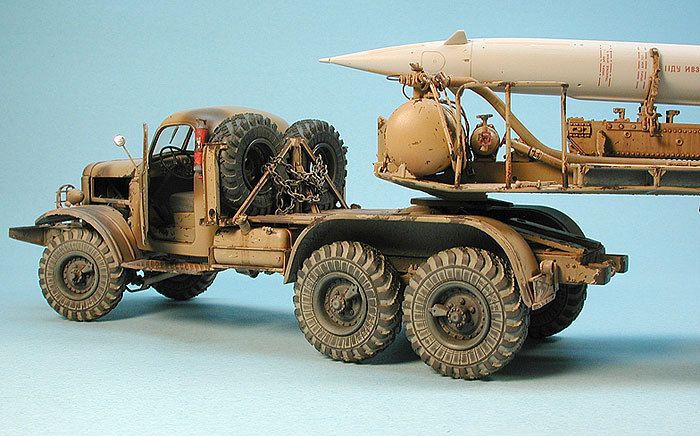
Furthermore the front wheels are
designed to be steerable with a fiendishly clever mechanism which I
actually managed to make workable for several seconds. Unfortunately
the mechanism broke apart under the weight of the wheels with their
rubber tyres, so I ended up gluing them. However it does at least
enable you to position the wheels exactly as you desire before
fixing them in place. The rear axles are equally complex and
well-detailed. I had a problem attaching some of the transmission
parts (E12, E13 and E16) and had to do some minor cutting to achieve
a good fit.
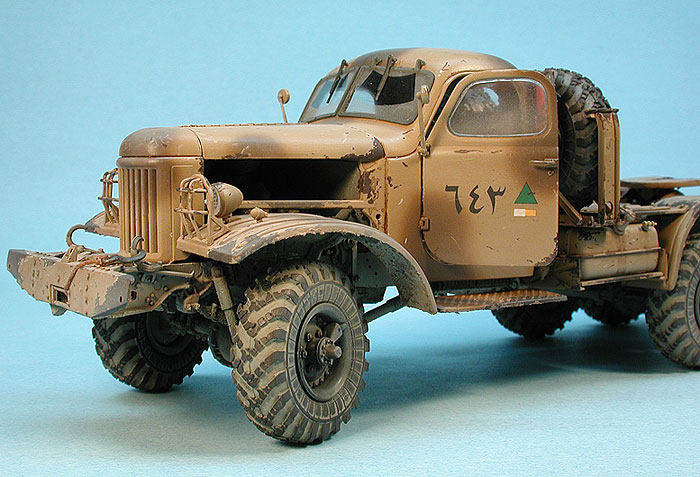
A nice cab interior is provided, other than weathering and adding
decals for the instrument faces I added it out-of-the-box. Getting
the mudguard assemblies to fit to the chassis was more challenging,
and by Stage 17 of the assembly sequence it became increasingly
difficult to hold the model without something breaking off. The
wheels were the last parts I attached to the model and although I'd
done various dry-runs during assembly I still found it difficult to
ensure all 6 wheels touched the ground. Another caution- make sure
the trailer with missile are in place on the truck when carrying out
this procedure. I didn't, and the extra weight of the
missile/trailer lifted the front cab wheels off the ground, so I had
to re-adjust all
6 wheels again. (Another reason to build the trailer and missile
first).
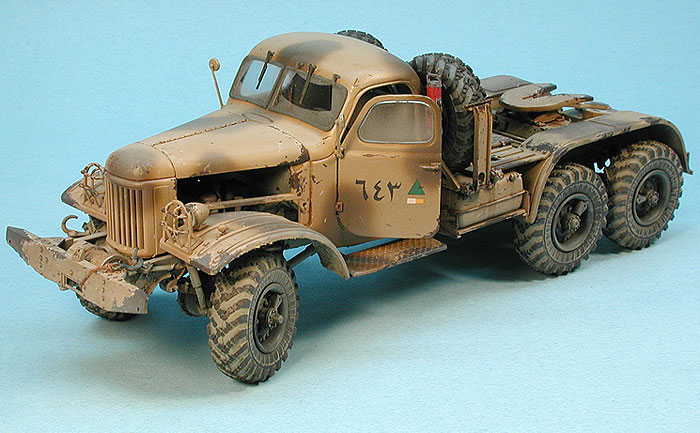
Painting and
Weathering
This is my favorite part of the
whole modelling experience. I use acrylics almost exclusively,
followed by a protective coat of Future, followed by oil washes. The
various paint-chips and scratches were painted on using Vallejo
paints and a fine brush, and any detail high- lighting was done with
water-colours.
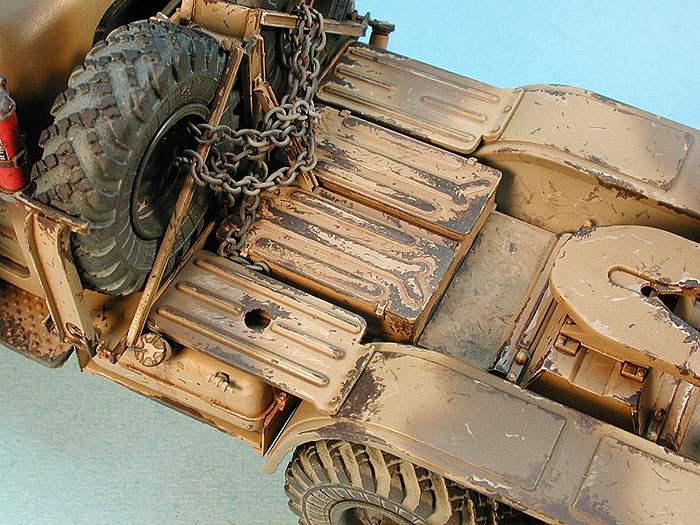
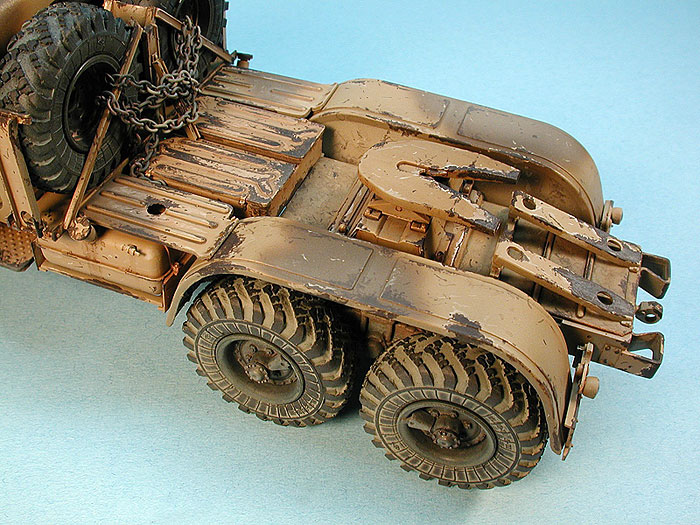
For the dried sand/mud under the
wheel arches and chassis I used MIG pigments mixed with their
acrylic-Gel, applied thickly in a further attempt to hide some of
the ejector-pin markings. Finally a mist of Tamiya buff was sprayed
from below to simulate dust.
Conclusion
I was very impressed with this kit.
It's not quite Tamiya quality but is still highly detailed and
well-engineered. For me the biggest hurdle was actually starting
such a complex model, the sheer number of parts and sprues looked
intimidating, but I actually completed the entire model in 3 weeks.
It didn't place in the Model Club
contest but I certainly had fun building it.
Click the thumbnails below to view additional images: