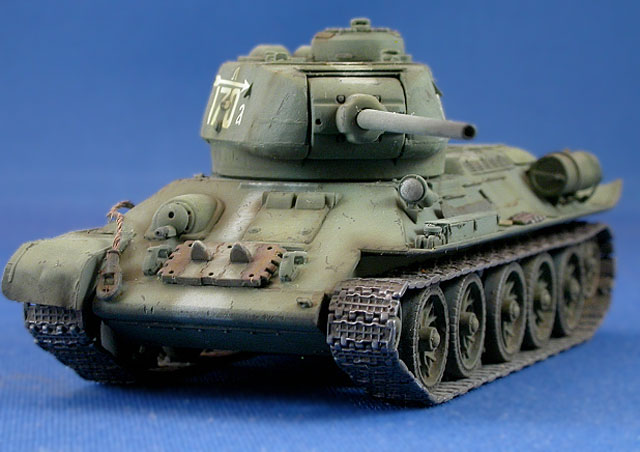
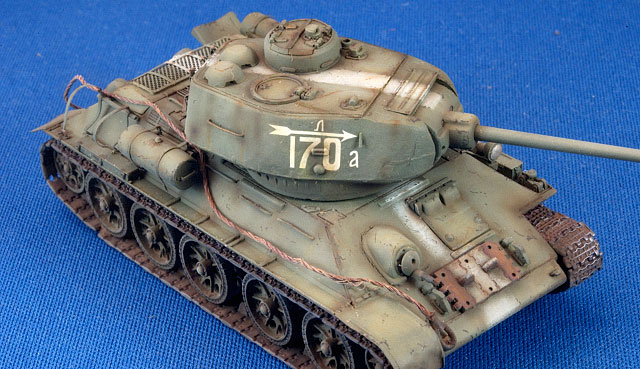
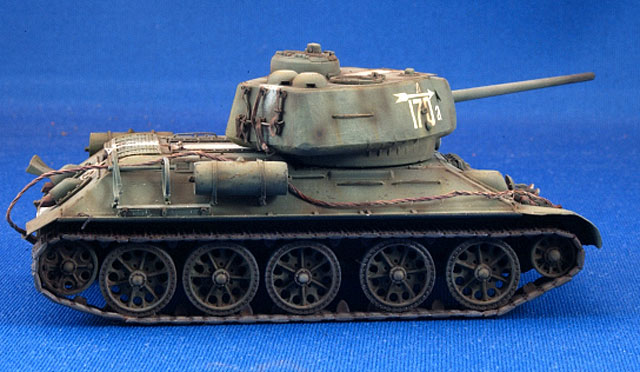
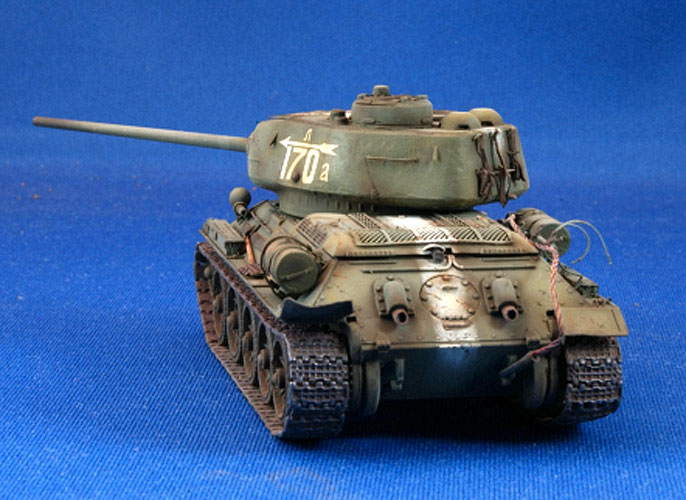
This is the Dragon T-34/85 Mod.
1944, kit #7269, with enormous help from the Eduard photo-etched
detail set # EDU22099, a few scratch built bits, and tracks from a
UM T-34. I finished it in the kit supplied markings of a tank
belonging to the 4th Guards Tank Brigade, of the 2nd Guards Tank
Corps, Belarus, June/July, 1944.
I love to paint and weather models. Being involved in a long,
arduous build like detailing the Monogram 1/48 scale B-17G allows me
few opportunities to do that.
Building in 1/72 scale allows me
to do what I love to do on a regular basis (the builds tend to be
quick) without me taking my eye off my main project.
Construction
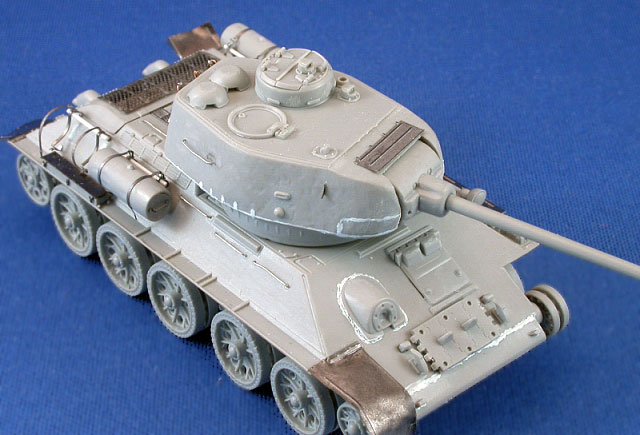
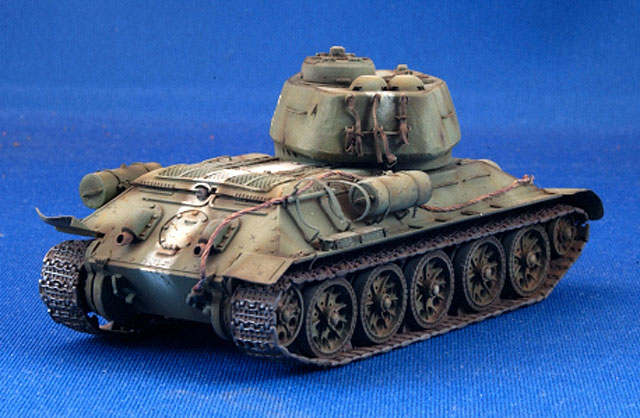
This is the second dance I’ve had with a Dragon 1/72 T-34. I find
their 1/72 kits to be a bit schizophrenic. The plastic is
beautifully molded, but they insist on using what amounts to rubber
bands for tracks.
On the T-34, with their
characteristic saggy and ‘kinky’ circumvent around the running gear,
length and link tracks would be a better choice to replicate that
defining trait. I ended up using length and link tracks ’stolen’
from a UM (Ukraine) T-34. The tracks and I had a slight difference
of opinion on how they should fit onto the running gear though. I
was of the opinion that coming from what I assumed to be a
reasonably accurate kit, that they should fit without too much
drama.
They, the tracks, seemed to object
to being used to correct an alternate kit’s deficiencies. In the end
I was able to ’persuade’ them to see things my way, though there are
a few gaps and areas I’m not completely happy with. Next time I
would assemble the tracks, running gear and lower hull separately
before painting and attaching the upper hull. The way I did it, I.E.
after attaching and detailing the upper hull, I endangered all that
nice, but delicate, photo etched detail with the constant handling
required to fit the tracks.
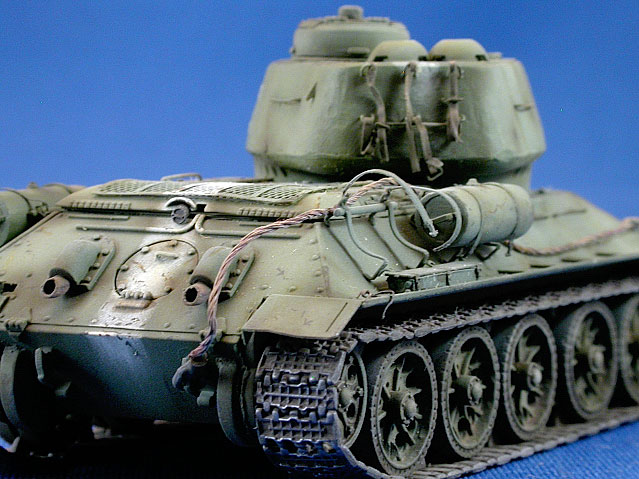
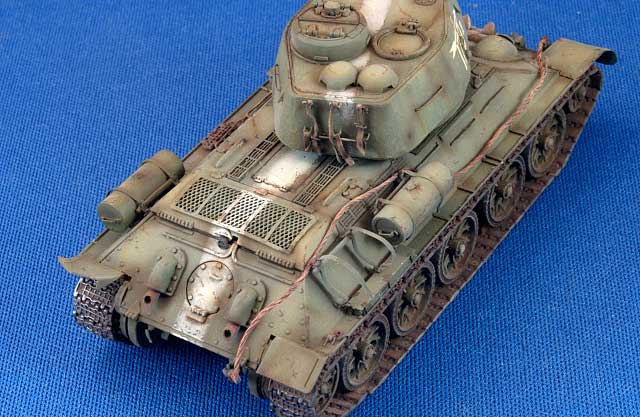
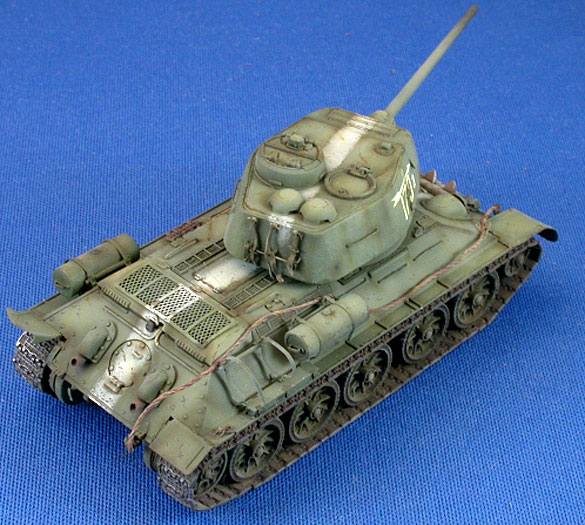
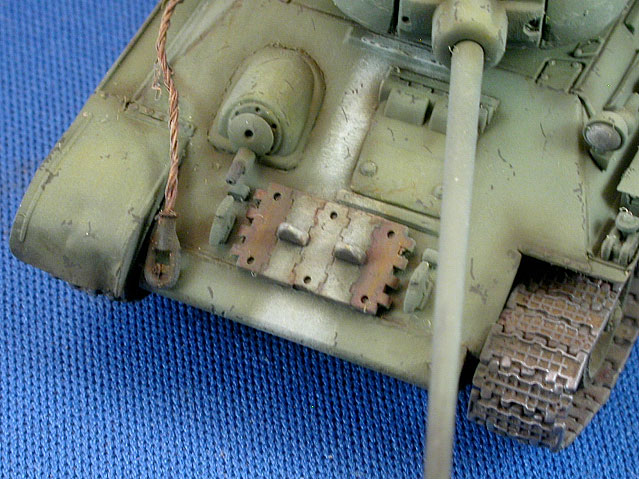
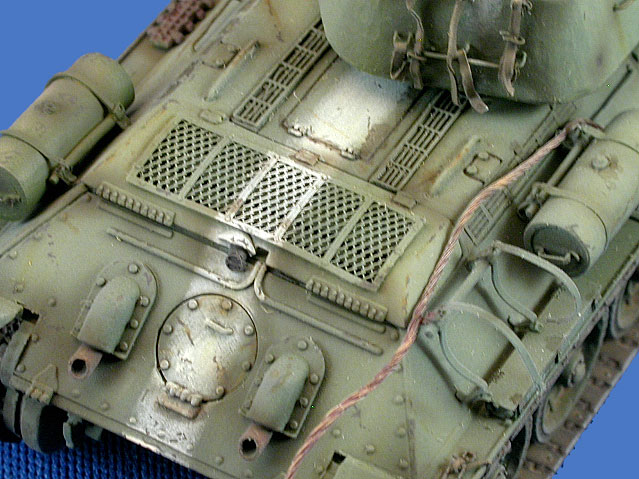
The Eduard photo etched fenders
really are a necessity in this scale and their Photo etched fuel
tank brackets allowed me to replicate a fuel tank lost during
battle.
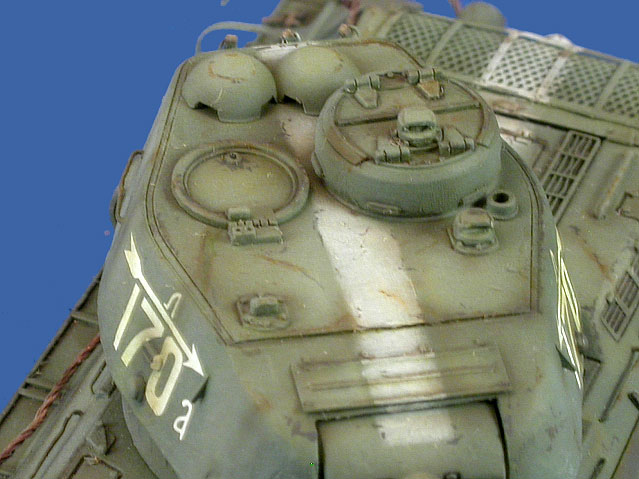
All grab handles were replaced with 10 amps fuse wire. The tarp
hold-down straps on the rear of the turret (yes, that is what THEY
are) were cut from wine bottle foil. Eduard supplies these on their
fret, but I found them hard to fold and make look convincing. All
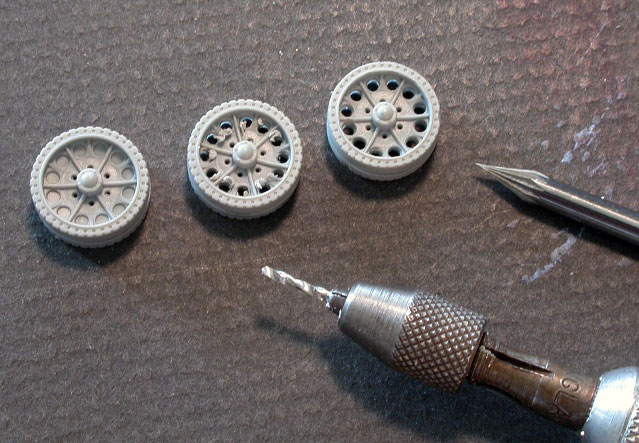
the lightening holes were drilled out of the road wheels.
The characteristically rough cast turret was replicated with dremel
tool bits, sandpaper and files.
I first gouged the surface with a
ball shaped cutting bit, bouncing it off the surface. I then used a
file to create scraps, etc. With a dome shaped Dremel bit, held
parallel to the surface I smoothed out the rough spots.
Finally I used a medium grade
sandpaper to did it all a more scale appearance. Weld seams were
enhanced with a bead of thinned 3M Acryl-Blue Gazing Putty.
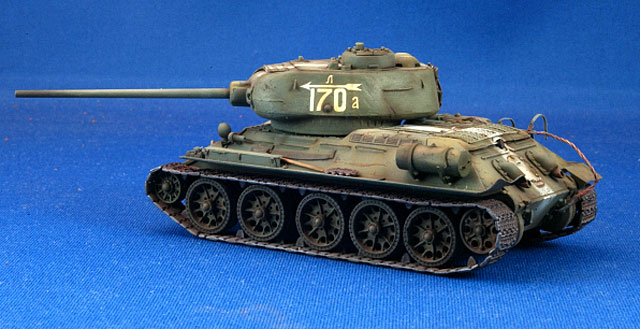
Painting and Weathering
I painted the assembled turret, assembled hull and the road wheels
separate. I mixed some Mr. Color Flat Black with my Mr. Surfacer
1200 and primed the whole lot with that mixture. The base color is a
mix of Mr. Color #136 Russian Green 2 and #134 Japanese Grass Green.
Top areas were given a coat of the base mix lightened with USN Lt.
Gull Grey. The white ID stripe were masked off and dry brushed on
using Humbrol Flat White.
Next step was a gloss coat of Mr. Hobby Super Clear (lacquer). When
dry I applied the unit markings to the turret sides and applied a
pin wash using a dark brown artist oils mix to all recesses.
Next step was to apply a flat coat of Mr. Hobby Clear Flat (again
Lacquer based). Weathering commenced with the application of two
filters. First was Olive green followed by a mix of Azo Green and
Yellow Ochre. Second stage of weathering was applying small dots of
oil paints to all the flat areas and blending them in to the surface
using a flat brush wetted with turpentine. Colors used were white,
Yellow Ochre, Naples Yellow, Azo Green, Olive Green and Grey.
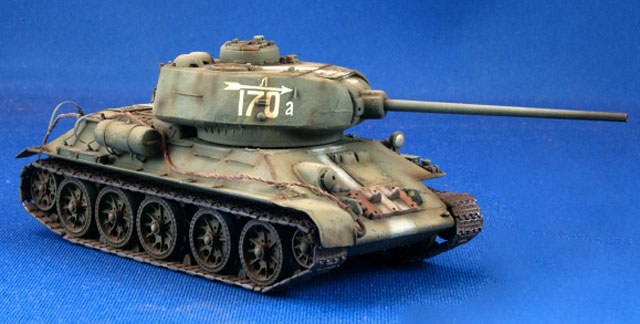
Paint chips were next achieved by applying small dots of Burnt Umber
oil paint then blending that in with a liner brush wetted with
turpentine. I defined them more by applying light dots and lines
using Vallejo Acrylic Black Grey/Burnt Umber. Final weather was with
a post shade of Tamiya Red-Brown/Nato Black mix.
I attached the road wheels to the hull and painted the tracks before
assembling them. As I said earlier I lost and or damaged some
delicate photo etched parts along the way. Lesson learned. The
running gear and lower hull was then weathered using Dry Pigments.
Dark Earth followed by Light Earth and some Dust and Industrial Dirt
thrown in. Some more Dark Brown oil washes in and around the running
gear, a dry brush of Mr. Metal Color Steel on the tracks and Black
Soot pigments applied to the end of the Gun Barrel and that was it,
time to stop the madness. At least it felt that way, because I can
see where you could easily go too far with the whole weathering
thing, especially in this scale.
I would be remiss if I did not give a nod to the various sources of
inspiration, tips and techniques used. Hyperscale.com, Missing-Lynx.com,
Model MILITARY International magazine and Military in Scale magazine
were all sourced for the above. ALL the weathering techniques I used
were gleaned from the many talented contributors of the
aforementioned sites and magazines.
Conclusion
This was a nice two week ‘therapy’ session. Mike Grant had commented
how he built one 1/72 scale tank and ended up with a whole closet
full of 1/72 scale armor kits. I could easily end up with a display
case full of them also if I was to allow my self the indulgence.
This was FUN.
Click the thumbnails below to view additional images: