|
Scratchbuilding a 1/144 TIGER I
s.Pz.Abt. 501, Tunisia,
December 1942 - January 1943 |
scratchbuilt, 1/114 scale |

|
| by Benjamin Guenther |
Introduction
This
model was a hit at last years IPMS Nationals and I am pleased to
finally have the chance to display Ben’s fantastic build article
here on Missing Lynx.
The patience,
exceptional detail and masterful dedication are just awe inspiring!
Enjoy!
Nick Cortese
Planning
Normally,
references are quoted at the end, but if you build conversions or
scratch-build anything you know the value of information. I used
Germany’s Tiger Tank-D.W. to Tiger I by Jentz and Doyle, Tiger I and
Sturmtiger in Detail by Bruce Culver and the AJ press four volume
series on the Tiger. I also found that David Bryden’s website
http://www.TigerI,Info/ was indispensable with drawings,
pictures and dimensions for anyone wanting to detail a Tiger.
Several other works were used, but these four were the main ones.
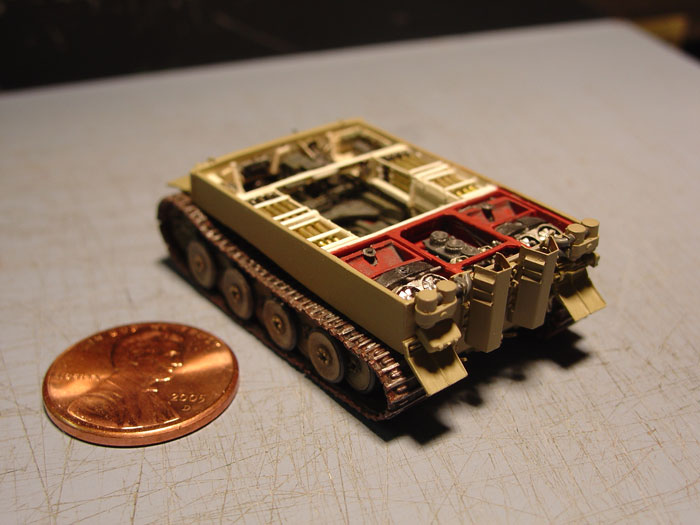
Construction
Germans made it
easy to build their armor with flat surfaces, using Jentz & Doyle’s
book I found the armor thicknesses, converted these to 1/144 scale,
then found plastic sheet that matched and glued up the basic hull.
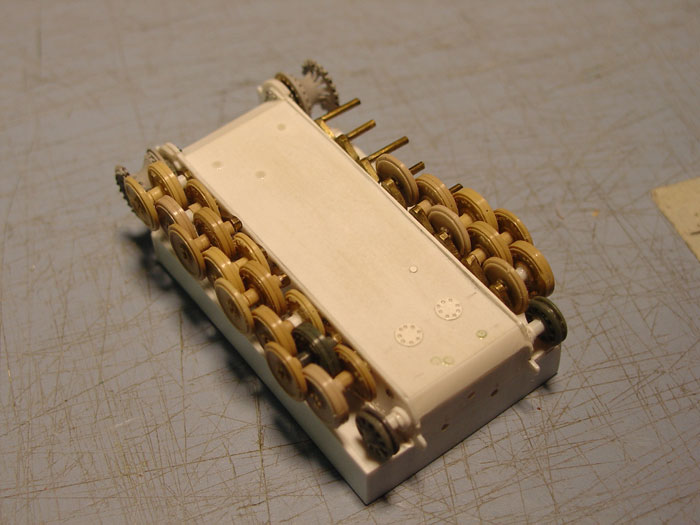
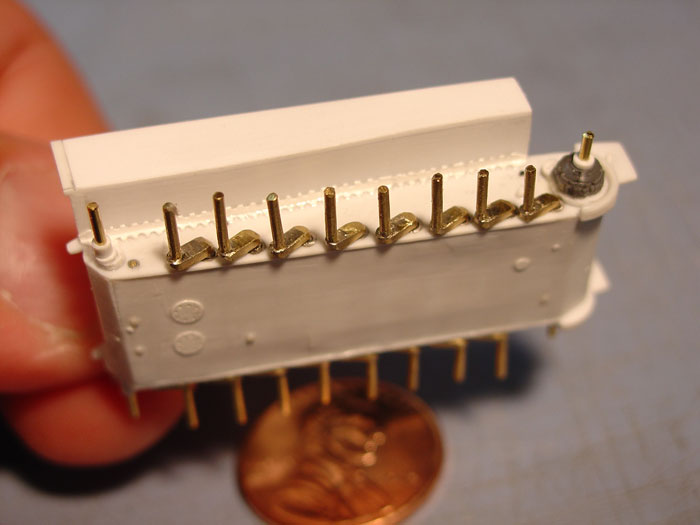
I then decided to make the torsion system working, which really
wasn’t that hard to do. Brass rod of the correct diameter became
the bars, arms were cut out of brass sheet and the two were silver
soldered together. Stainless steel tubing was fitted to the hull
and the torsion bars went thru them to the other hull side where
they were inserted into holes and glued in place. With that you had
a working torsion system, until later when you added the road wheels
and tracks, and then you couldn’t move them much at all.
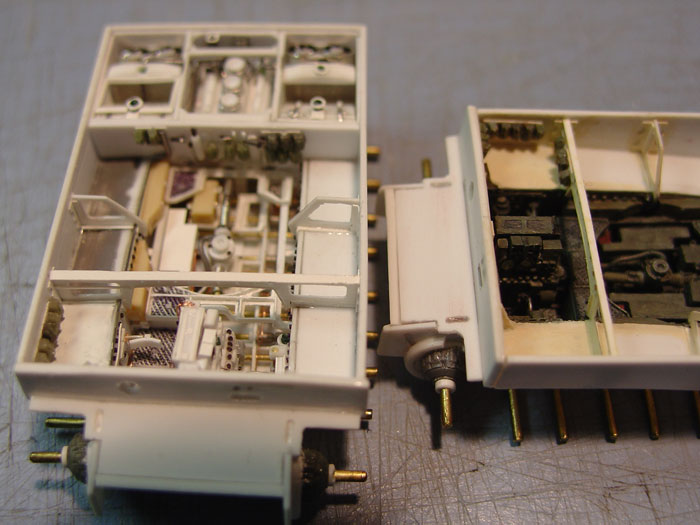
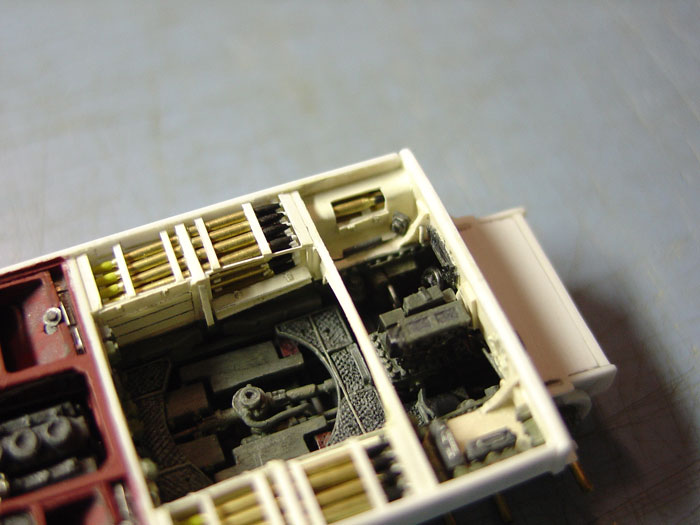
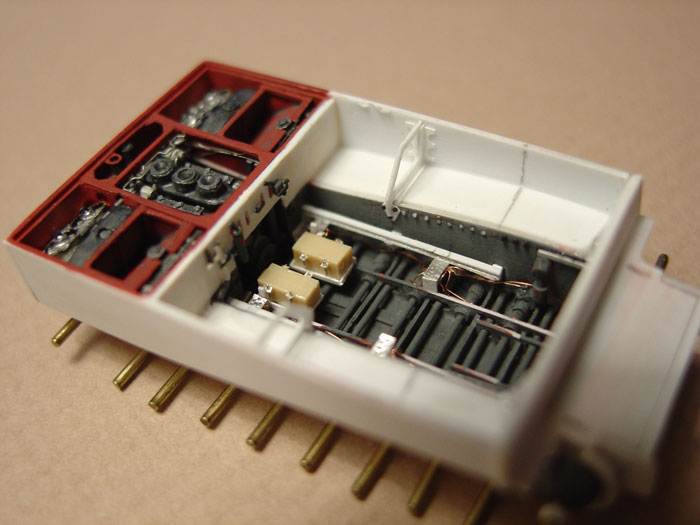
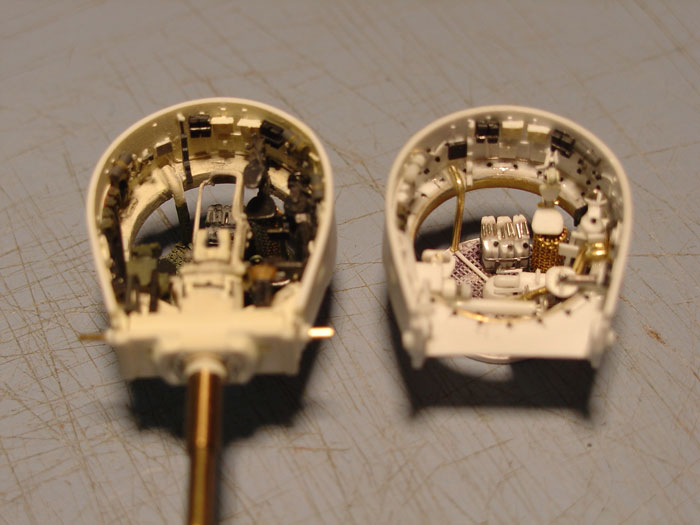
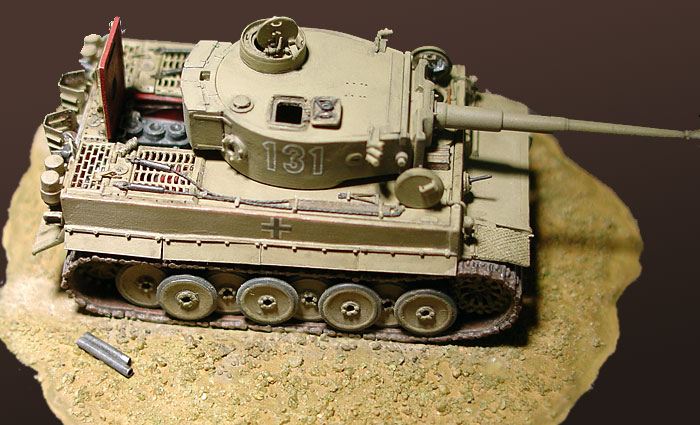
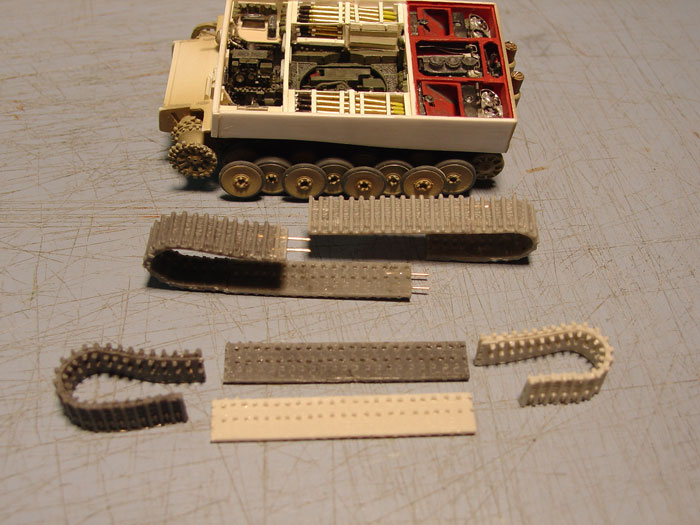
I had decided to
make an early Tiger in Tunisia and that dictated everything
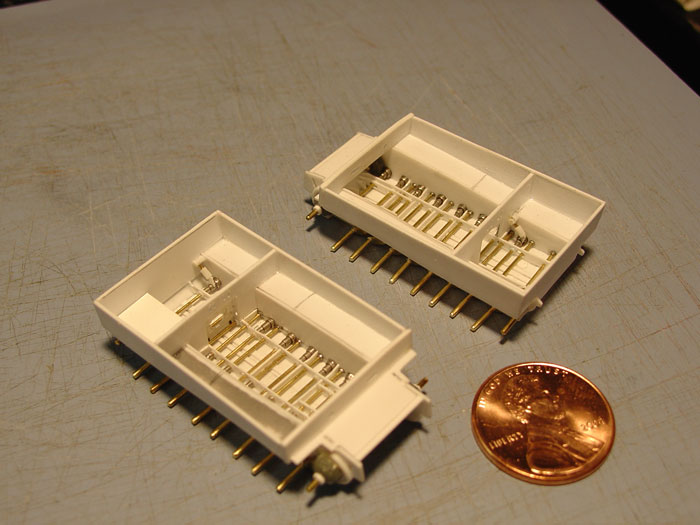
afterwards. If you notice in the pictures I built two tigers.
Working in this small scale two models allowed me to practice on one
and get the other right. I had to make 2 or 3 parts and choose the
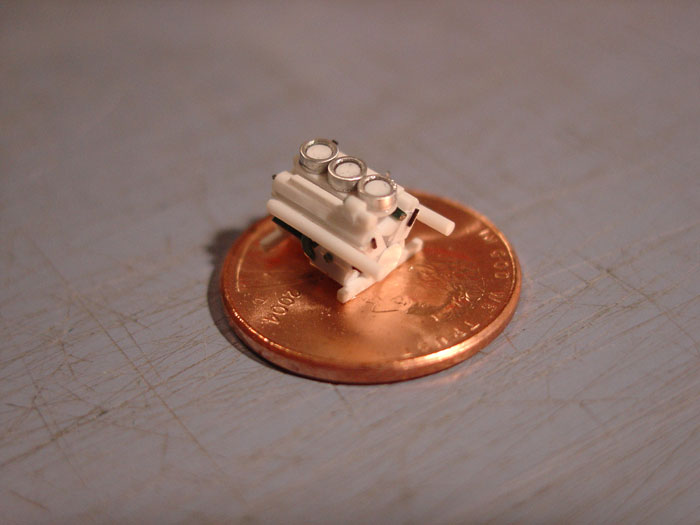
best one for the finish model. The engine compartment came next; I
converted the dimensions into 1/144 scale and made the parts.
Click the thumbnails below to view additional images:
It was at this
juncture that I picked one model to be painted and the other
unpainted, this one would be left open and used for display. After
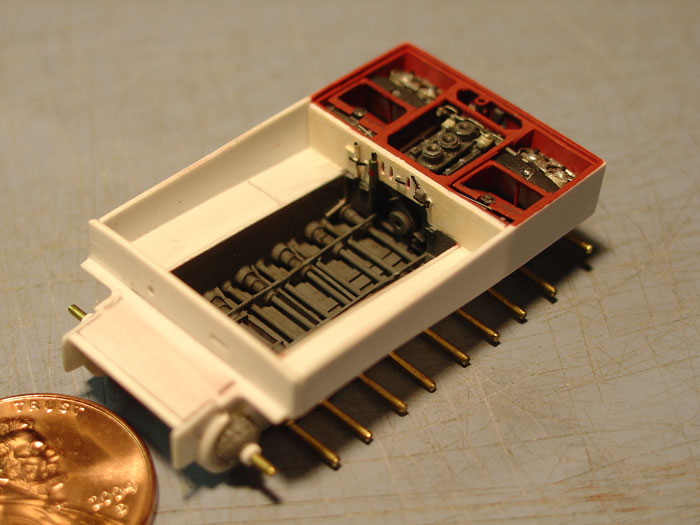
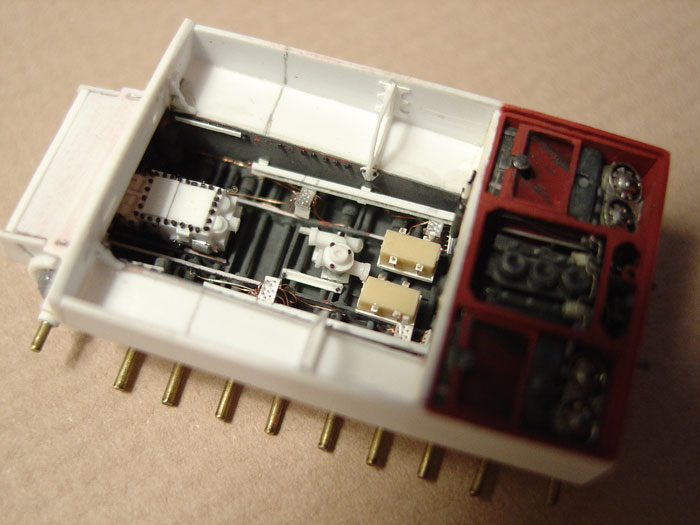
that it was a matter of duplicating everything that was in a Tiger
from the hull bottom up. With the interior done I then made the
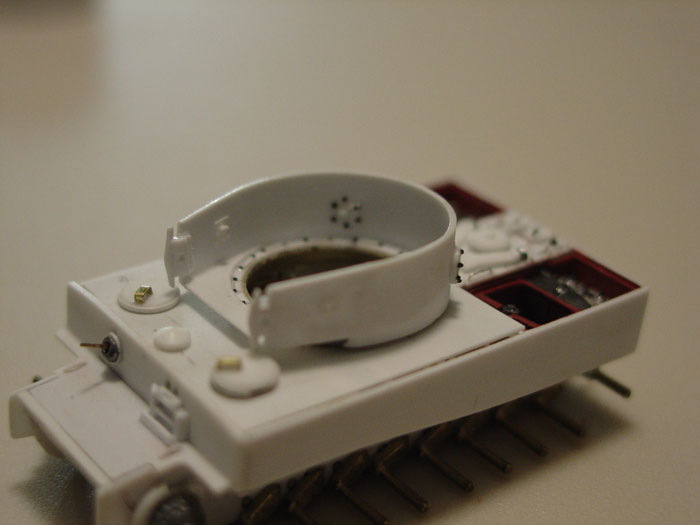
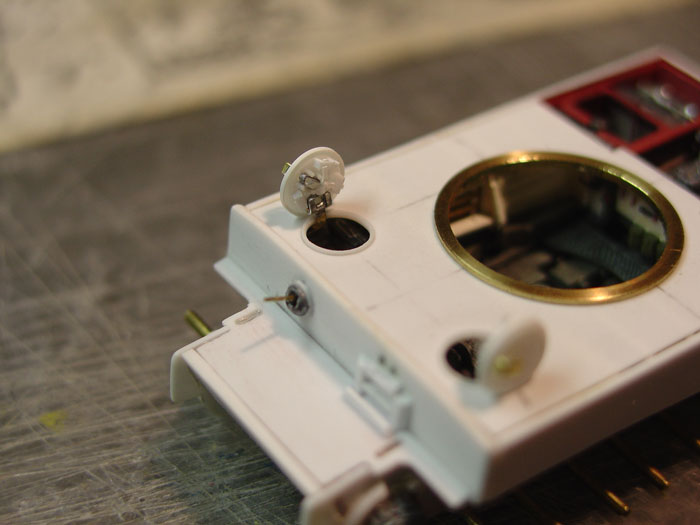
hull top, turned a brass turret ring and made the crew hatches.
Using some soft .oo5” Aluminum sheet I made the double hinge for the
hatches, that way they would open and close. Detailed the hatch
interiors and I was ready to move onto more trouble, the turret.
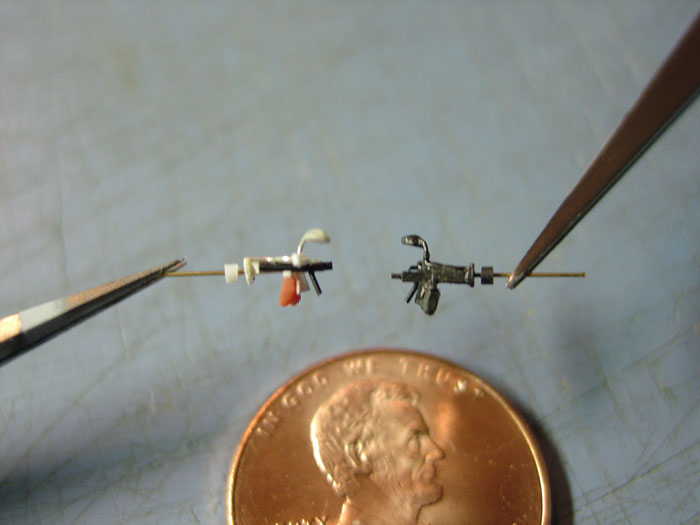
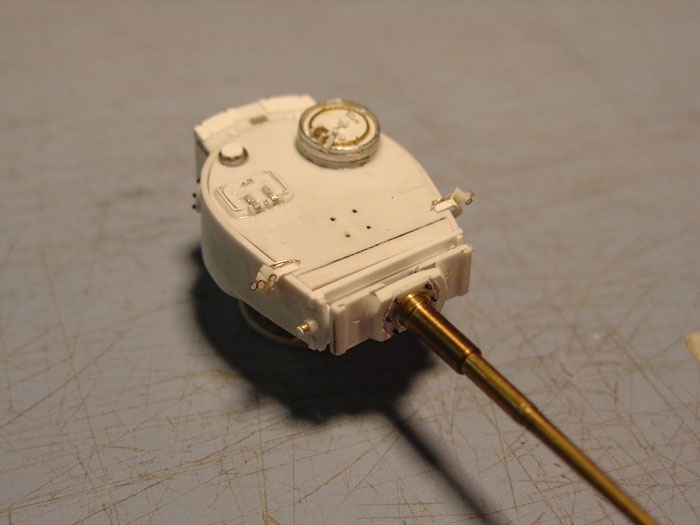
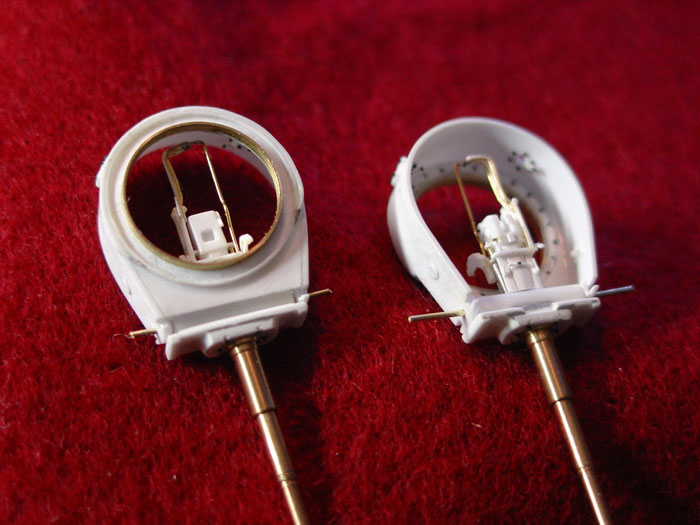
Bryden’s website
has turret dimensions that I converted into 1/144 scale. I cut
plastic into the turret bottom and then bent plastic around it to
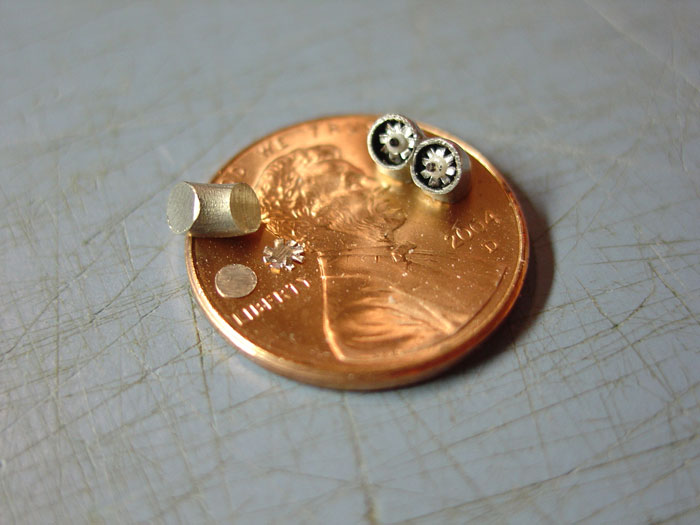
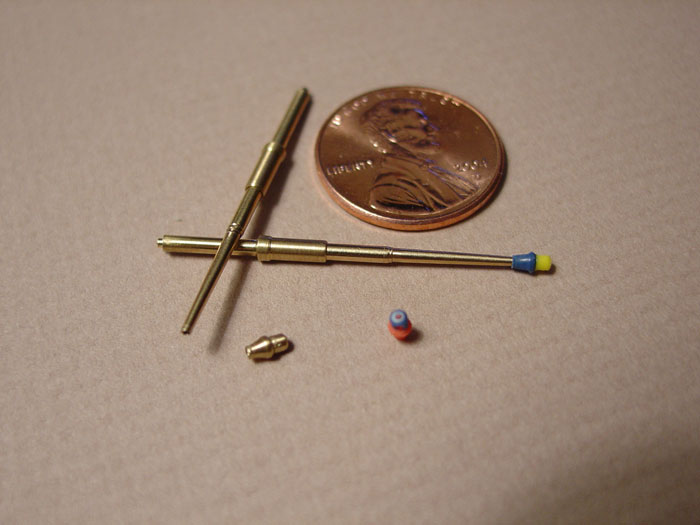
make the turret sides. Brass barrels were turned on my Sherline
lathe as was a brass pattern for the muzzle brake.
Click the thumbnails below to view additional images:
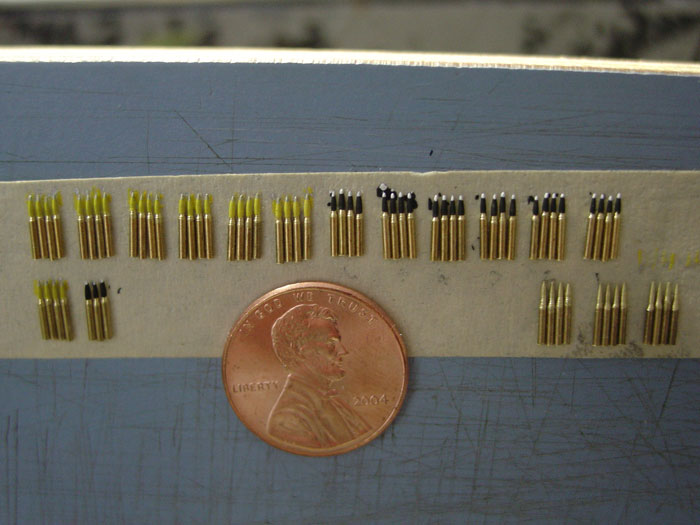
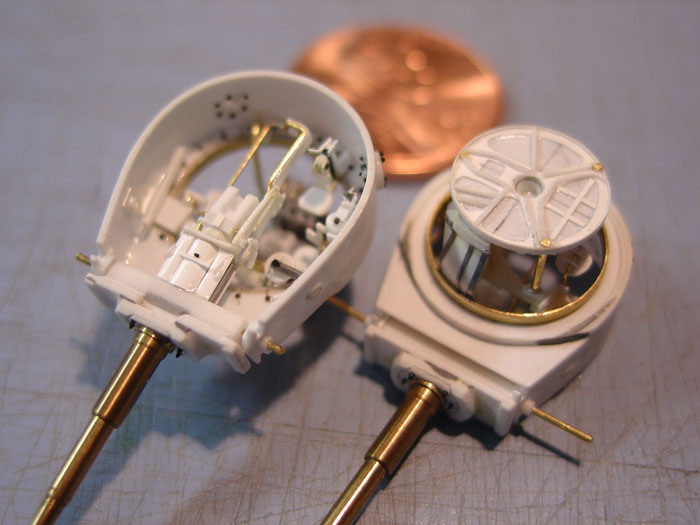
A rubber mold
was made and half a dozen muzzle brake parts were cast, as lower and
upper halves. I had to cut, file and swear at them to make the
openings that are on the lower/upper halves. These were small, thin
pieces and I only managed to make three out of the lot. Next, the
rear portion of the 88 gun was made and mated to the barrel.
Mantlets were made and the guns inserted, which were then attached
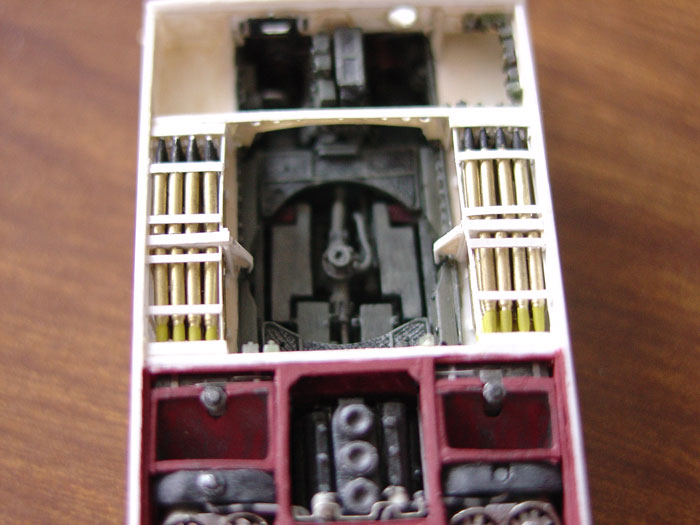
to the turrets. Finally, the turret interior was completed and one
painted. The turret roof was cut from sheet plastic, the underside
detailed and holes for the loader’s hatch and commander’s cupola
were cut. The cupola was turned on my lathe from Aluminum round
stock. Hatches for both were made and hinges were made that allowed
them to open and close. The turret ventilator was made without the
cover as any tank firing its gun would soon fill with smoke if the
cover was over the ventilator fan.
Click the thumbnails below to view additional images:
I sprayed
painted the model with Testor’s Model Master RAL 7008 Afrika Khaki
Braun that was lighten with 30% of FS36492, light gray (a very light
gray). After drying the tank’s OVE were made and attached, which
after everything else was fun to do. Tow cables were made by
twisting strands of .003” copper wires together. I used a water
base black for my wash and mixed up MIG powders to lighten the top
surfaces and to dust up the road wheels and tracks. This project
took 14 months to do although at times it did seem never-ending.
Model, Images and Text
by Benjamin Guenther
Page Created 18 May, 2006
Page Last Updated
17 May, 2006
|