|
|
|
|
German Heavy Tank Destroyer Elefant
Tamiya, 1/35 scale
Reviewed by Brett Green
| Catalogue Number and Description: | Tamiya Kit No. 35325 - German Heavy Tank Destroyer Elefant Tamiya Item No. 12644 - Zimmerit Coating Sheet for 1/35 Elefant |
| Contents and Media: | (35325) Five sprues of dark yellow plastic; 96 track links and lengths on four brown-coloured sprues; polythene caps; one length of string; markings for three vehicles. (12644) One sheet of self-adhesive textured and printed vinyl. |
| Scale: | 1/35 |
| Price: | TBA |
| Review Type: | FirstLook |
| Advantages: | Excellent detail; superb fit; easy build; probably Tamiya’s best link-and-length tracks to date; minimal ejector pin marks. |
| Disadvantages: | |
| Recommendation: | Highly Recommended |

Introduction
After releasing their Jagdtiger back in 2008, I suppose it should have been no surprise that Tamiya would also eventually tackle Germany’s original tank destroying behemoth, the Ferdinand. Even so, I was surprised and pleased to see this new Elefant in Tamiya’s list of forthcoming releases.
The hallmarks of Tamiya’s recent military releases have been a high level of detail, clever engineering, simple parts breakdown and trouble-free construction. Tamiya has brought all of these attributes to their new 1/35 scale Elefant.
FirstLook
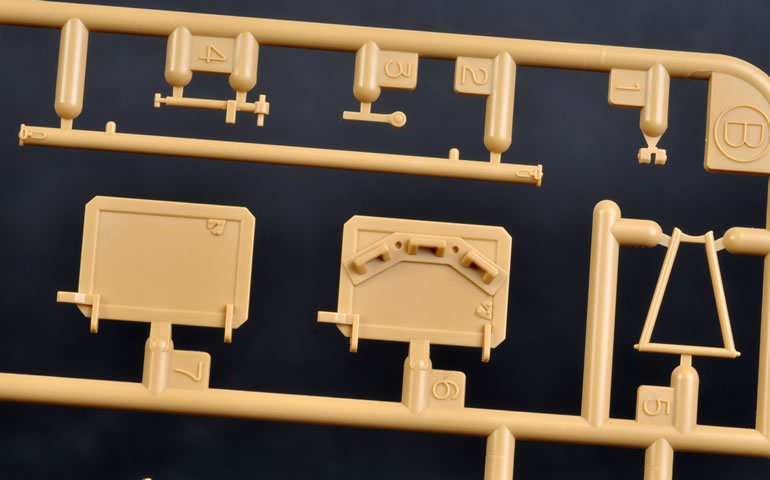
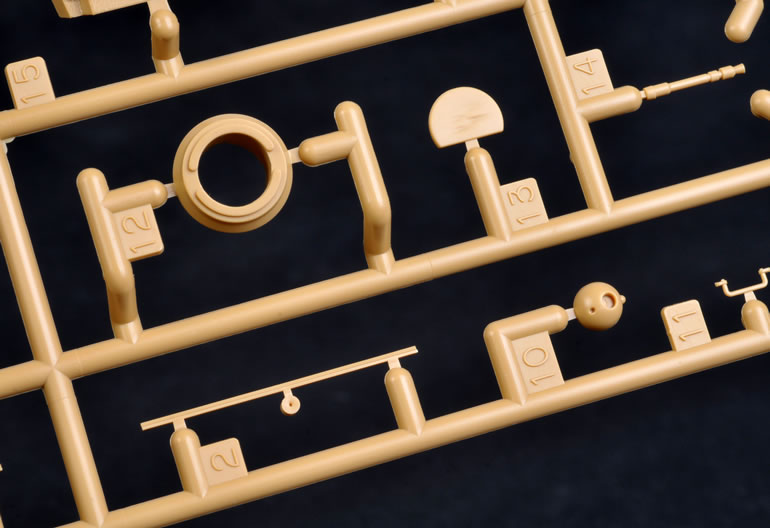
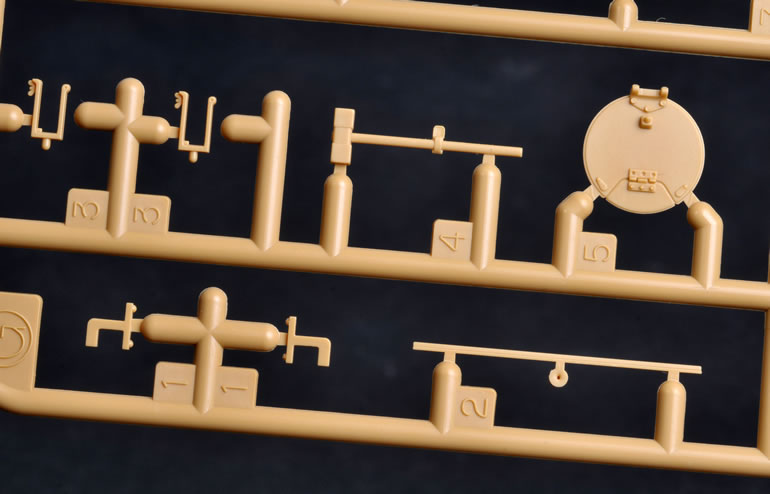
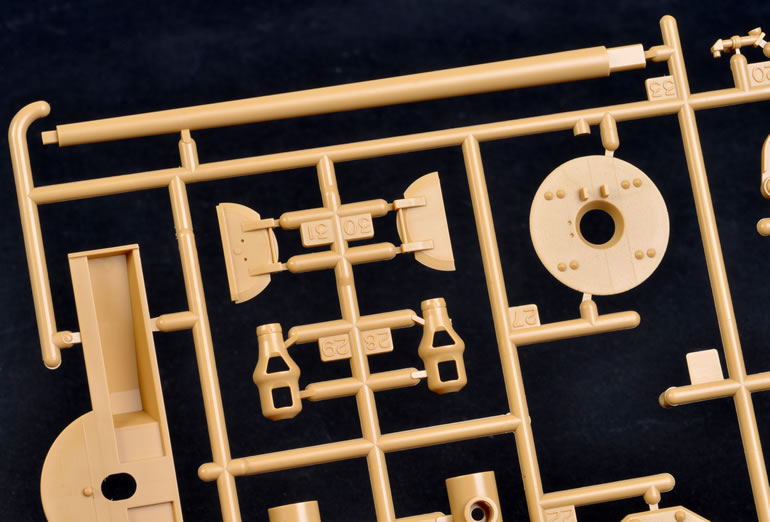
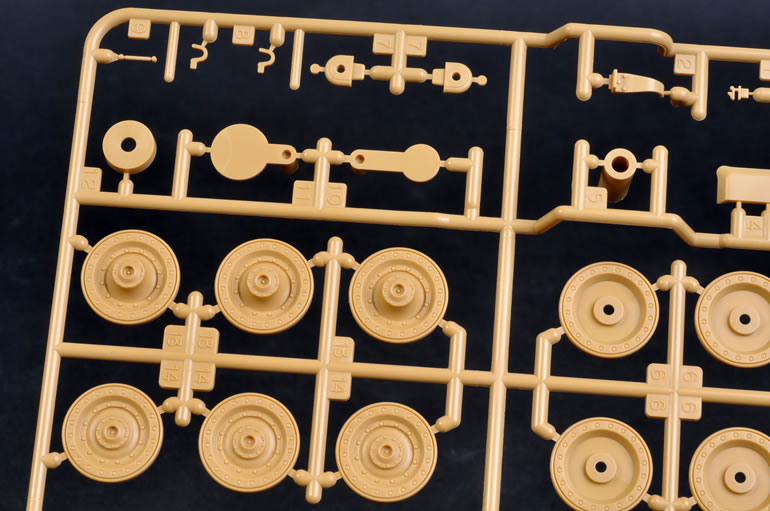
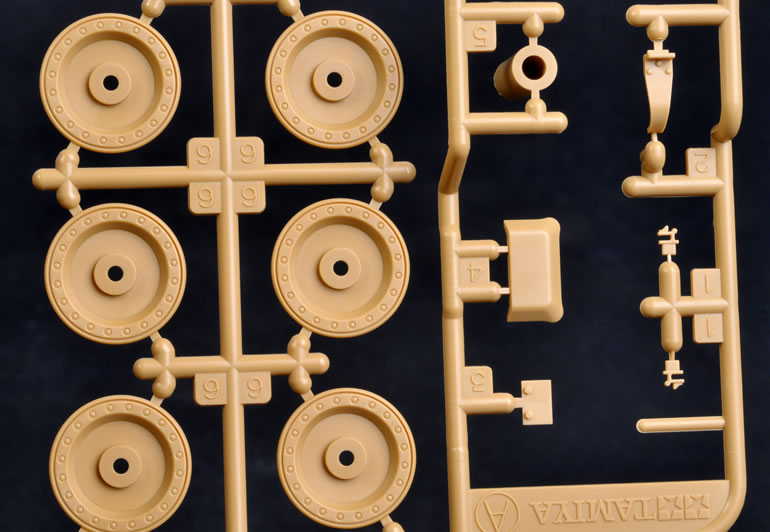
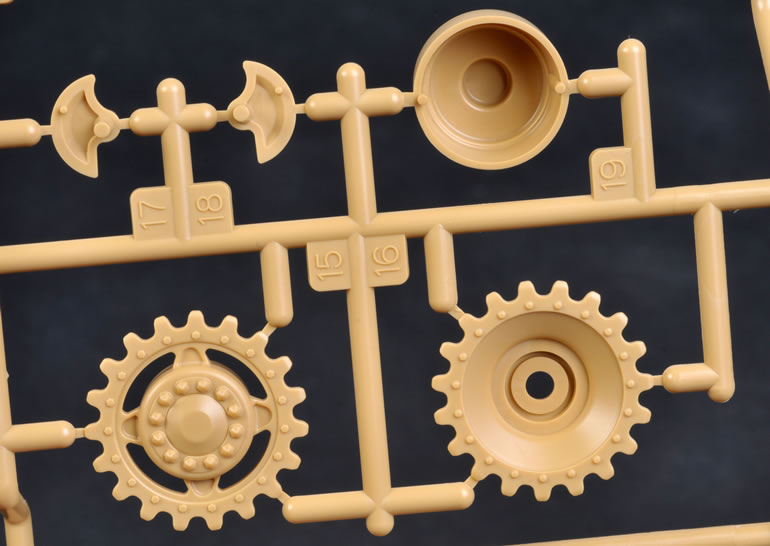
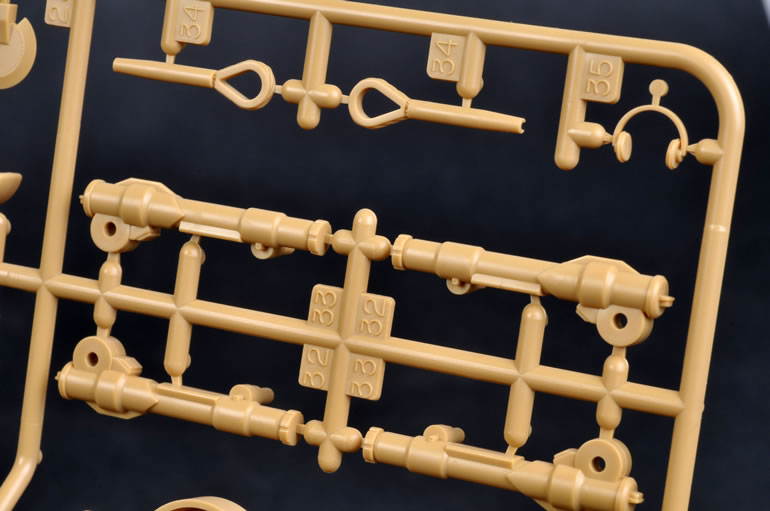
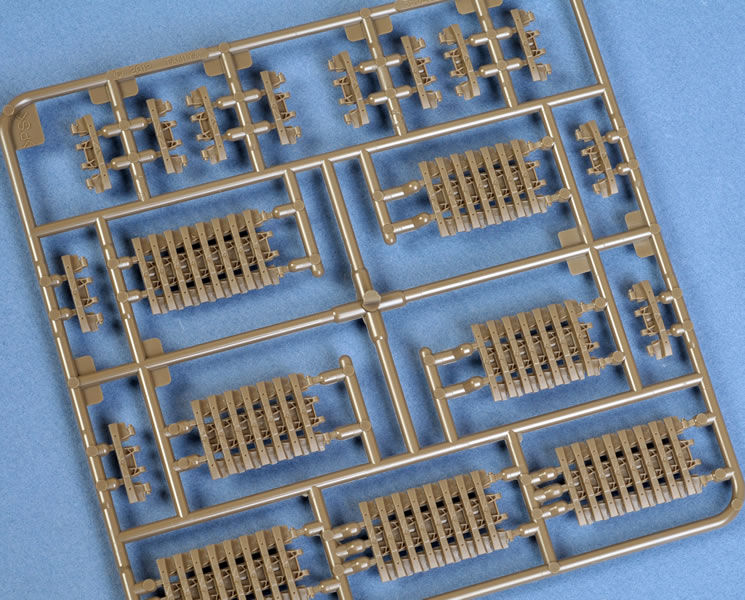
I was so excited to receive the new kit that I started cutting parts off the sprues before I counted them. I can tell you, however, that the parts are presented on five sprues of typically Tamiya dark yellow plastic, with a further 96 track links and lengths on four brown-coloured sprues.
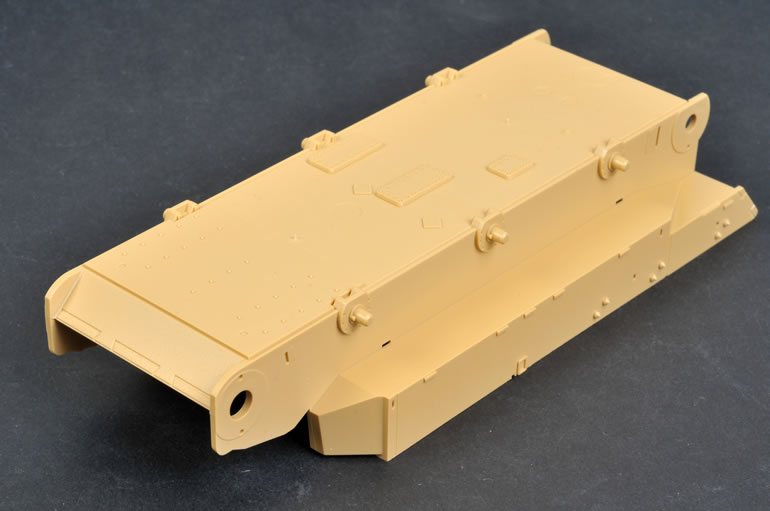
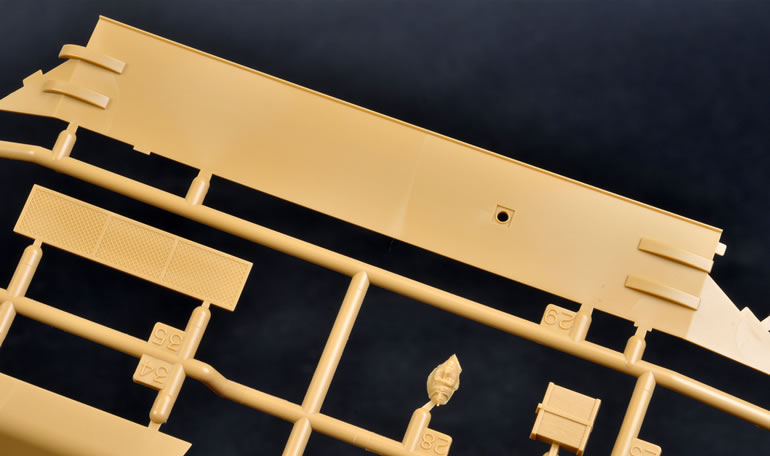
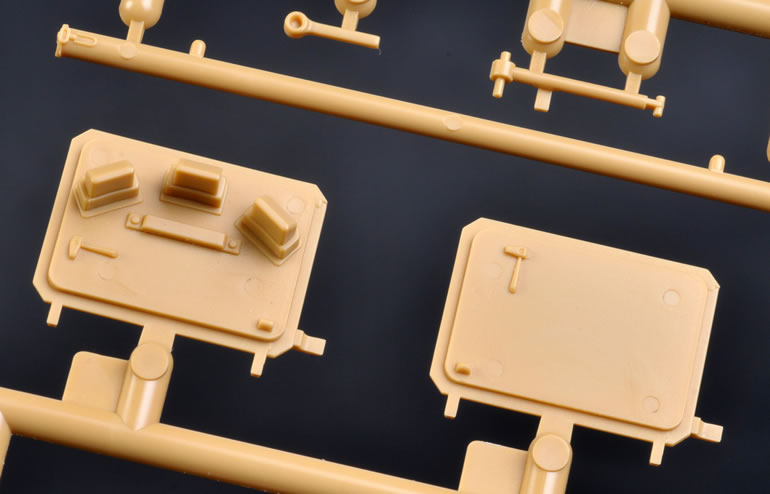
The hull is presented in one large piece with the floor, lower and upper sides plus sponsons all moulded integrally.
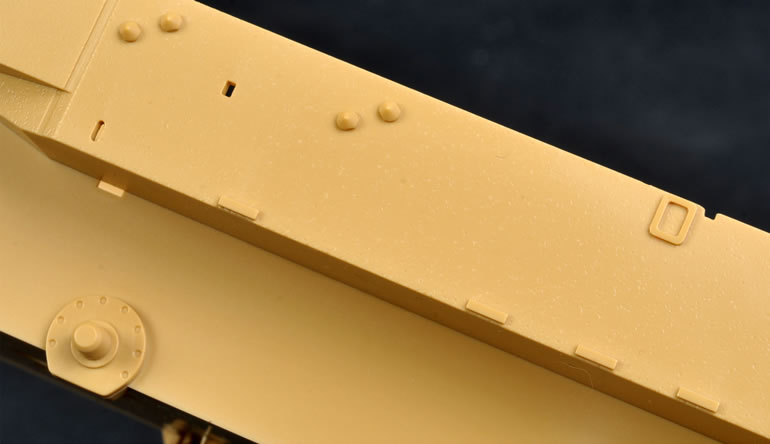
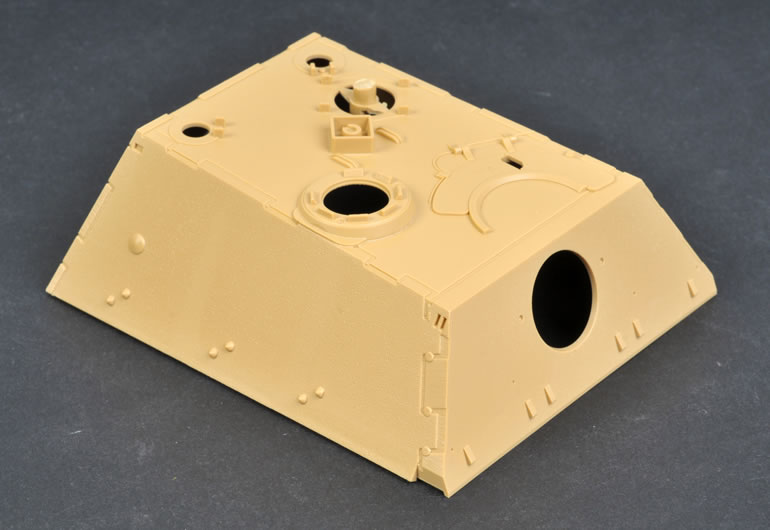
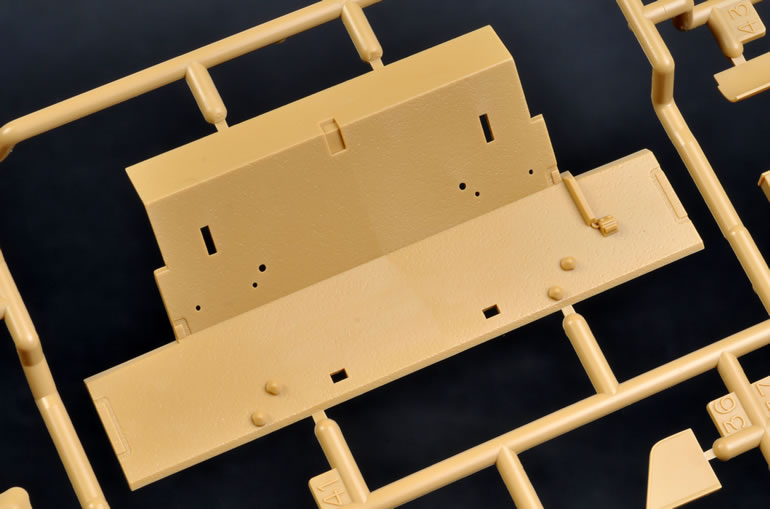
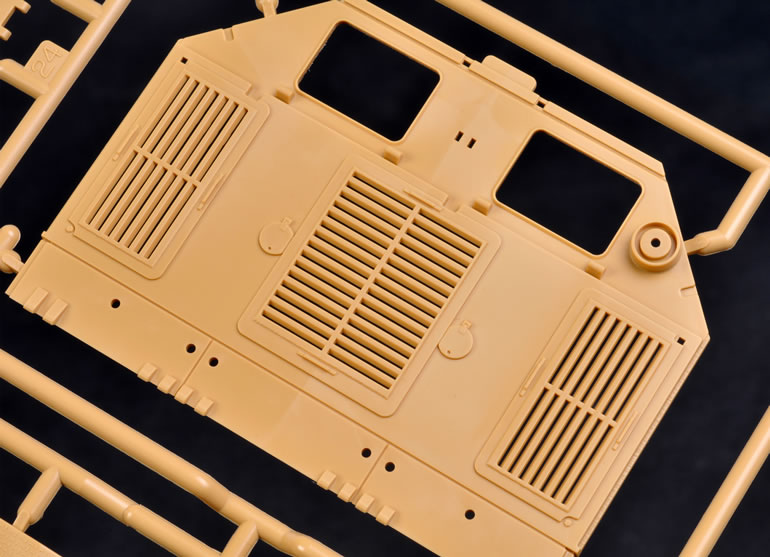
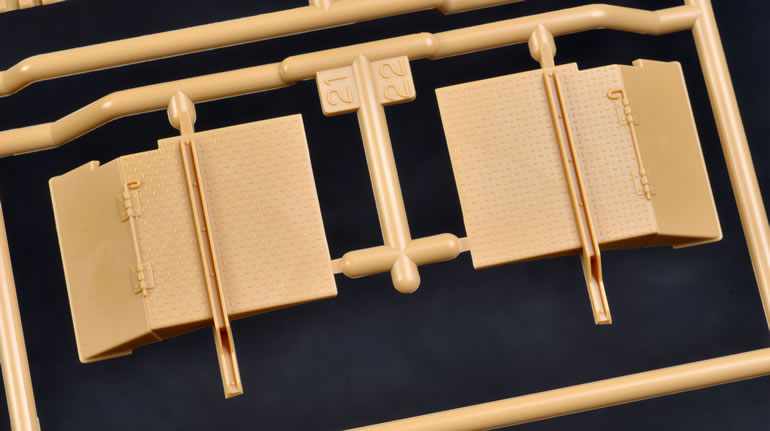
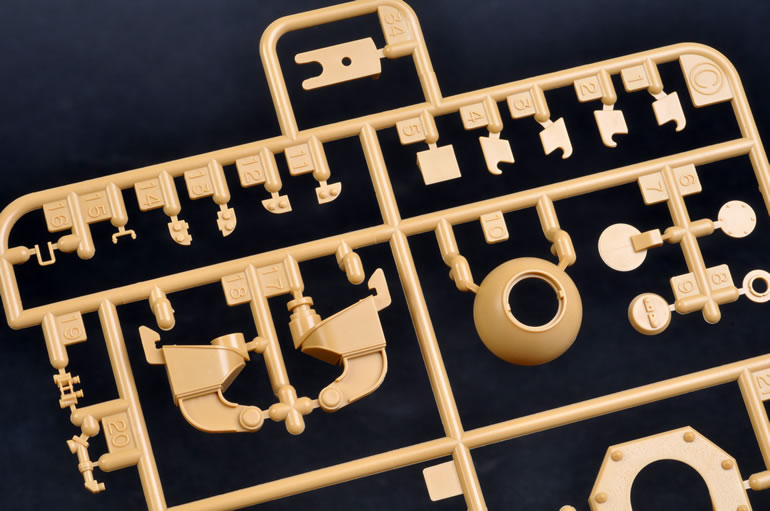
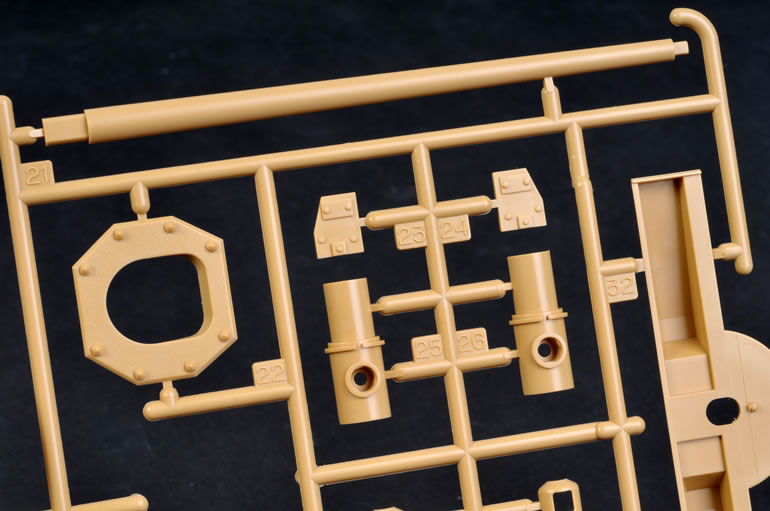
Similarly, the big superstructure is moulded in one piece. The rolled armour plate features subtle but convincing pitting – some of the nicest texturing that I have seen from Tamiya.
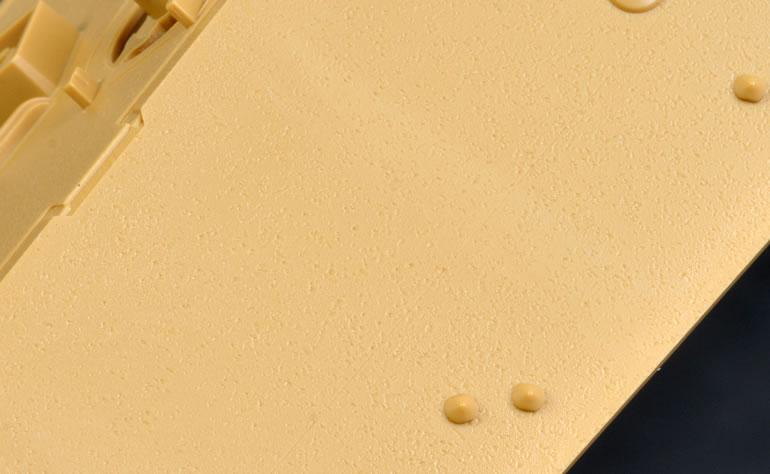
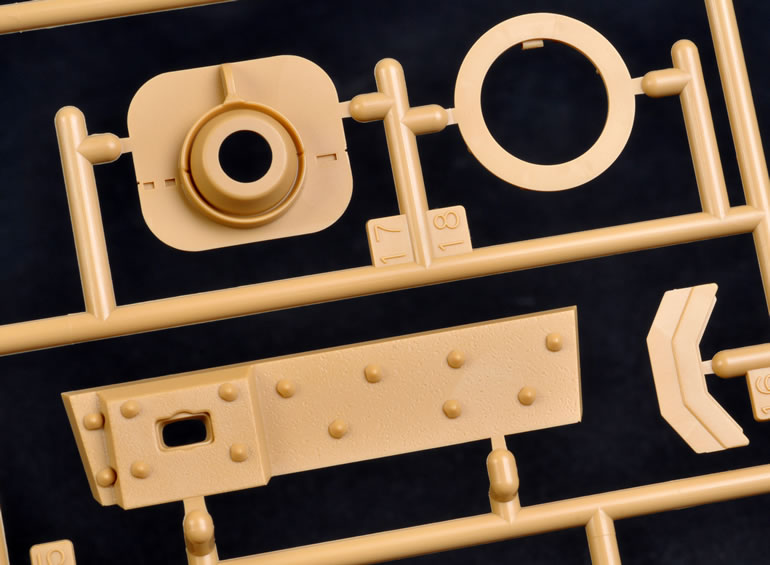
Tamiya seems to have made a special effort to minimise ejector pin marks on this kit. Traditionally, the danger areas have been the insides of hatches and the back face of track links. On this kit, there are literally no moulding marks anywhere on the tracks, and those on the insides of the driver’s and radio operator’s hatches are so faint that they should not be a problem.
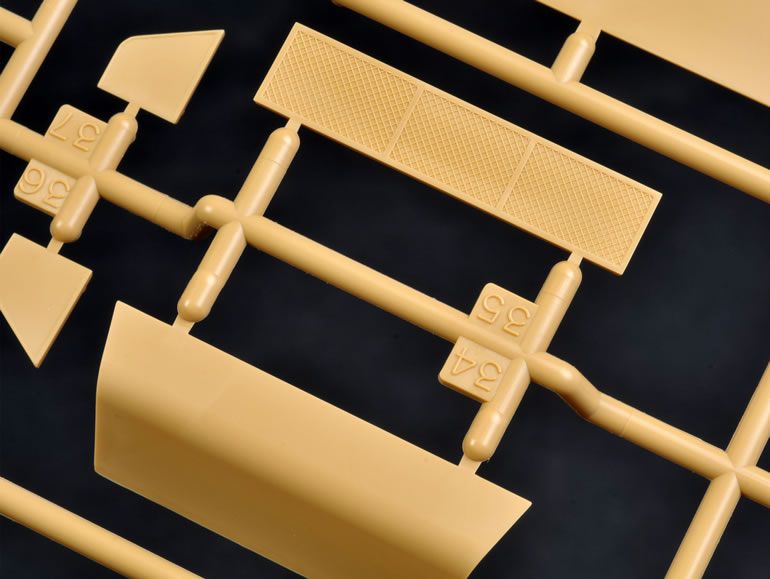
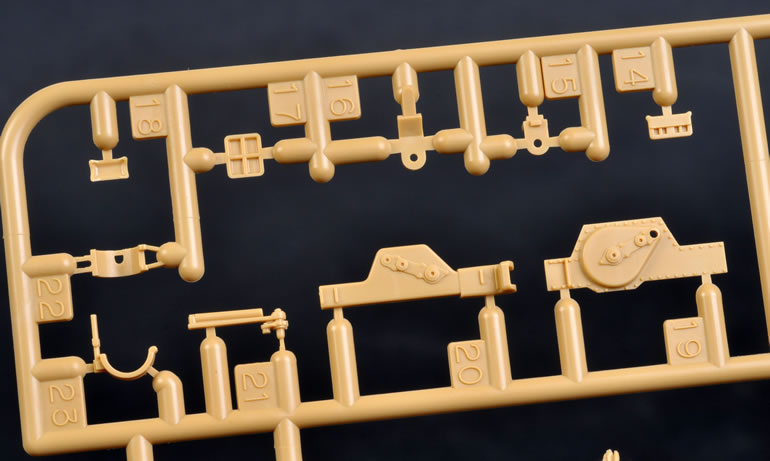
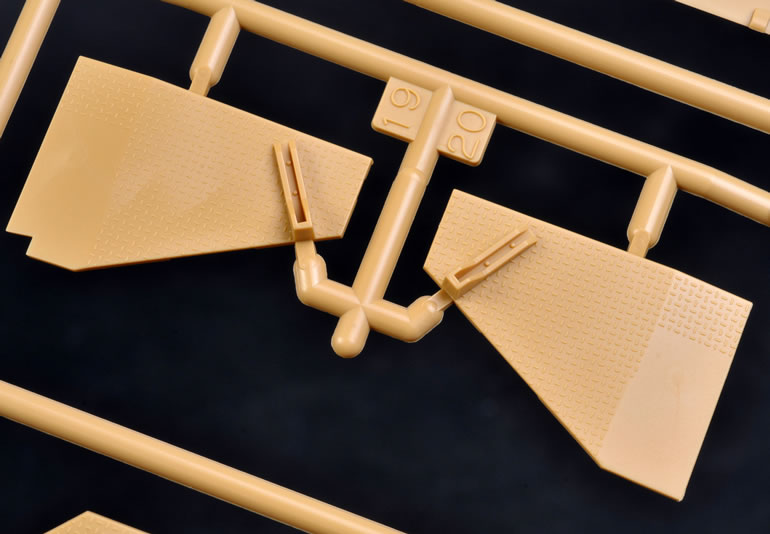
Smaller detail parts such as handles, tow cable guides and the gun barrel travel lock are delicately moulded.
The simple suspension units will be workable if you take care while applying cement. The wheels and drive sprockets are all held in place with polythene caps.
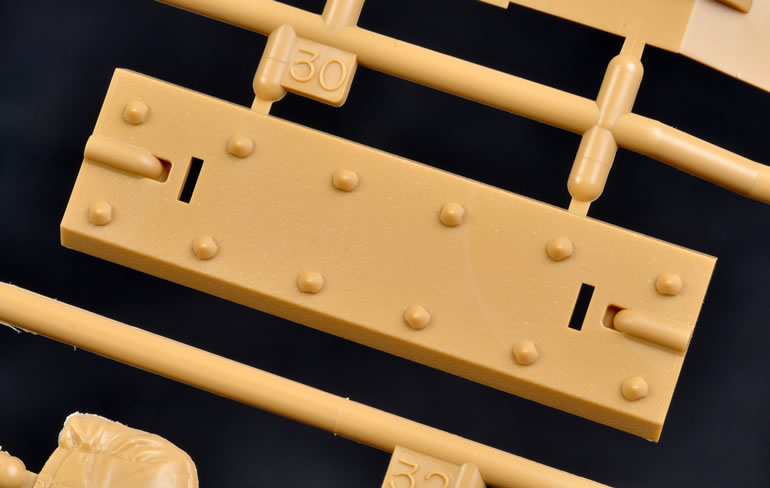
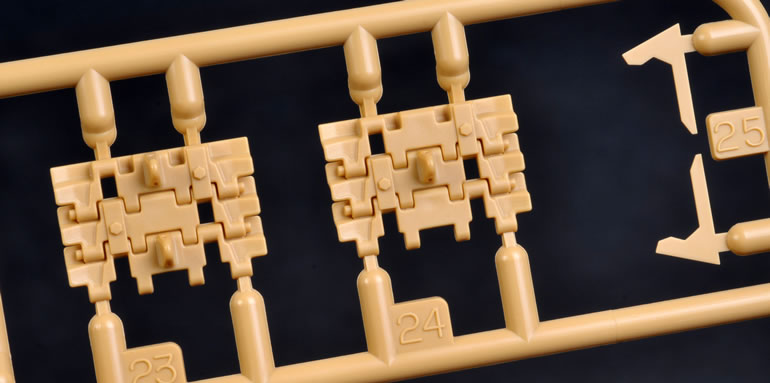
The tracks are a highlight of the kit.
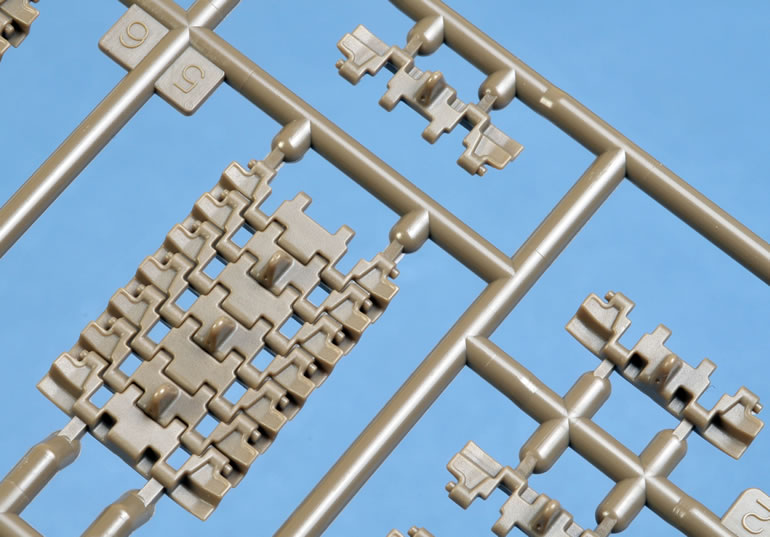
They are made up from a combination of individual links and five different lengths. The lengths are moulded with curves in place – either up or down depending on their final position on the track run.
Not only are the front faces of the tracks well detailed, but the edges with their track pin are very impressive too.
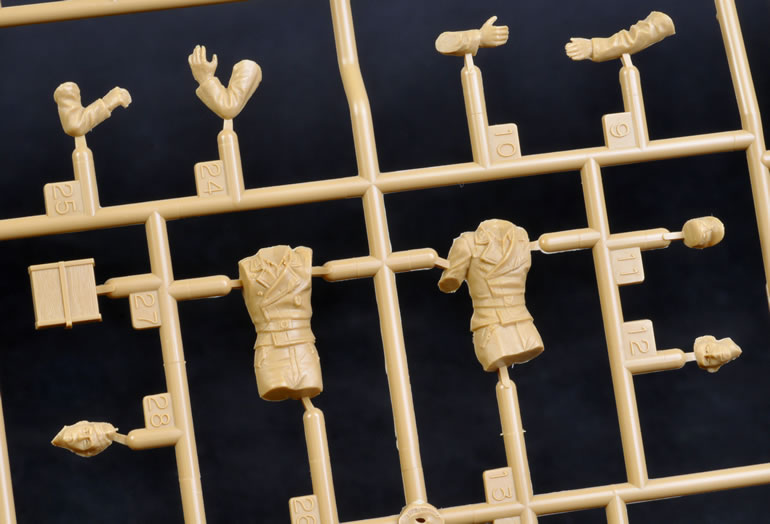
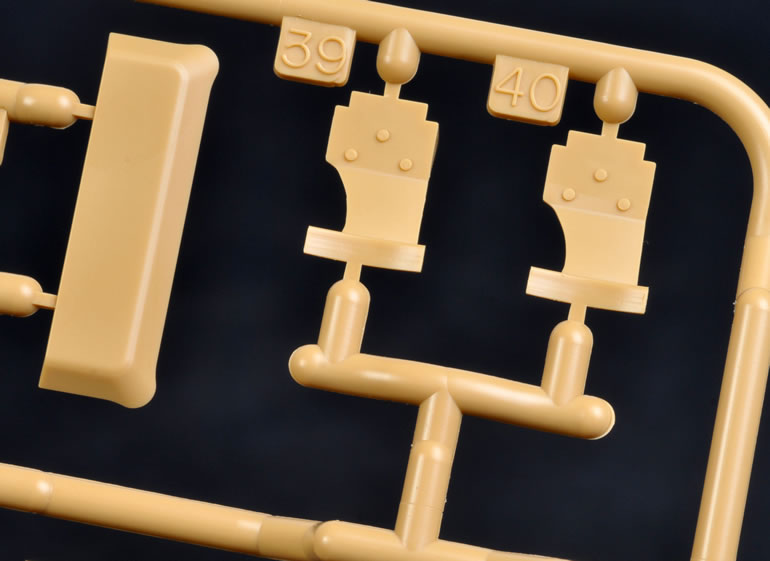
The plastic parts are rounded out with three crew figures – a driver, a loader and the Commander. They are all well moulded and the facial detail is particularly nice.
The only multimedia in the kit is a length of string for the two tow cables. With no headlights and the only grille being virtually invisible behind a heavily undercut exhaust housing, clear and photo-etched parts are not really required.
Three marking options are provided – one based in Italy and two from the Eastern Front.
The instructions are well laid out over 17 steps with clear illustrations supplemented by text directions where required. The section dealing with the tracks is especially well done.
Zimmerit
The Elefant was essentially a reconditioned and improved Ferdinand.
During 1943, the Ferdinand tank destroyer on the Eastern Front suffered from mechanical problems that were compounded by poor visibility and the lack of any close defence weapons. The large smooth steel surfaces were also a magnet – quite literally – to infantry-placed explosive charges. The surviving Ferdinands were therefore withdrawn and rebuilt with more reliable engines, a modified Panzer III cupola with all-round episcope vision, a bow mounted machine gun, and renamed "Elefant". Zimmerit coating was also applied to combat magnetic charges.
The bottom line is that all Elefants wore a coat of zimmerit. If you want your model to be accurate, you’ll need to add a zimmerit coat using one of three methods:
-
Do it yourself with putty and your favourite zimmerit application tool
-
Adapt a commercially available resin zimmerit set to this new kit, or
-
Use Tamiya’s self-adhesive zimmerit set made especially for this model
The easiest of these solutions will be Tamiya’s self-adhesive zimmerit.
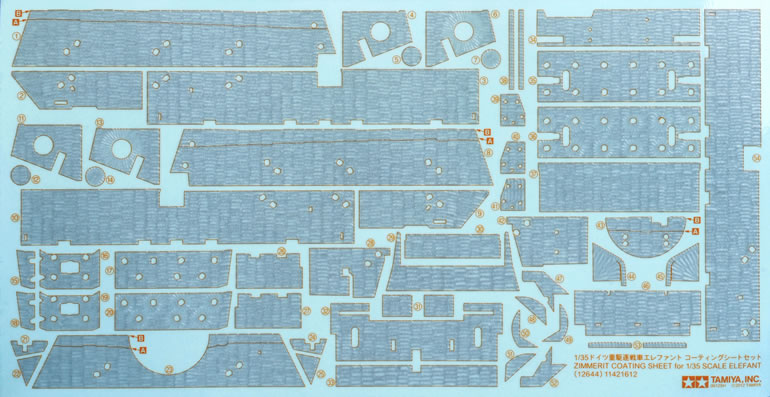
The various zimmerit segments are printed onto a textured vinyl sheet, and feature two different patterns. The zimmerit looks great on the sheet, and the depth of the pattern means that it should show up well on your model under a coat of paint.
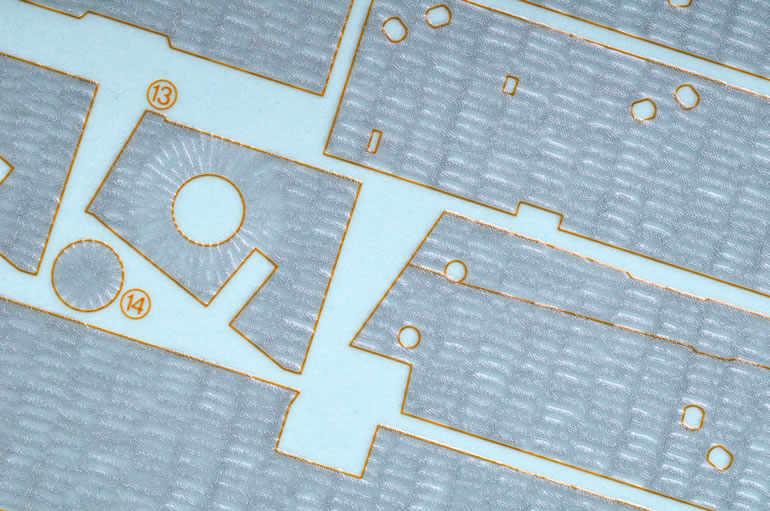
All you will need to do is cut the sections from the sheet, punch or cut out the circles to accommodate the conical bolt heads, peel off the backing and apply them to your model. Voila! Instant zimmerit!
Conclusion
Once again, Tamiya has delivered a well-detailed and easy to build model of an iconic vehicle.
Tamiya is not resting on its laurels though. The improvements are evolutionary rather than revolutionary, but they are there. This time, ejector pin marks have been all but eliminated in visible locations, and in my opinion the tracks are Tamiya's best effort yet. The facial features of the three crew figures are very good too.
It is nice that Tamiya has offered an easier option for those modellers who do not want to tackle a zimmerit finish themselves. The self-adhesive zimmerit sheet will be welcomed by many, but those who want a genuinely unique pattern can use putty and zimmerit tools instead. The instructions are quite clear about the patterns and demarcations of the zimmerit used on the kit's three marking options.
Tamiya's 1/35 scale Elefant is a great kit. Sit back, relax and enjoy the build!
Highly Recommended.
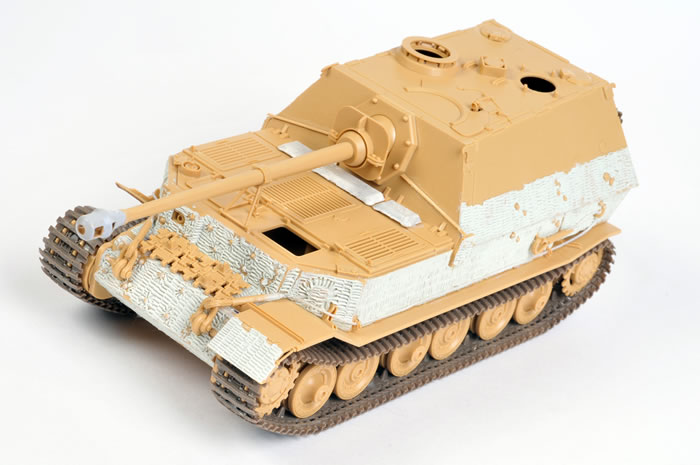
NOTE: The title photo is my Elefant build, which was finished in zimmerit using Tamiya's two-part smooth epoxy putty textured with a screwdriver.
Thanks to Tamiya Japan for the sample
Tamiya kits are distributed in the UK by The Hobby Company Limited
Home
![]() Discussion Groups
Discussion Groups
![]() Gallery
Gallery
![]() Articles
Articles
![]() Reviews
Reviews
Copyright
![]() Vendors Room
Vendors Room
![]() Links
Links
![]() Contact us
Contact us
Copyright www.missing-lynx.com 2012
![]()
Text and Images by Brett Green
Page Created 8 July, 2012
Page Last Updated
8 July, 2012