MOVE ON!
Building the Pershing
The model is the now re-released DML's T26E3 (ref 6032). It correctly depicts a WWII vintage Pershing with T81 single pin steel tracks commonly seen in this conflict. Tamiya has also just released its 1/35 Pershing which seems to have the same type of tracks. Anyway, the later T80E1 rubber pad tracks, were mounted in at least one Pershing tank during WWII.
DML's kit is one of their best, along with the Jagdtiger family and the Elefant/Ferdinand duet. The detail is good, and the fitting is overall right, but I needed to use some putty in some places. The trickiest part of the building process was to achieve a correct alignment for the suspension arms and the wheels. I think that in this area, Tamiya is still clearly ahead from Dragon. The tracks are of the link-by-link type, as usual with Dragon. Their fitting is not perfect, but they are buildable with not many complications. The links show ejection marks on the inner surface. I sanded down these marks in the links where they could be visible once installed.
The rough casting texture of the hull and turret surface is well represented by Dragon in the kit. Nevertheless I decided to enhance this texture by dissolving the surface of the plastic with ethyl acetate and brush onto it with an old, hard brush. The ethyl acetate has to be used only in well ventilated areas. Probably, ordinary liquid glue for plastic would have done the same job.
The only significant addition to the kit was a cal 0.50 machine gun from Verlinden. The kit was pretty much build out of the box, with some "compulsory" additions and improvements which are detailed in the following photographs. For the building process, the excellent article by Steven Zaloga in Military Modelling no. 7 vol. 30, 2000 has been used as primary reference.
As a general comment, the casting texture was enhanced by dissolving the external surface of the plastic with Humbrol liquid cement and texturing it with a hard, old brush. Once the surface was dry, a smooth sanding completed the work.
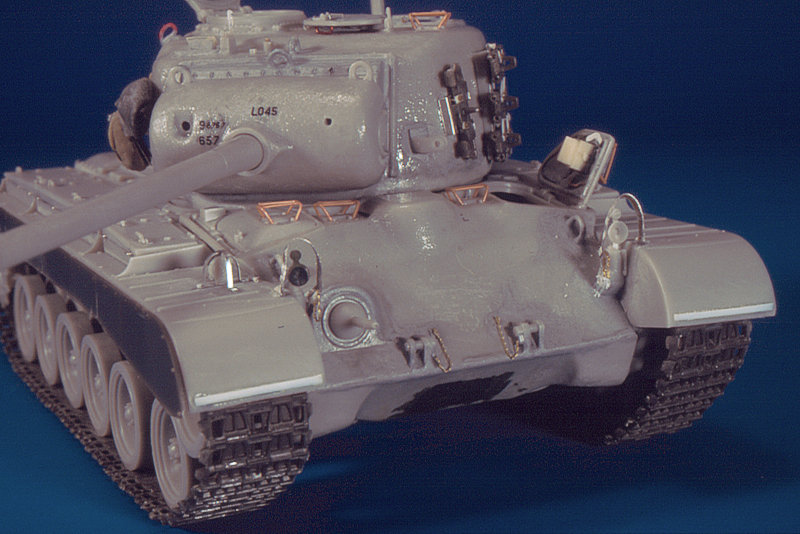 |
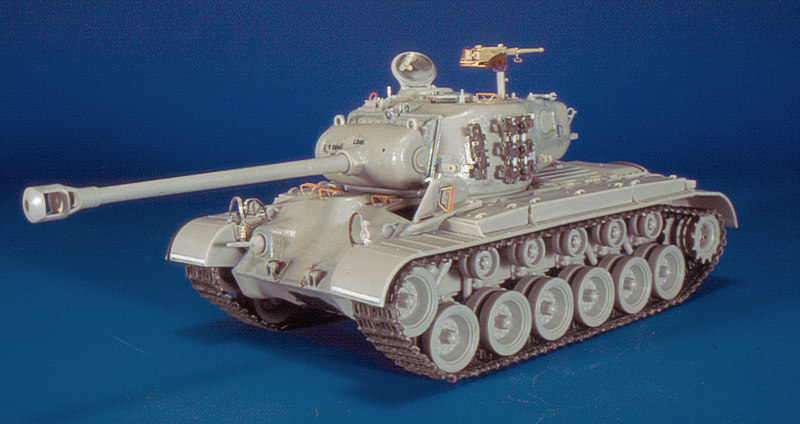
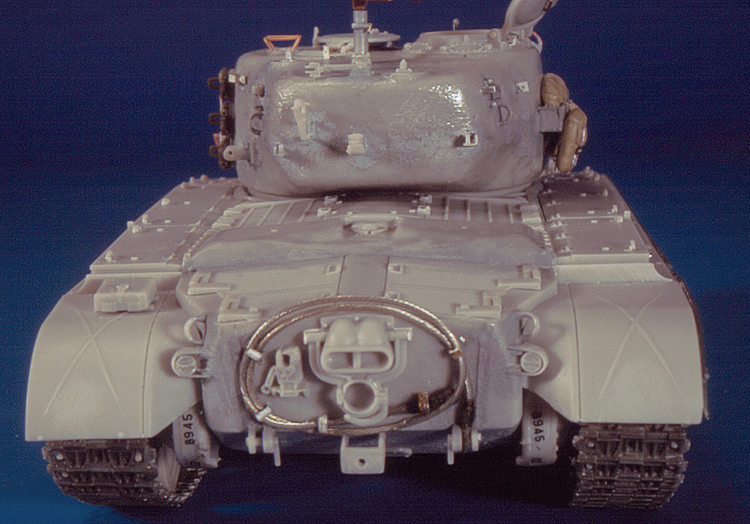
| Frontal view of the unpainted model. The small chains for the retaining pins of the towing hooks and the caps for the plug of the headlamps when these are dismounted are photoetched. The guards for the headlamps and horn were made with strips of lead foil, since the plastic ones provided by Dragon are too thick. The periscope guards were done with electric wire glued with cianoacrylate. The periscope in the inner side of the driver's hatch is Verlinden's. The casting numbers in the gun mantlet and the lower portion of the bow are from Archer Fine Transfers. A strip of plastic card was added in the lower portion of the frontal mudguards. In these photographs, both the tracks add the side sandshields were provisionally attached to the model. The lower edge of the sandshields were sanded down to obtain a more in scale thickness. |
|
 |
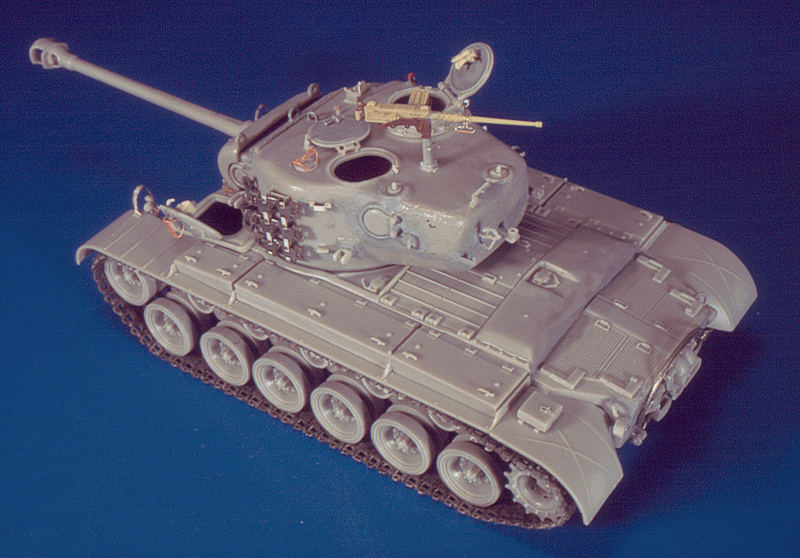
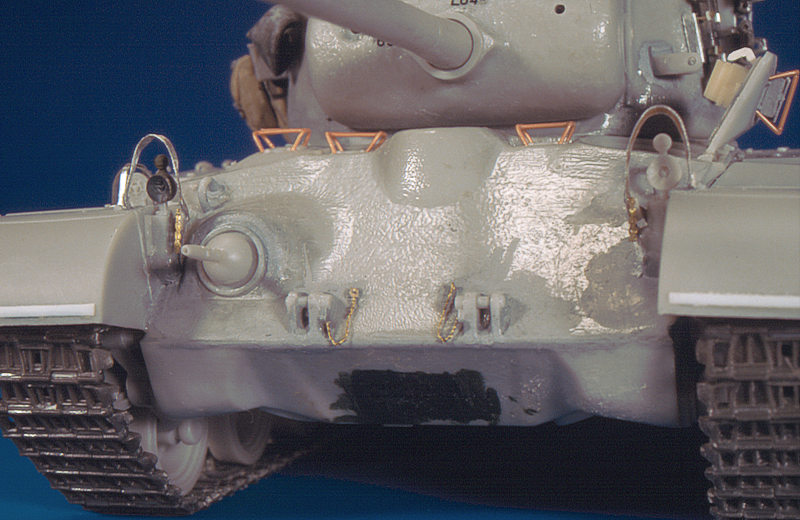
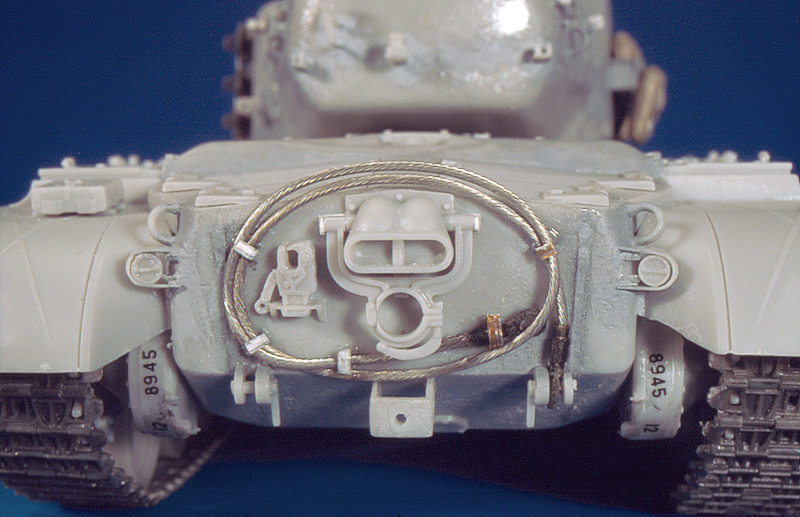
| In this close view the periscope guards made with electric wire are visible. Also notice the guards for the headlamps and horn were made with strips of lead foil. Some screws, made with stretched sprue slices, were added in the horn guard. |
 |
| Rear view. The most important addition here was the towing cable. I used a reference from a local brand, Soja models. The towing eyes at the end of the cables were borrowed from an US modern Italeri's vehicle. The hooks and clamps to hold the cable were made with lead foil strips. The casting numbers in the transmission housing came from Archer Transfers again. |
|
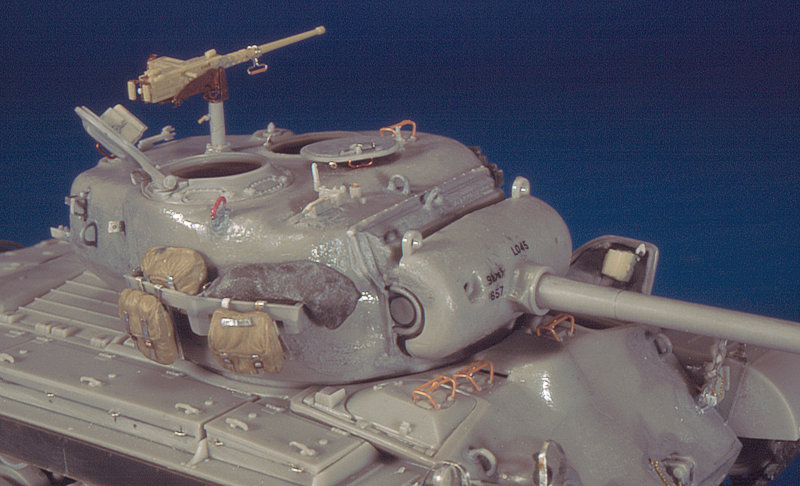 |
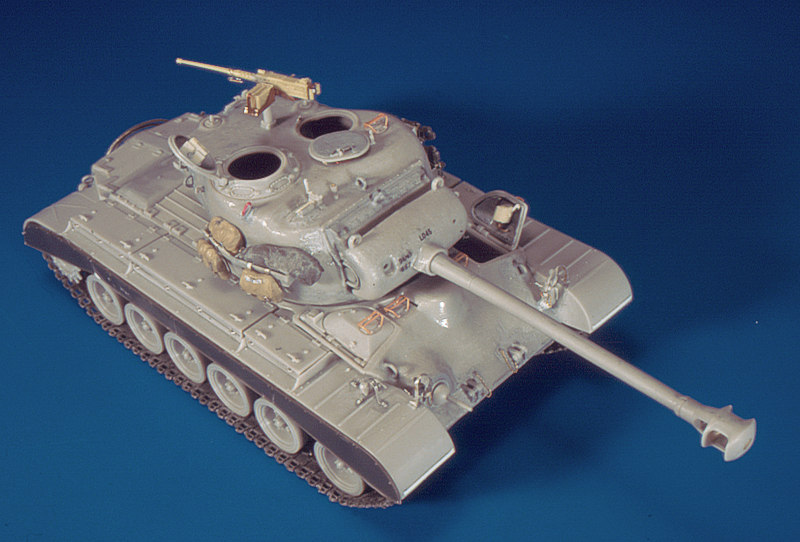
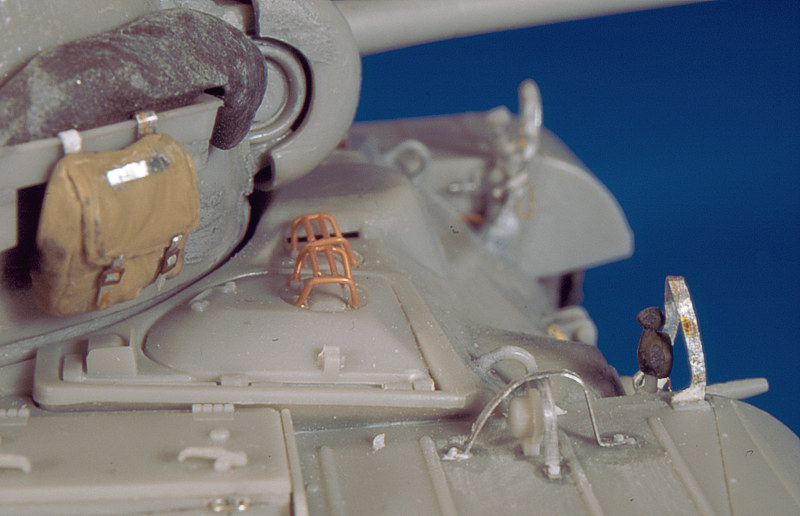
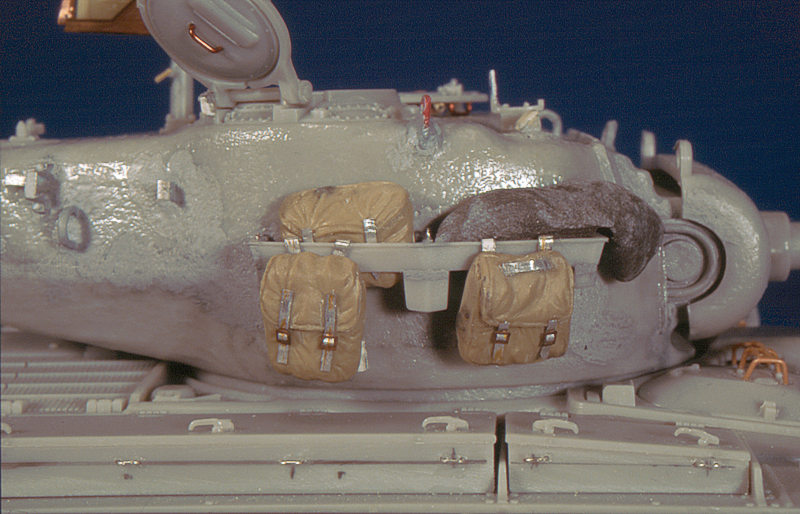
| In the turret, several small details were added or improved. The handles for both commander's and gunner's hatches were done with wire. The closing mechanism of the inner side of the gunners hatch were detailed with lead foil. The bags and sacks of the stowage rack came from Academy and were detailed with lead foil strips and photoetched buckles. Some tie downs were added in the rack, and also in the sides of the containers located over the mudguards. A new wire hook (in red) replaced the plastic one provided by Dragon which is too thick. Verlinden's periscopes were added to the turret roof and the interior of the commander's hatch. |
|
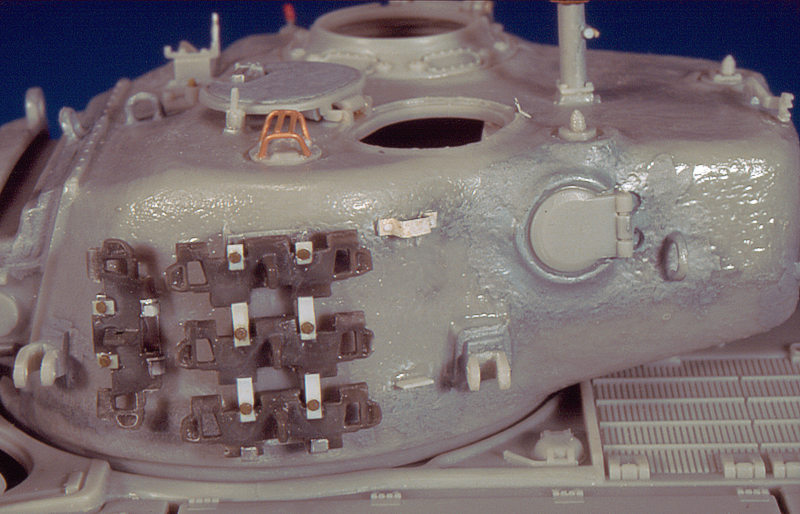 |
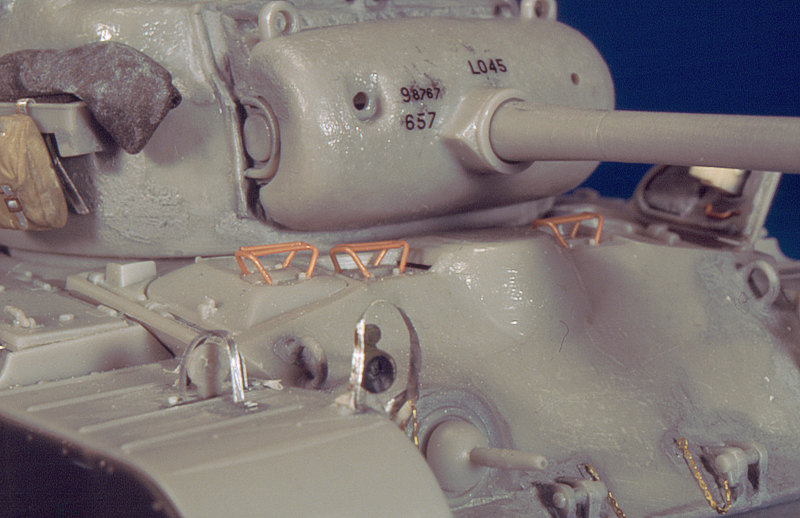
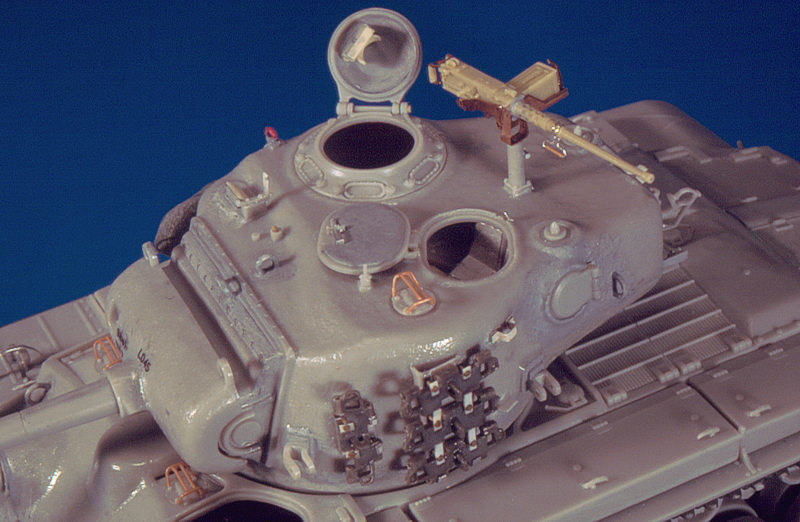
| The spare track links holders on the left hand side of the turret were re-built with lead foil stripes and nuts coming from other kits leftovers. The changing track tools clamps were also detailed in this way. Two holes were drilled behind the cartridges ejection port.. |
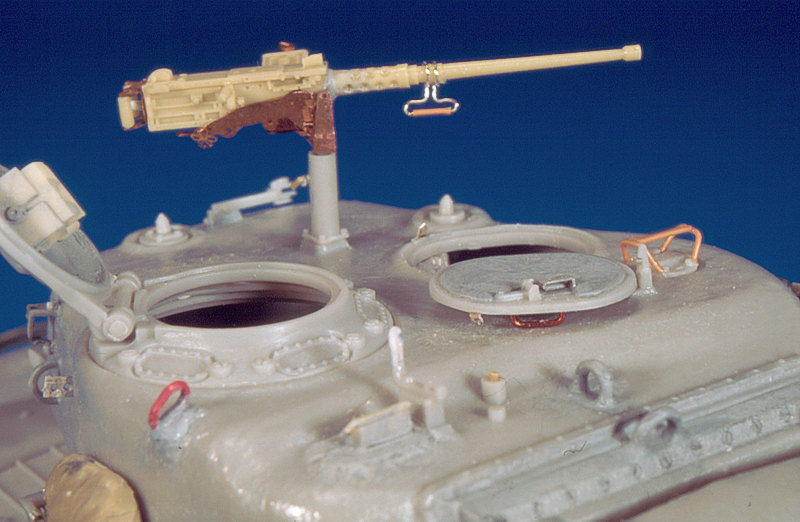 |
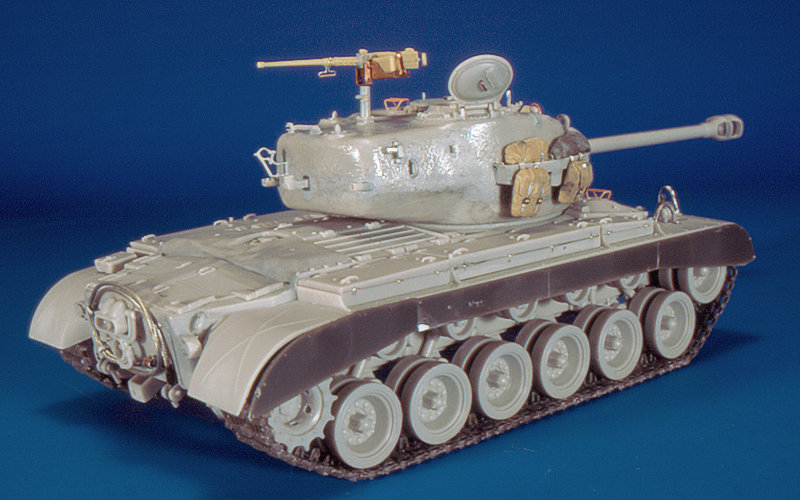
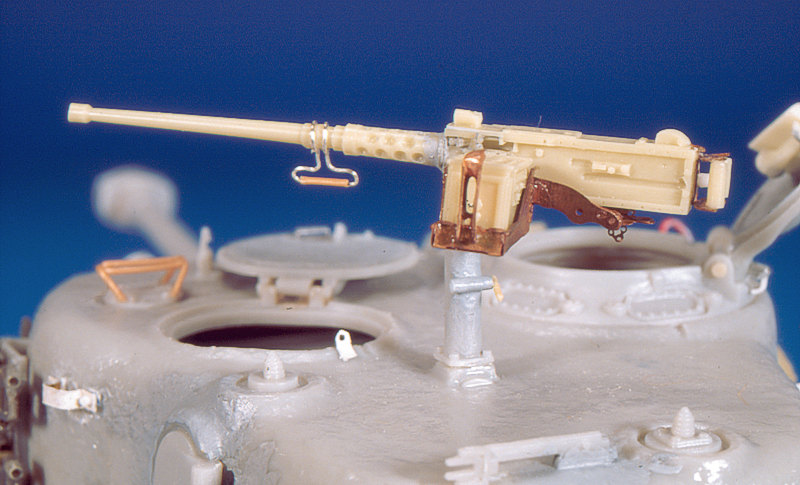
| The Browning cal 0.50 heavy machine gun is a Verlinden item made of resin and photoetched parts. I found somewhat difficult to build it, but once it was done, the overall detail level is good. I added the gun barrel replacement handle, made with electric wire. Also notice in this photo that the MG pedestal was also detailed. |
|
|