|
|
| Home > Articles > Dioramas > The Last Panther in Pomerania |
|
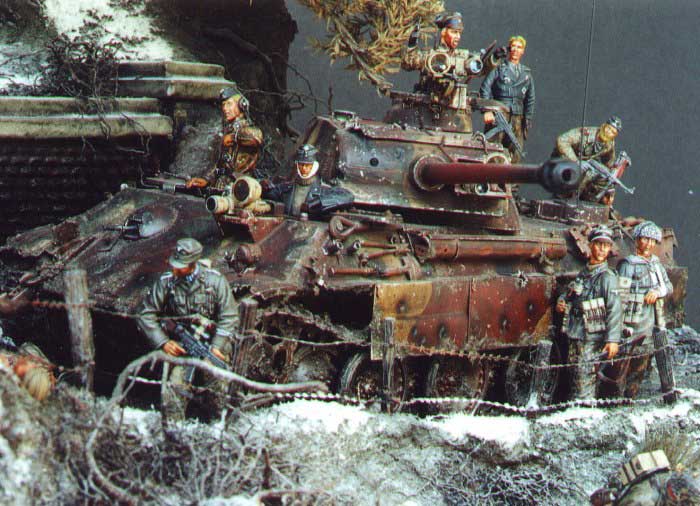
I wished to create something in this setting that was
not only of interest from all sides but also one having a significant
change in its elevation from front to back. Dioramas which tend to catch
my eye or those which aren't just a plank with some groundwork. I love
to see something which is truly artistic utilizing both architecture
and landscape. There are two separate camps when it comes to dioramas.
One believes that a central theme is key and that too much action tends
to cloud the artists idea of what is going on. The second prefers a
"slice of life" with various activities which engage the viewer
leaving them with plenty to take in. My own interpretation lays somewhere
in between. I prefer to capture an instant in time with all its activity
but also a central theme. I am not sure if I've accomplished it.
I began by cutting a section of plywood into a twelve inch by sixteen
inch section to act as a base. I choose this size as it was just big
enough to contain the scene I envisioned, and yet small enough, I hope,
to carry on an aeroplane to competitions. Next I laid out the basic
ground elevations using foam board. I have used foam board for years
for just this purpose and I find it an excellent product. Designed primarily
for architects, this board is made by pressing a layer of Styrofoam
board between two layers of cardboard. This combination is both very
strong and lightweight. It can be glued with white glue, but for quicker
drying time whilst laying out the base structure I prefer to use "Household
Goop" a type of resin adhesive. Once dry it forms a very strong
join. The foam board was used exclusively for the basic structure, including
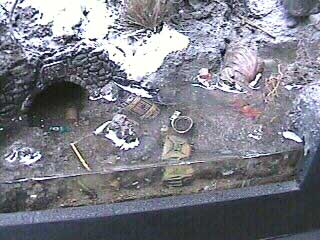
hillside, roadway, riverbed, and the basis for the brick walls. The
exception here, is the small brick sewer entrance at the base of the
ravine. This is a commercially available HO scale railroad tunnel entrance.
Made of plaster it is easily converted for use in 54mm. It was set into
the base to await the application of celluclay.
Once a suitable layout was achieved I went to work on the section of brick wall and steps which lead from the mountain road to a small memorial. I built up the wall separately with foam board, including the steps leading from the road to the hillside memorial. The bricks were created from small sheets of Alexander the Great (S004) "Cobblestones". These are cardboard sheets with pressed cobblestone on one side. They were cut to size with an exacto and glued onto the foam board form using Elmers "White Glue". Once dry the flat foam board simulating concrete slab was given several coats of artists matte paste. When dry it was sanded smooth and the entire brick section glued into place. Once satisfied with the form I began the groundwork in earnest with the application of "Celluclay". Now a word, if I may, about this product. I have used it for years. And from time to time switched to other products such as Porion. However, I have always been most satisfied with celluclay and its abilities. I mix celluclay in a large glass bowl and then gradually add water to the mix. With celluclay it is better to mix it too dry than too wet. Celluclay added too wet will take weeks to dry, mould, and warp both the foam board and the wood base.
With the proper mixture I add thin layers of celluclay to the formed out landscape, creating the roadway, hillside, ravine and river bed. I also mixed the groundwork. There are numerous products available on the market which simulate mud. I found the most realistic is the real thing. I make two mixtures, one wet and one dry. The dry mix is garden variety dirt, well sifted, with some Naples, Florida sand, pre-strained coffee grounds, a little backing soda, and some sifted stones. This dry mix is sprinkled on the wet celluclay, thin on the hillside, heavy on the roadway. The remainder is mixed with water and white glue and placed in a small tin covered with tin foil to be used on the Panther, the figurines and for touch ups. After the groundwork is in place, I sprinkled on Hudson & Allen (9617) "Summer Turf".
Before the celluclay dried I pressed in the Panther tracks into the roadway and added several wheel ruts to simulate heavy traffic. I also impressed the feet of all the figurines so they would have a proper seat upon completion of their painting later on. The memorial, a resin cross from Verlinden Productions (722) "Roadside Shrines" was pressed into the wet celluclay and then removed for painting. The tree was fitted into an appropriate location and removed for finishing. As you might note it is a Bonsai tree, which is nothing more than a juniper bush trimmed down. It had an interesting shape, so I ripped it from its pot, snipped off the roots for other use and soaked it in bleach to kill it. The base of the tree was formed with celluclay and then etched with a palate knife to match the Bonsai trunk texture. What can I say, it works. The root was placed below the roadway and sticks out of the side of the ravine.
|
|
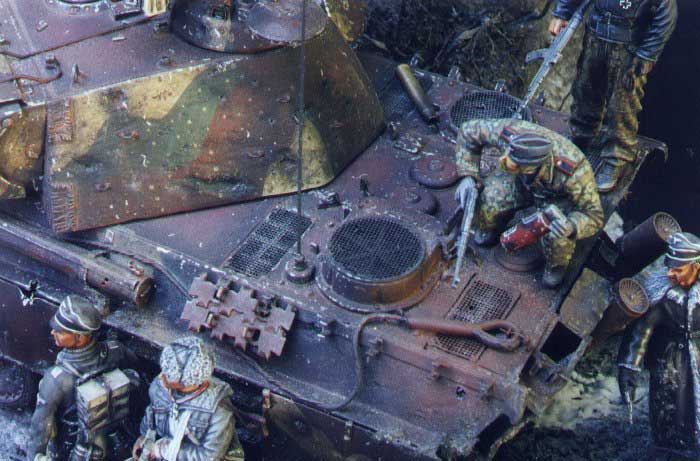
The entire diorama was now set aside for drying. 48 hours later it was dry enough to accept painting and drybrushing. The groundwork was airbrushed using water soluble colours. I mixed Raw Umber with Flat Black in a 75/25 mixture and then cut it with 60% water and blew it through an Iwata SP gun. This was applied until all the earthen areas were covered with an almost chocolate brown coating to represent dark wet earth. This was then misted here and there with the same mix with some khaki added to lighten the earth. Once this was all in place and dry, it was all drybrushed with khaki to bring out the details of the dirt road and landscape. The grass was airbrushed with a mixture of various greens and browns and drybrushed with some yellow. The tree was placed into its pre-made hole and glued in with "Household Goop" epoxy. The trunk was airbrushed "Pig Brown" and washed with burnt sienna and flat black. The leaves, in this case, were just right and let alone.
|
|
One I was satisfied with the organic portion of the groundwork,
I moved on to the brick sections. My thoughts regarding early-spring
in East Prussia, particularly an army on the verge of collapse brought
visions of dread and darkness, therefore I chose to paint everything
in dark earth tones and emulate a sense of doom and gloom. The bricks
were certainly no exception. They were base coated with khaki drill,
and then well washed with burnt sienna and flat black. This was then
very lightly drybrushed with khaki mixed with 20% white. The Portland
cement slabs were airbrushed with khaki, washed with a mixture of 80%
raw umber 20% flat black and thinned with 80% "Windex Blue".
This was then airbrushed again in a cloud pattern using gradually lightened
variations on the khaki.
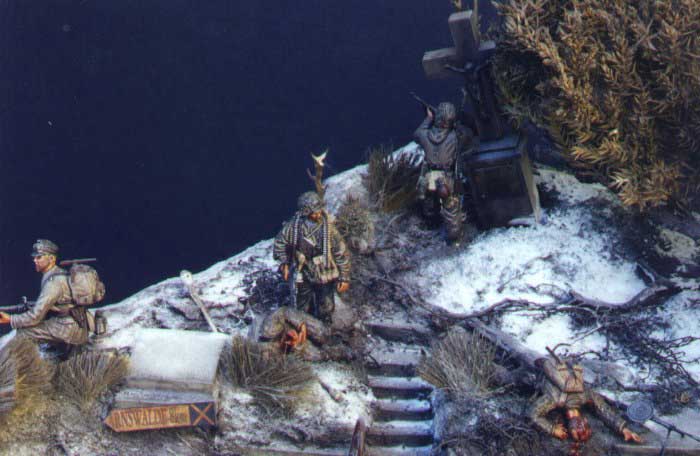
Details were set in at this point. The posts for the barbed
wire were cut down from longer posts in the Tamiya (35027)"Barricade
Set" , whilst the barbed wire itself is from the Verlinden Productions
(VP3 051) p.e. set. The lamp set in the brick retaining wall is from
an old ADV (no. 35609) Urban Accessories Set with frosted glass panes
made of tissue paper which was washed with off yellow and burnt sienna.
The panes were then coated with two part resin to simulate glass.
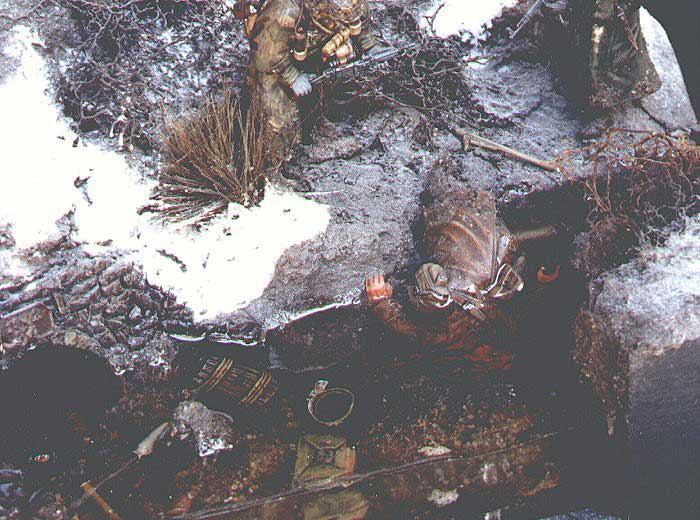
At this point only remained the spring run off in the ravine to deal
with, but this would be set aside for now until the figurines were completed
as I thought to place a poor Russian bugger in the depths. I painted
that figurine first. Once completed it was positioned in the ravine
with an assortment of typical possessions disregarded by a retreating
army.
When all was laid in I poured in eight thin layers of EnviroTex Lite
"Pour On". This is an excellent product which produces a crystal
clear, high gloss finish which is about equal to 50 coats of varnish.
It has multiple uses from laying in water to reproducing glass dials,
headlamp lens' and spectacle lens'. It comes in two 32 fluid ounce bottles,
one containing the resin, the other the hardener. There is only one
draw pack to this product-the two parts must be mixed equally. Any deviation
results in a sticky resin mess that will never, ever dry.
To achieve the clean sides of the stream I set up two glass panes on
either edge of what would become the edges of the stream. The glass
panes were fixed tight and the bottoms filled with five minute epoxy
to prevent any leakage from the poured resin. Each layer was poured
in thin. Do not make the mistake of pouring it all in at once. The resin
requires contact with oxygen to dry. If it is too thick it will create
nasty bubbles in the center which will not float up to the surface and
break as it does when poured in thin even layers. Once I had poured
in four layers I painted in flowing blood from the waxed Russian's head
and chest wounds. This was redone with each consecutive layer until
the blood had a nice depth to it.
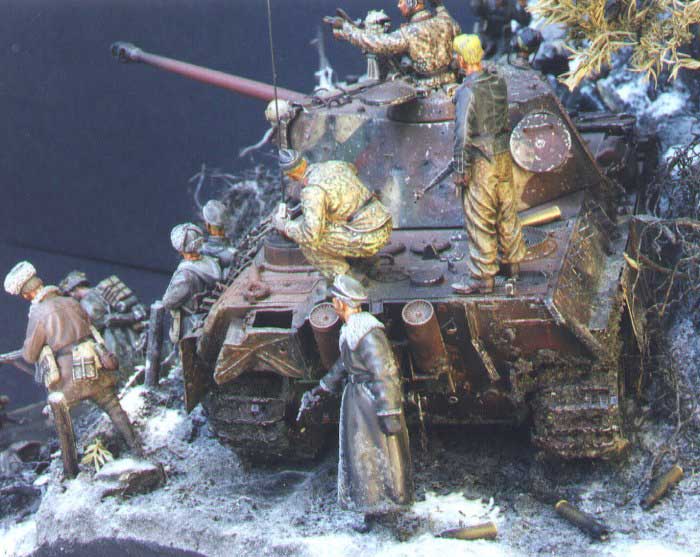
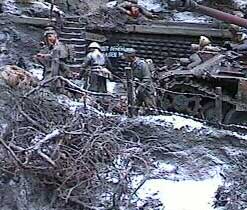
Jumping ahead a bit here. Once all the figurines were complete I relocated
their proper imprints in the dried celluclay and together with the Panther
they were attached using small amounts of "Household Goop".
After they had all set I went back with a tin of the pre-mixed mud with
a touch more water I mentioned earlier and set it in around the boots
and the tank caterpillars to represent the early-spring quagmire.
The base was cleaned up with sides of black foam board. Wet celluclay
was added over the top "lip" of the board and merged with
the dry celluclay with paint re-touching. Those areas representing more
muddy than others were then brushed with a coat of Testors "Glosscote
Lacquer" and for the less sodden area Model Master "Semi-Gloss
Clear Lacquer Finish".
Finally, after all was completed, I sprinkled on Hudson&Allen "Snow"
beads to recreate the early-thaw of East Prussia in February of 1945.
Page 1, 2, 3, 4 ,5 ,6 ,7 ,8 ,9
| |
|
Home |